How to give your web developer access to your WordPress site
Prerequisites
- WordPress
Overview
By the end of this you will have created a separate WordPress login for your developer, given it the right level of access for the work they are doing, and know how to take that access away again when the job is finished. You do all of it from Users in your dashboard, and it takes about ten minutes. You need an Administrator account on your website to do this: if your left menu has no Users item, your account is an Editor, and you will need to ask whoever looks after your website. Either way, you should never hand over your own username and password.
Ask your developer which email address to use#
Before you touch the dashboard, get the email address your developer wants the account attached to. Use the address they gave you on their proposal, contract or in writing, rather than one you have guessed or found on their website.
This matters more than it looks. WordPress emails the login details straight to that address, so a typo means the details land in someone else’s inbox. Throughout this guide the placeholder [email protected] stands in for the real address you were given.
Open the Add User screen#
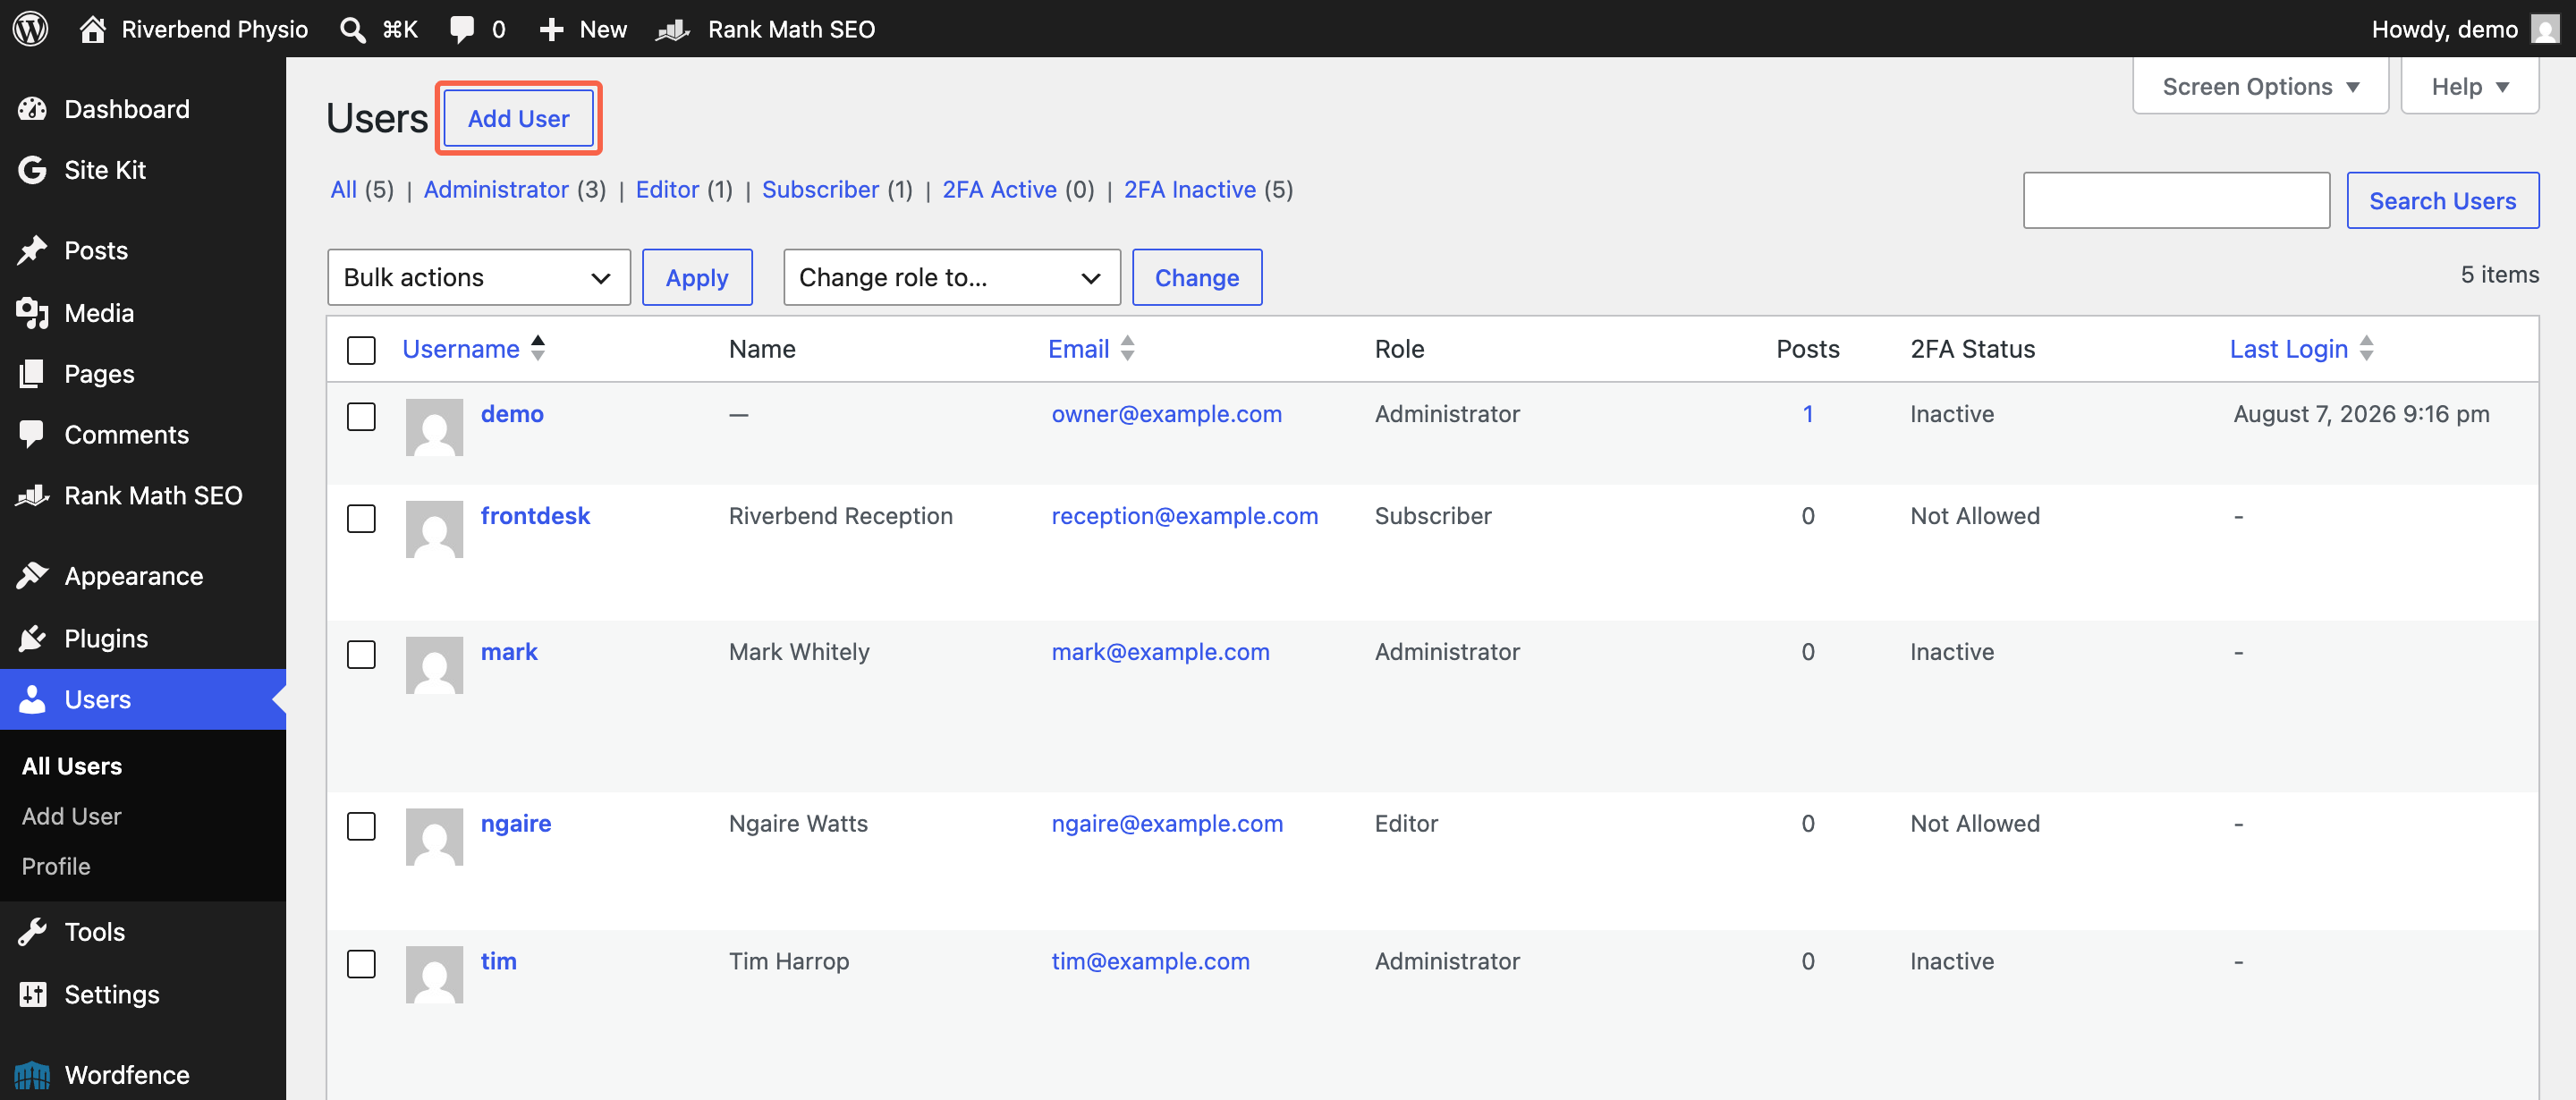
Log in to your website’s dashboard, usually your domain followed by /wp-admin. In the black menu down the left, click Users. That opens a list of everyone who can currently log in. If there is no Users item in that menu, your account is not an Administrator and you will not be able to go any further, so this is the point to ask whoever looks after your website.
Now click the Add User button beside the Users heading at the top of the page. There is a second Add User link in the left menu underneath Users and it does exactly the same thing.
Fill in the username and email address#
Only two fields on this screen are compulsory, and they are the two marked required. In Username, type something that makes it obvious whose account this is later on, such as their first name or their company name. Usernames cannot be changed afterwards, so it is worth a moment’s thought.
In Email, put the address your developer gave you. First Name and Last Name are optional but help you recognise the account at a glance in six months. Leave Website empty.

Leave the password alone and send the welcome email#
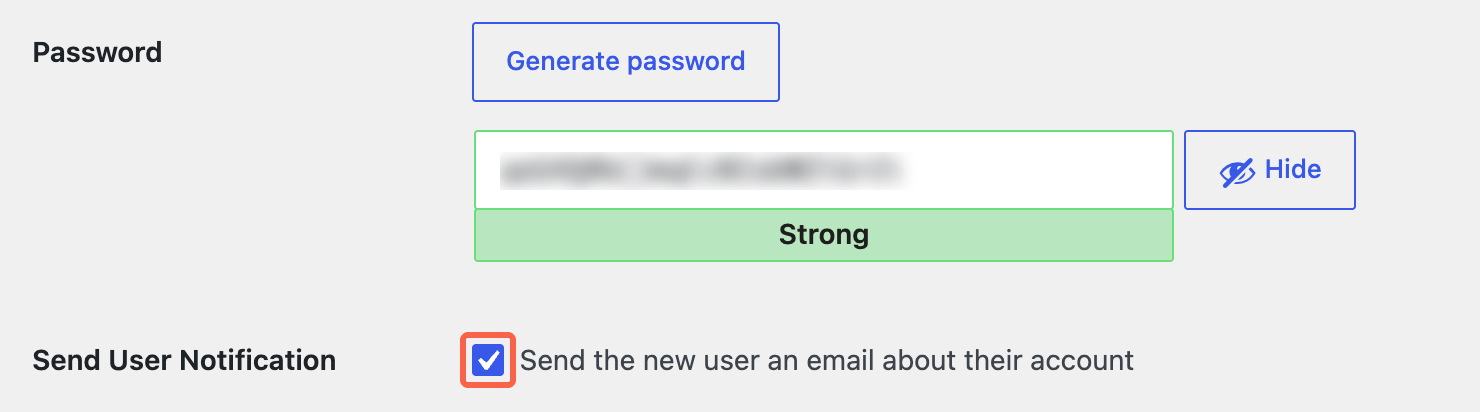
WordPress has already filled the Password box with a long random password, and that is the one you want. Do not replace it with something you can remember, and do not write it down to pass on. Your developer will set their own password from the email.
Underneath, make sure Send User Notification is ticked, so WordPress emails them a link to set up their login. It is ticked by default. If you untick it, nobody gets told the account exists and you will end up sending the password yourself, which is the thing this guide is trying to avoid.
Choose the right role for the work#
The Role dropdown is the part people get wrong, and it is the only choice on this screen that really changes anything. It starts on Subscriber, which is almost never what you want. Click it and you get five options, in this order: Subscriber, Contributor, Author, Editor and Administrator. Two of them matter here.
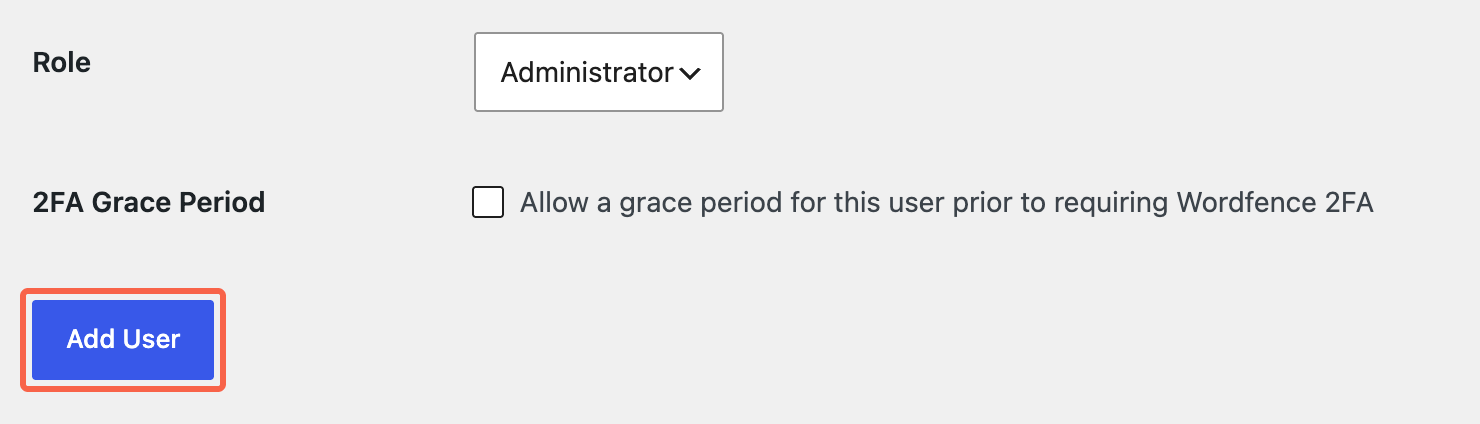
Pick Administrator if your developer is doing development work: installing or updating plugins, changing the theme, fixing something broken, moving your website, or touching settings. Anything less and they will hit a wall halfway through and have to come back to you. Administrator can change everything, including adding and removing other users, so this is real trust rather than a formality.
Pick Editor if they are only writing or tidying content. An Editor can add, edit and delete any page or post, but cannot install plugins, change the theme or alter settings. Subscriber, Contributor and Author are for other purposes and are not enough for a developer. If you are unsure which one your developer needs, ask them before you create the account rather than guessing high.

Create the account#
Click the blue Add User button at the bottom of the form. If a field was missed, WordPress will tell you at the top of the screen and nothing will have been created yet.
Depending on what else is installed on your website, you may see extra rows on this form that WordPress does not put there itself, such as the two-factor option a security plugin adds just above the button. You can leave those at their defaults.
Check the account appears in your Users list#
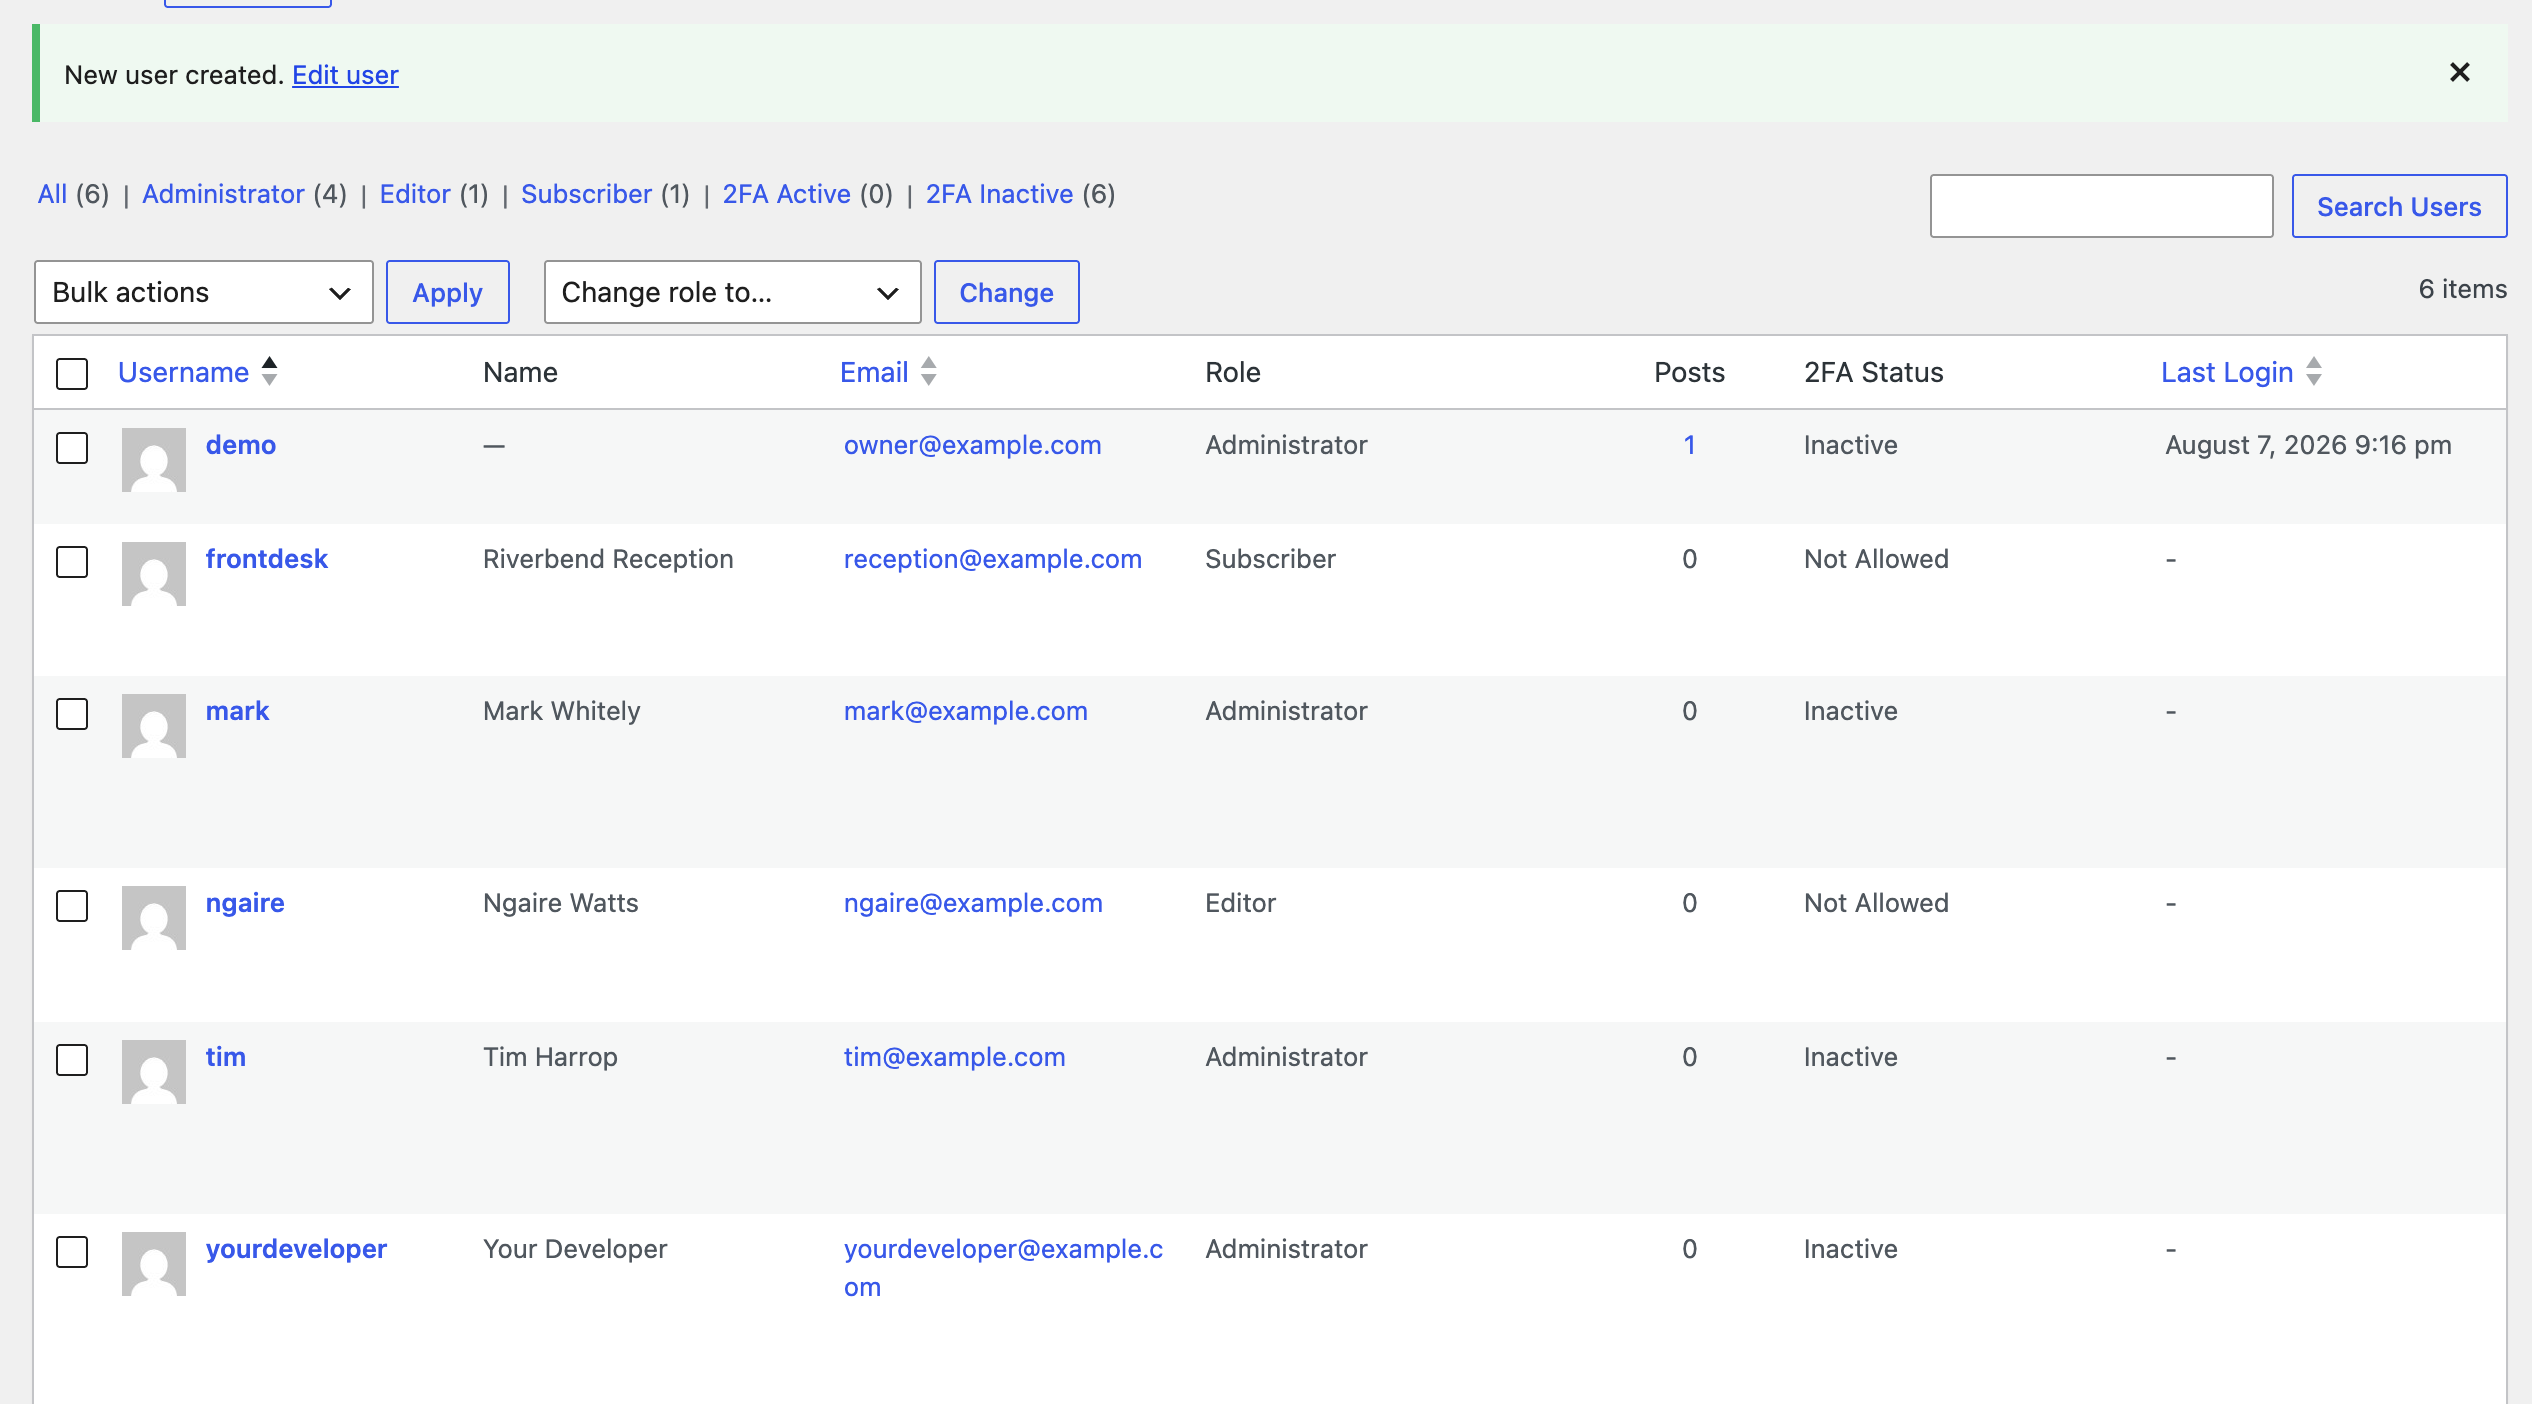
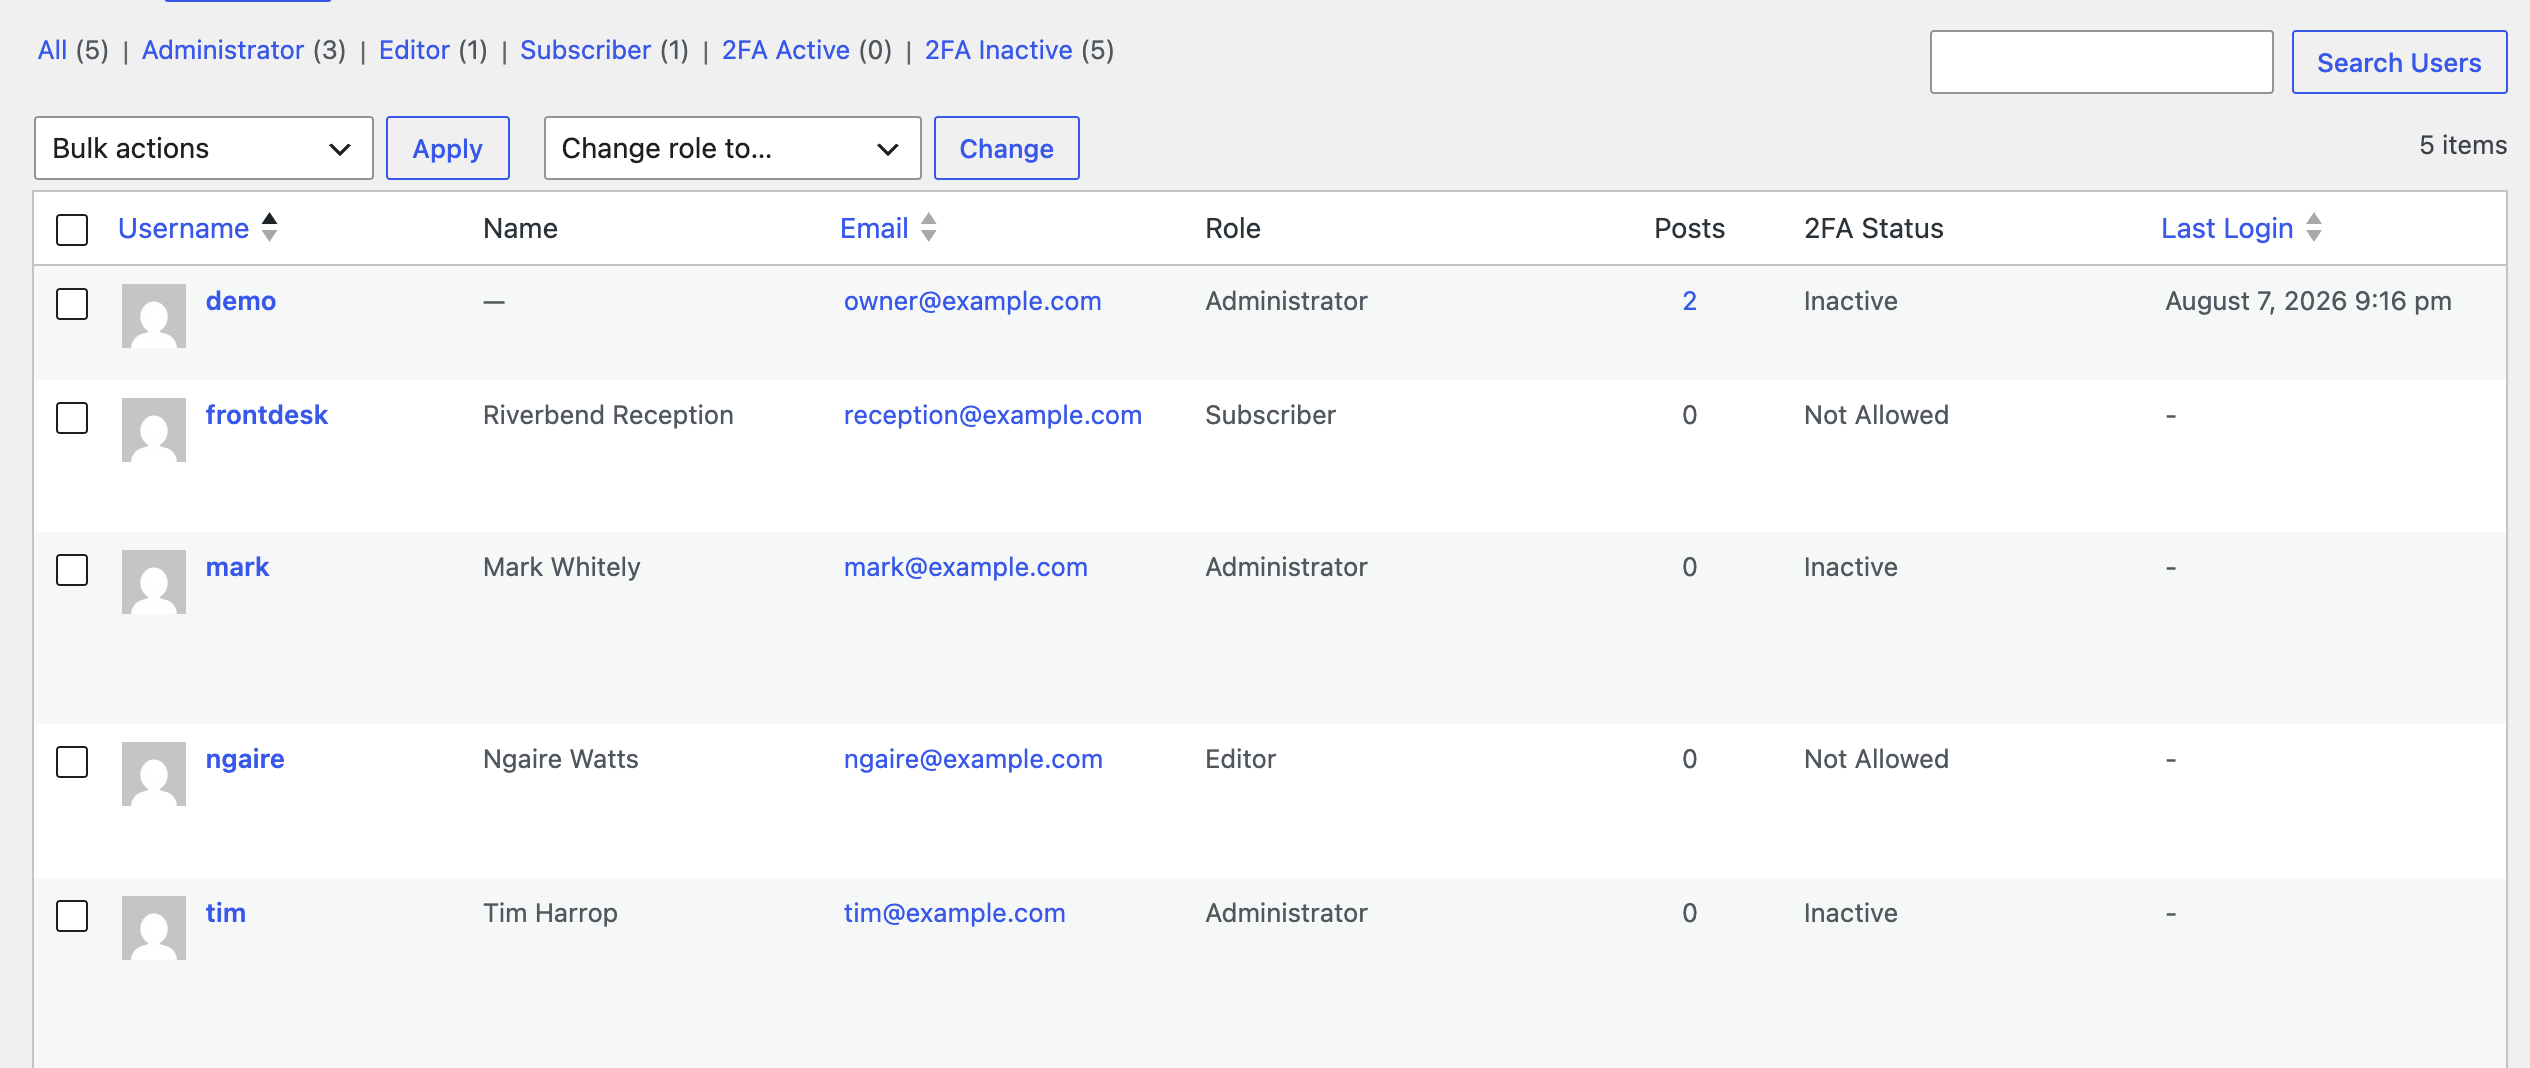
WordPress takes you back to the Users list, tells you the new user was created, and the account is now in the table. Check the Role column says what you intended before you tell your developer it is ready.
If you picked the wrong role, you do not need to start again. Tick the box beside their name, choose the correct role in the Change role to dropdown above the table, and click Change.
Remove the access when the work is finished#
This is the step almost everyone skips, and it is the reason so many WordPress sites have half a dozen old logins nobody recognises. An Administrator account that is still open months after the job ended is a way in for someone else, and you will not notice it being used.
Go to Users and hover over your developer’s row. A row of small links appears under their username: Edit, Delete, View and Send password reset, plus anything your plugins add. They are blue, apart from Delete, which is red. Click Delete. If you would rather keep the account but shut it down, use Change role to and set them to Subscriber instead, which leaves them able to log in but not to change anything.

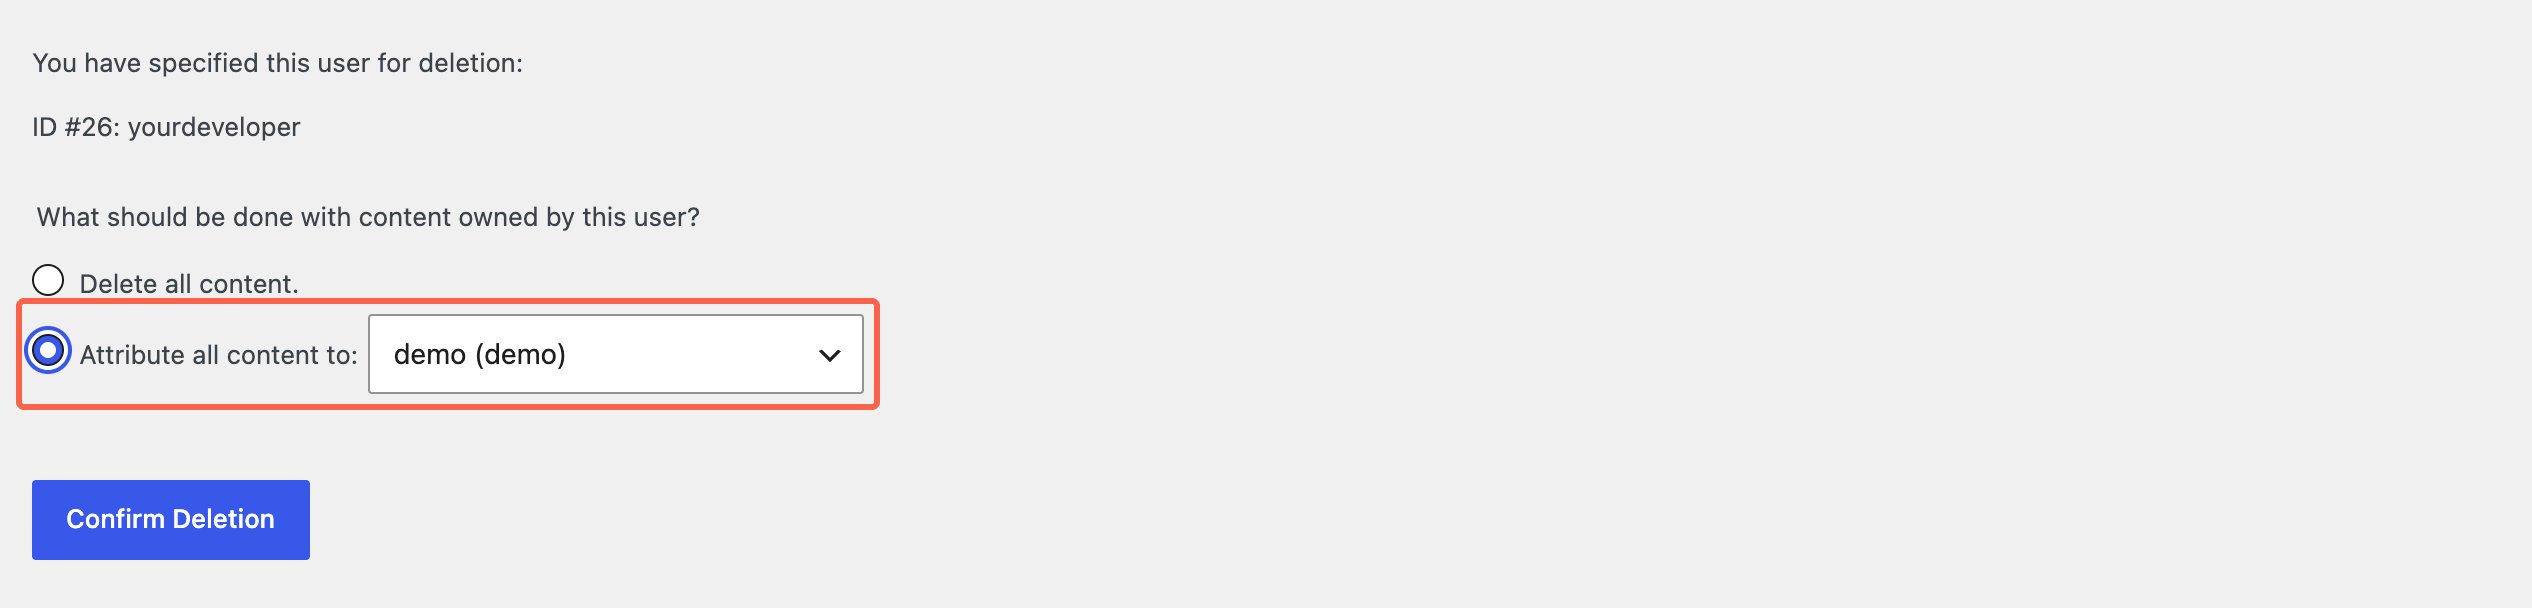
A screen headed Delete Users then asks you to confirm, and this is where you need to read rather than click through. If that account wrote any pages or posts, you are asked what should be done with content owned by this user, and given two options: Delete all content, or Attribute all content to another account.
Choose Attribute all content to and pick yourself. Delete all content does exactly what it says and takes those pages off your website. Then click Confirm Deletion. If the account never wrote anything, WordPress skips the question and only asks you to confirm.
Check who else can still log in#
While you are on the Users screen, read the whole list. The links above the table count how many accounts hold each role, and Administrator is the number to look at. Most small business websites need one or two, not seven. You may see other links in that row that are not roles at all, such as the two-factor status ones a security plugin adds.
If there is an account you cannot place, do not delete it on a hunch, because it may belong to a plugin or to your hosting provider. Ask whoever looks after your website first. Worth repeating the point underneath all of this: give people their own login rather than sharing yours, because a shared login tells you nothing about who actually made a change, and you have to change your own password every time someone leaves.
If you would rather this sort of thing was handled for you, along with updates, backups and security, that is what our WordPress care plan covers.
—Tested on WordPress 7.0.3 with Rank Math 1.0.275, Wordfence 8.2.2, Google Site Kit 1.184.0, 8 Sep 2026
Rather not do it yourself?
We can take this off your plate
If you would rather someone else handled the fiddly bits, that is what we are here for. Tell us what you are trying to sort out and we will point you in the right direction.
Let us give you a handWritten by