How to redirect an old page URL after you rename or delete a WordPress page
Prerequisites
- Rank Math
Overview
When you rename or delete a page in WordPress, the old web address stops working, and everyone who follows an old link to it gets a Page not found error, so you need to add a redirect that sends the old address to the right page instead. WordPress does not do this for you on pages, whatever you may have read, and there is nothing on your website that quietly remembers the old address once you have saved. By the end of this you will have checked what your old address is actually doing, turned on Rank Math’s Redirections tool, added a 301 redirect from the old address to the new one, tested it somewhere your own browser cannot mislead you, and switched on the setting that handles the next rename by itself. You need an Administrator account on your website to do any of it. If your left menu has no Settings item, your account is an Editor and you will need to ask whoever looks after your website. Allow about twenty minutes for your first one.
Write down the old address before you change anything#
A redirect needs two addresses: the one that is about to stop working, and the one people should land on instead. Only one of those is still recoverable afterwards, so start by capturing the old one.
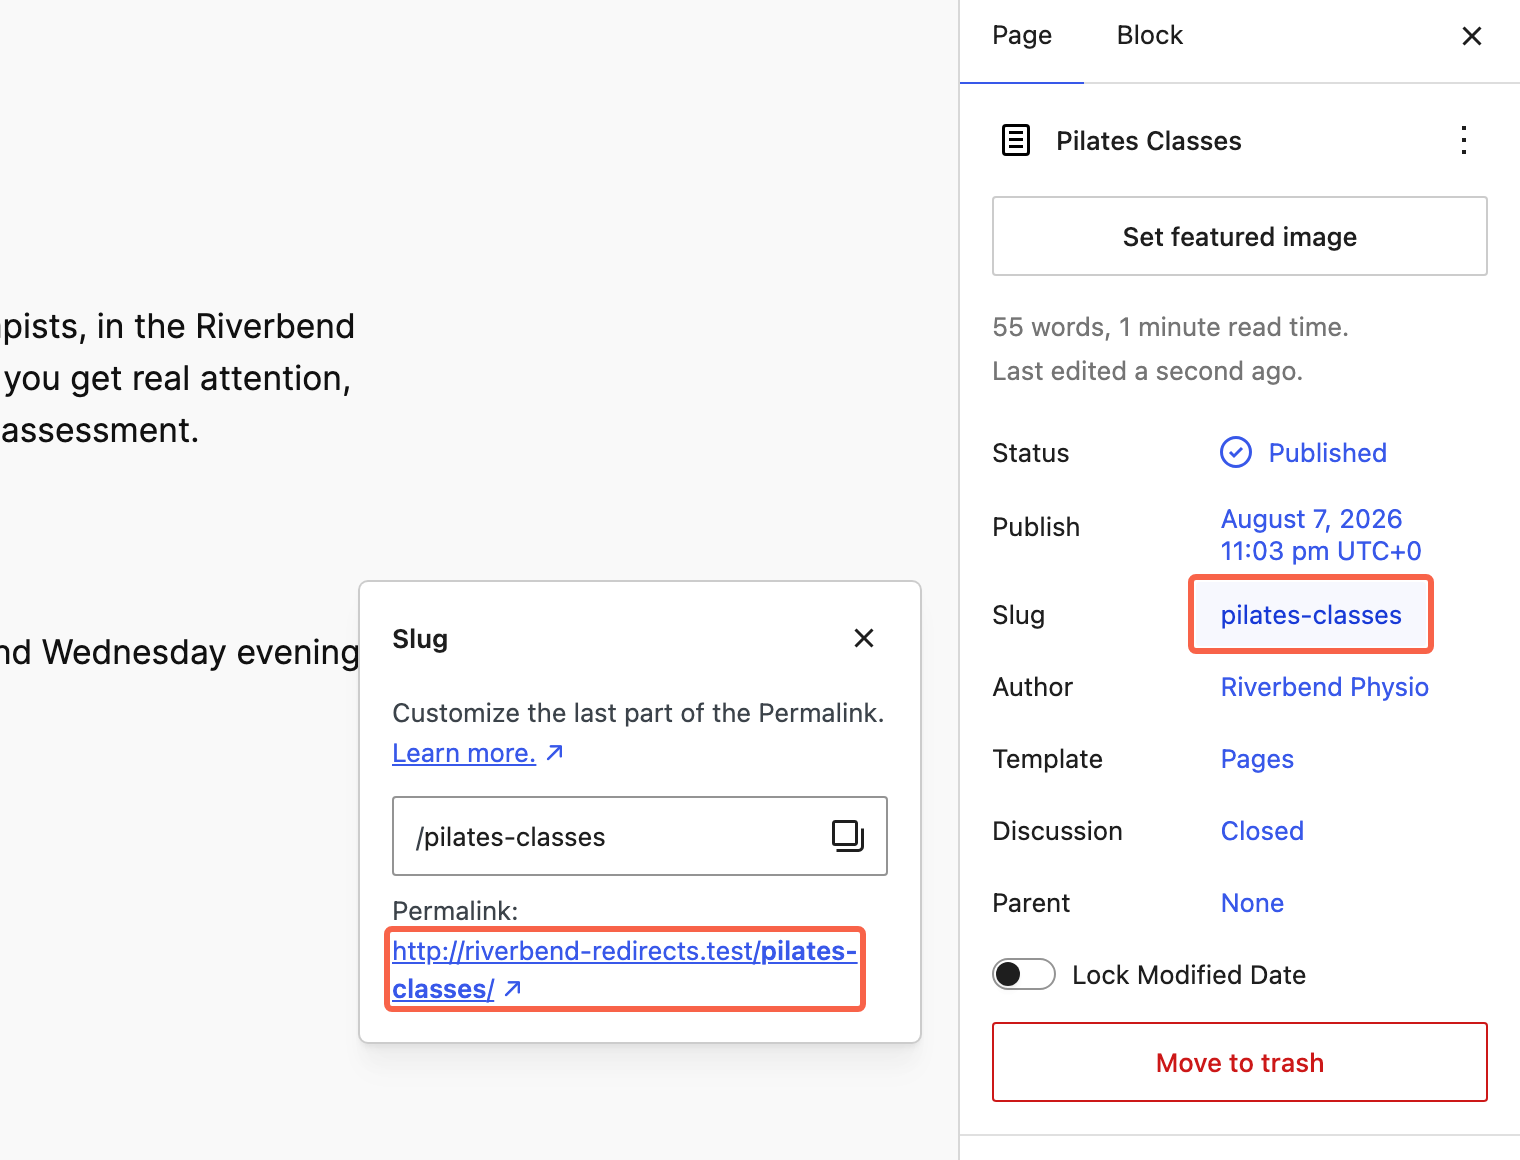
Open the page in the editor. In the settings panel on the right, make sure the Page tab is selected rather than Block, then click the blue address next to Slug. A small panel opens headed Slug, with the address in a box and the whole web address printed underneath it next to the word Permalink. Copy that whole address, domain name and all, into a note or an email to yourself.
Worth knowing while you are here: changing the page title on its own does not move the address. WordPress works the address out from the title the first time you save the page and then leaves it alone. It is editing this Slug box, or using Move to trash at the bottom of the same panel, that breaks the old address. If you are creating a page rather than moving one, this is the moment to get the address right first time, which is covered in How to add a new page in WordPress and add it to the menu.
Check what your website is doing with the old address now#
Do not assume the old address is broken, and do not assume somebody has handled it. Open a private or incognito window, paste in the old address and see what happens. A private window matters here for reasons that come up again in step five.
If you renamed a page, you will get your website’s Page not found screen. WordPress does not redirect old page addresses. It has the machinery to do exactly that, and it deliberately skips pages, so the old address stops existing. If you renamed a blog post, you will probably land on the post at its new address without doing anything, because WordPress does quietly remember a post’s previous address. That difference is where “WordPress handles that automatically” comes from. It is true of posts and not true of pages, and almost everything in your menu is a page.
If you deleted the page, you get Page not found either way. Nothing is created for you, and nothing will be. One thing to rule out before you go on: if the old address still loads the page perfectly normally, that is your website’s caching handing out an old copy rather than anything working correctly. Step six deals with it.

Turn on Rank Math’s Redirections tool#
Rank Math has a redirect tool built into it, but it ships switched off, so this is not a step to skip even if Rank Math is already handling your SEO. Turning it on adds a screen; it changes nothing about your website until you actually create a redirect.
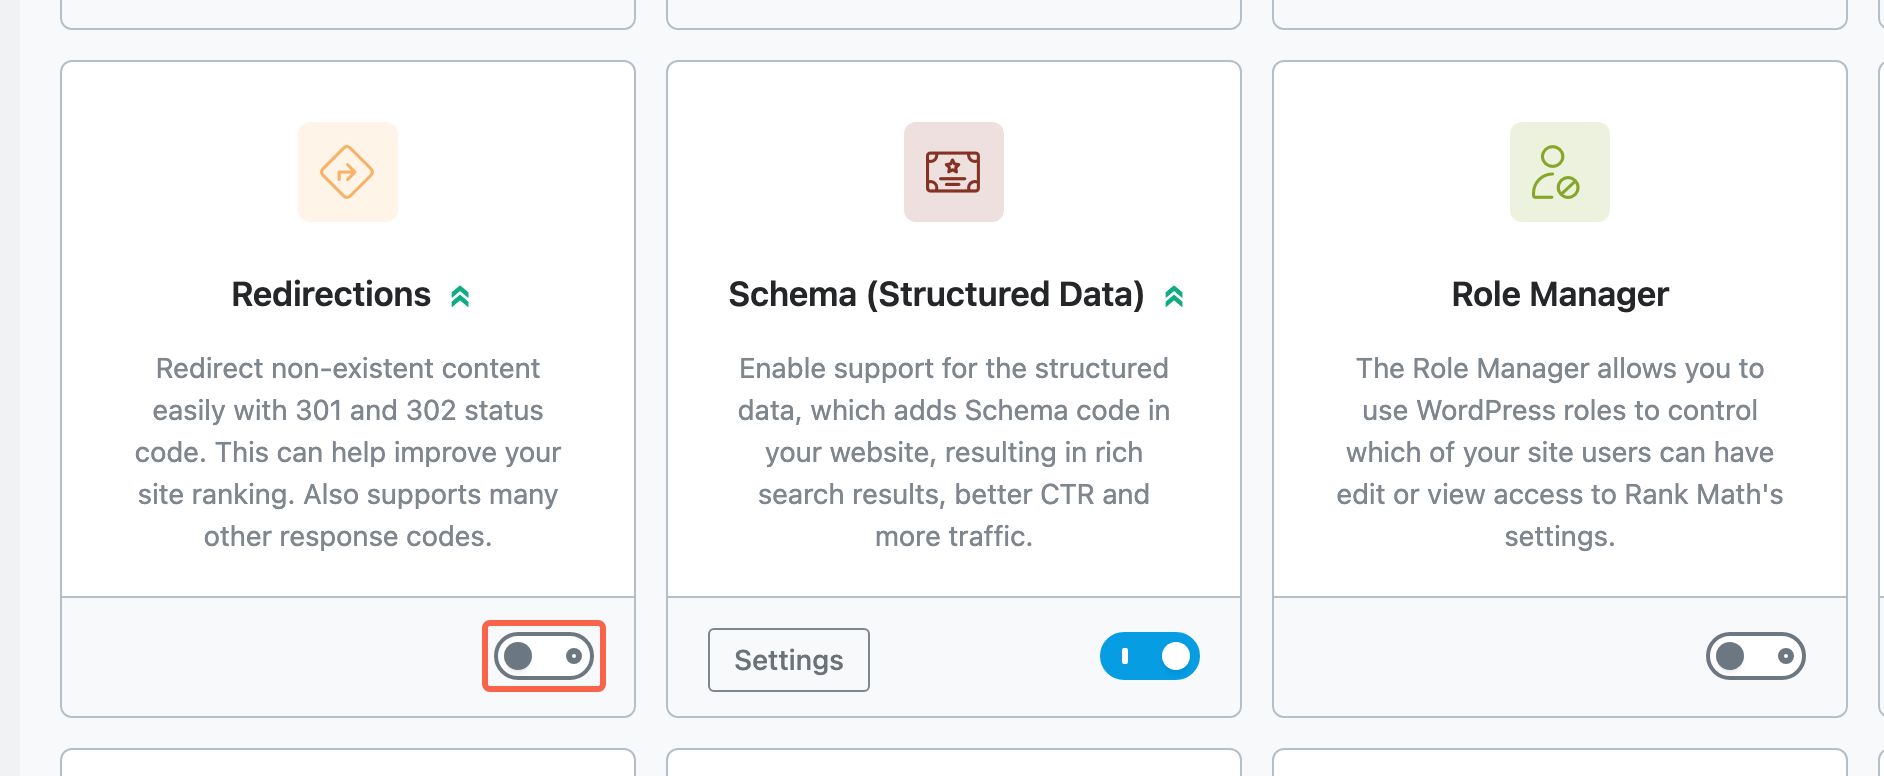
In the left menu, click Rank Math SEO, then Dashboard. You land on the Modules tab, which is a grid of cards. Scroll down to the card headed Redirections and click the grey toggle in the bottom corner of it. It turns blue and saves itself, and a new Redirections item appears in the Rank Math SEO menu on the left.
This guide follows Rank Math, which is what we use on most of the websites we look after, partly because the redirect tool comes with it rather than being another plugin to keep updated. Yoast covers the same ground in its premium version and there are perfectly good standalone redirect plugins. If your website already has one of those set up, use it rather than adding a second: two redirect tools running at the same time is a reliable way to end up with a loop, which is step seven.
Add the redirect and set it to 301#
Before the form, one decision. Send the old address to the closest equivalent page, meaning the thing the person clicking that old link was actually after. If you renamed the page, that is the same page at its new address. If you deleted it, it is whichever page now covers the subject: a deleted Pilates page goes to your classes or services page. Sending everything to your homepage is the common answer and it is the wrong one, because someone who clicked a link about Pilates lands somewhere that does not mention Pilates, cannot tell what happened, and leaves. Google treats a redirect to an irrelevant page much the same as a dead end, so you lose the ranking you were trying to keep as well.
The other decision is on the form itself. A 301 says the move is permanent and asks search engines to hand the old address’s ranking over to the new one; a 302 says you intend to put the old address back, so nothing is handed over. Unless you genuinely plan to restore the old address, you want 301, and it is what Rank Math has selected already.
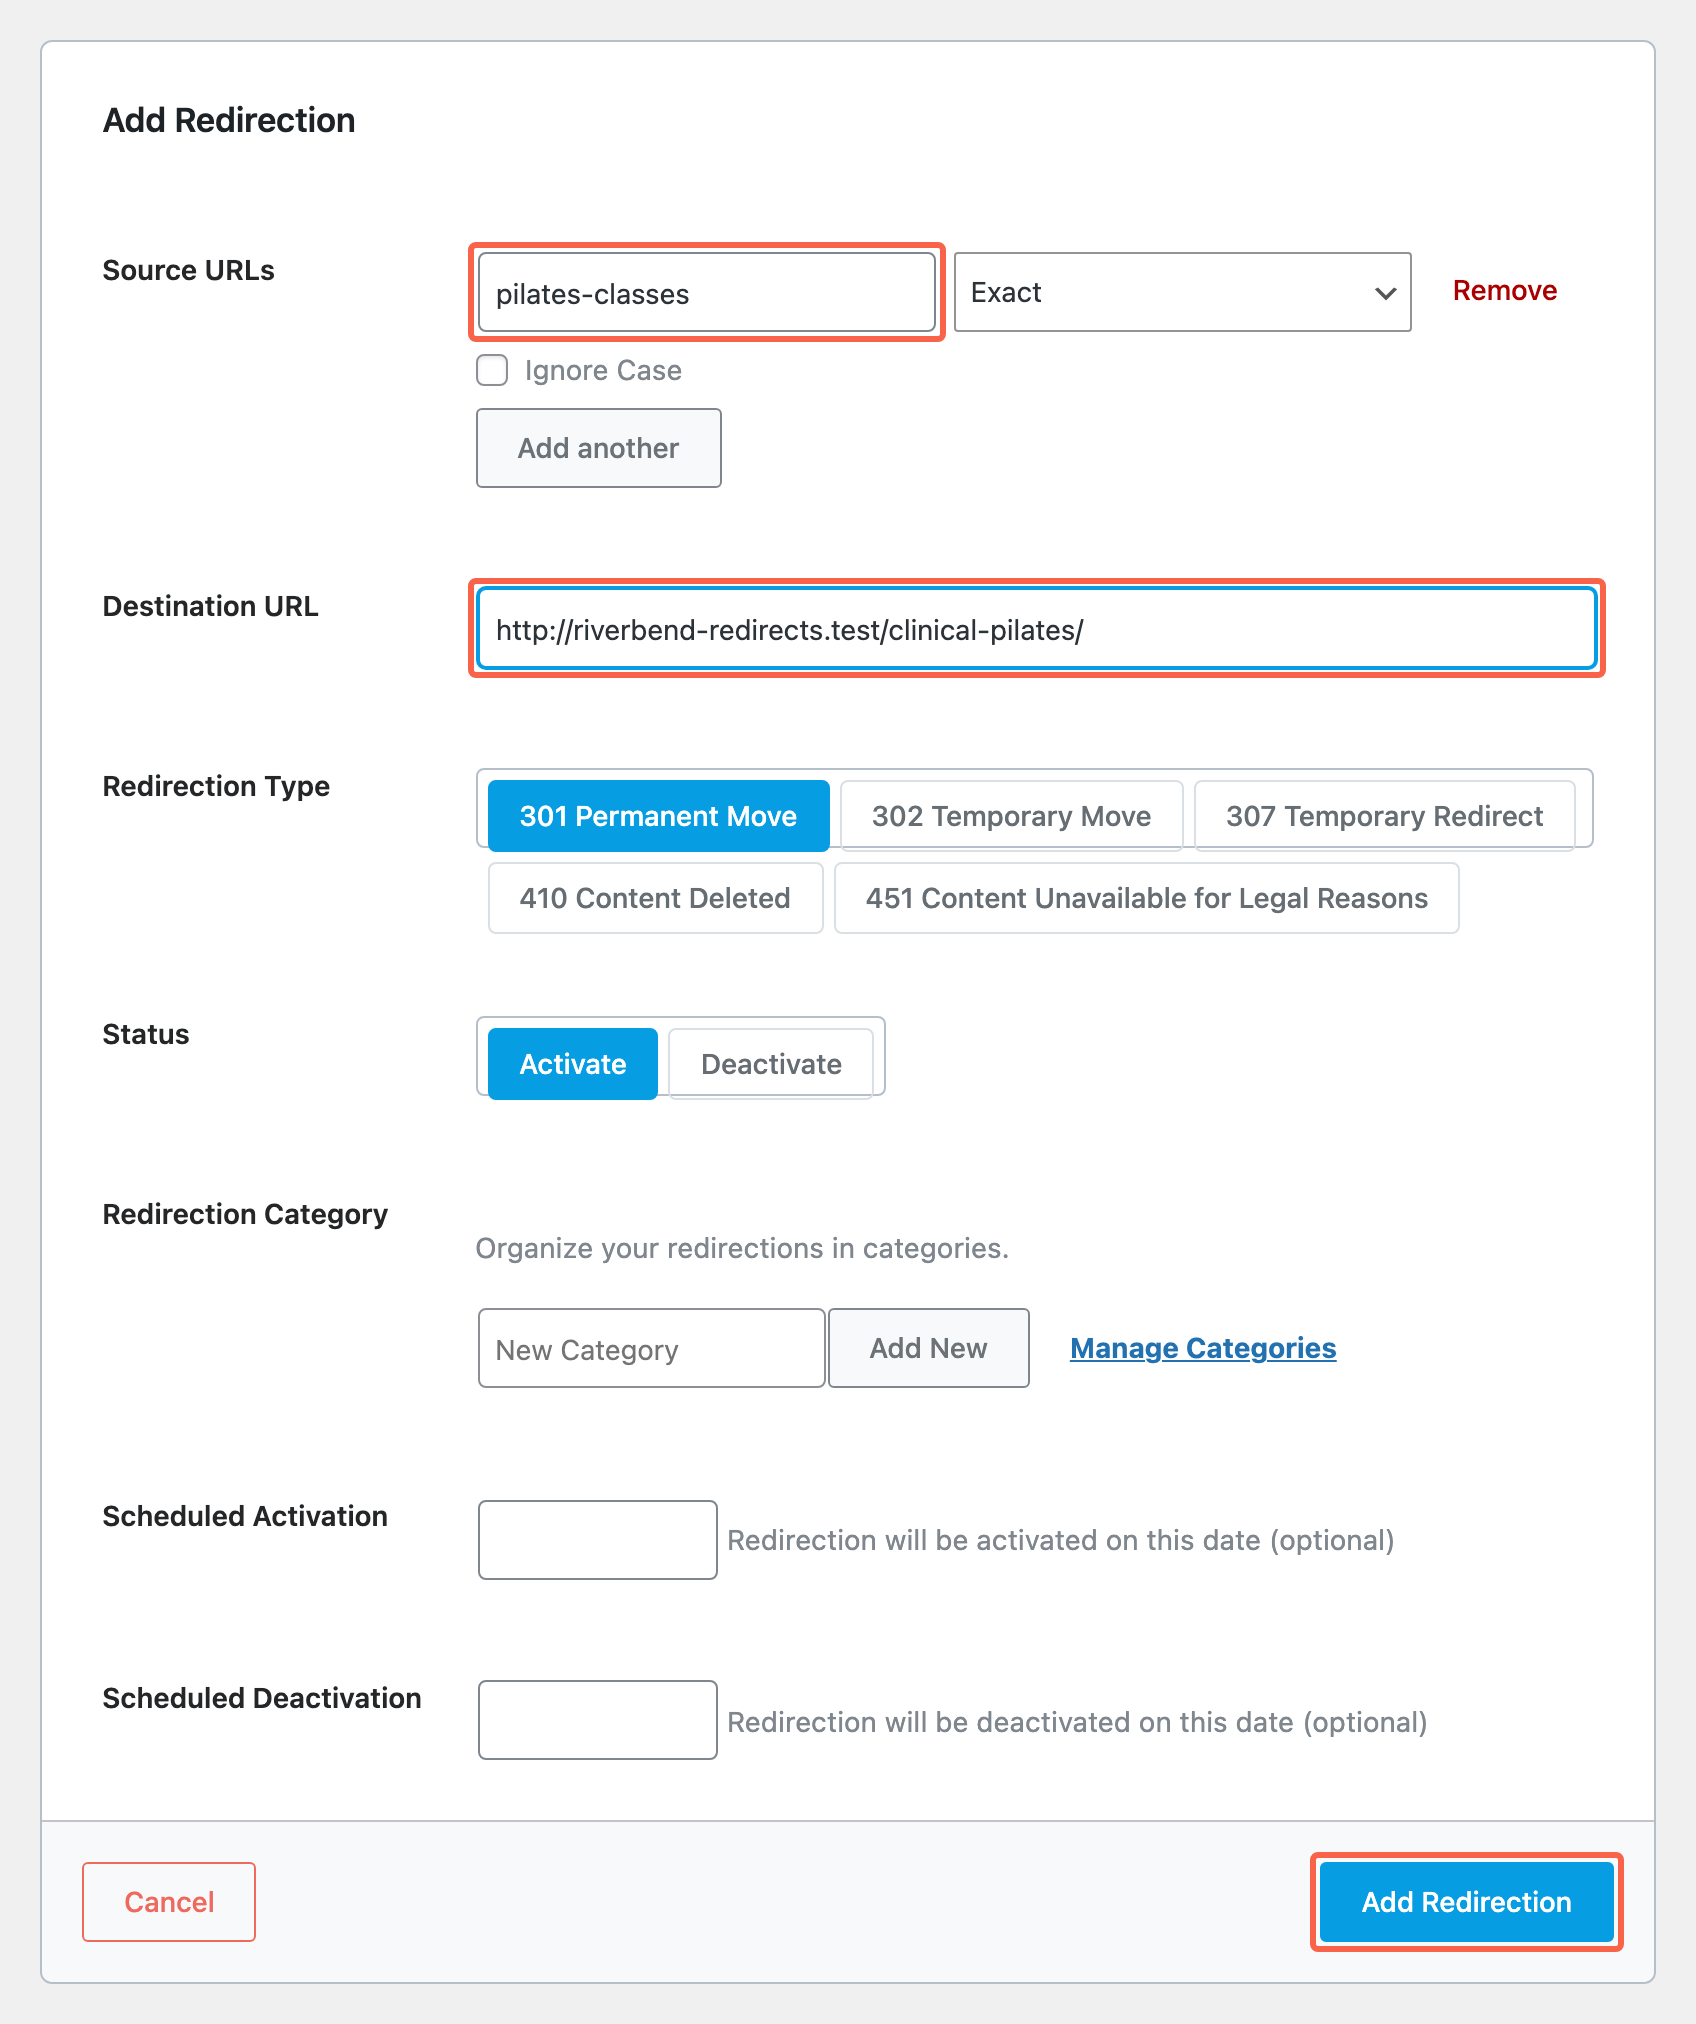
Click Redirections in the Rank Math SEO menu, then the Add New button beside the heading. In Source URLs, put the old address. You can paste the whole thing including your domain name or only the part after it, and both work. Leave the dropdown next to it on Exact. In Destination URL, paste the new address in full, domain name included. Leave Redirection Type on 301 Permanent Move and Status on Activate, ignore everything below that, and click the blue Add Redirection button at the bottom of the panel.
Test the redirect in a window that has not seen it before#
Your own browser is the least reliable place to check this, and it is worth understanding why before you trust what you see. Browsers remember permanent redirects and will keep following one they have already seen, without asking your website about it again. We tested it on a clean install: after a redirect was removed from the website entirely, the browser that had followed it once carried on going to the old destination on its own, while a fresh private window got the correct answer. The same effect works the other way round, which is how a redirect can look broken to you and be perfectly fine for everybody else.
So open a brand new private or incognito window, paste in the old address and press Enter. You should land on the new page. If you have already been testing in a private window, close it completely and open another one, because the same window remembers it too.
Then check it from your website’s side, which does not depend on any browser. Go to Rank Math SEO then Redirections. Your redirect is listed with the old address under From, the new one under To, and 301 under Type. The Hits column counts every time the redirect has actually fired and Last Accessed shows when it last did. If you have just tested the old address and Hits is still on zero, the redirect is not running, and the next step is the usual reason.

Clear your website’s cache if the old address still loads the old page#
Caching keeps a finished copy of each page and hands that straight to visitors without waking WordPress up, which is what makes your website fast. It also means a copy saved at the old address gets served before anything has a chance to redirect. We tested this too: with a page already cached at its old address, adding a redirect changed nothing whatsoever, and the old address kept loading normally until the cache was cleared.
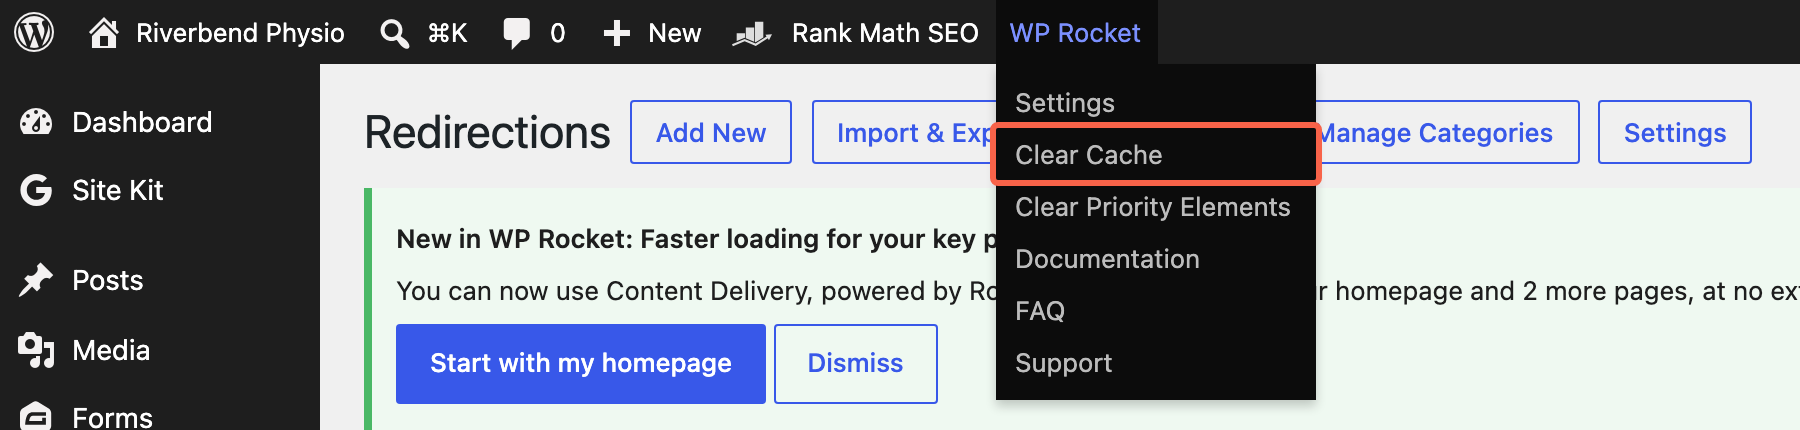
We use WP Rocket for caching on the websites we look after. In the black bar across the top of your dashboard, hover over WP Rocket and click Clear Cache. If your website uses a different caching plugin the same option will be in there under a name like Purge cache or Delete cache, and if you are on a managed host there may be a second cache at the hosting level with its own button.
Now test the old address again, in another fresh private window, and check the Hits column has moved.
Check you have not built a chain or a loop#
Redirects are permanent instructions that stay on your website and quietly accumulate, so it is worth a look at the whole list rather than only the one you added. Two things to look for, both visible from the Redirections screen.
A chain is a redirect pointing at an address that is itself redirected somewhere else. It happens naturally when a page gets renamed twice. In the list it shows up as two rows where one row’s To is another row’s From. Chains do get people to the right place, so nothing looks broken, but every hop makes the page slower to open and search engines are less generous with the ranking they pass along each one. Fix it by clicking the first redirect and changing its destination to the final address, so there is one hop instead of two.
A loop is two redirects pointing at each other, or one pointing at its own address. That address then stops working entirely and anyone opening it gets a browser error rather than your website. If a redirect you have just added produces that, delete it and start again rather than editing around it.

Set Rank Math up so the next rename looks after itself#
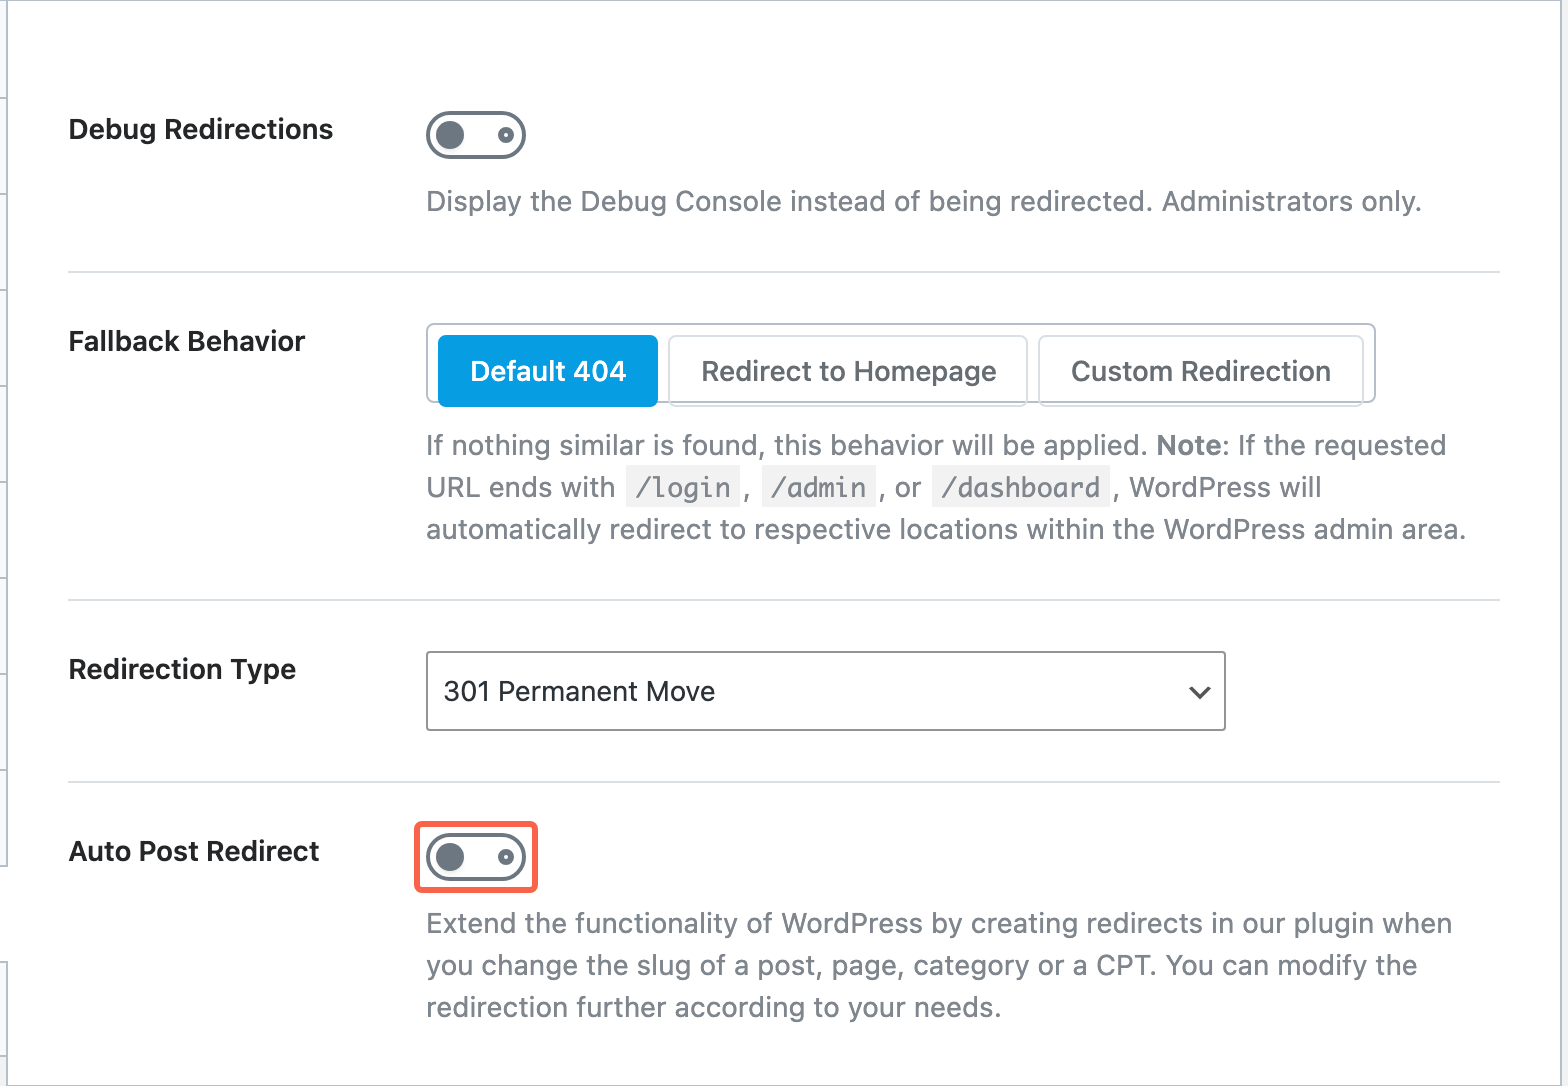
There is one setting that means you never have to do steps one to four again for a rename, and it is off by default. On the Redirections screen, click the Settings button at the top of the page. Turn Auto Post Redirect on and click Save Changes.
From then on, whenever the address of a published page or post changes, Rank Math writes the 301 for you and tells you it has, with a notice at the top of the screen reading “SEO Notice: you just changed the slug of a Page and Rank Math has automatically created a redirection.” Two things it does not do. It creates nothing when you delete a page, so deletions stay a manual job. And it adds a new redirect every time you rename rather than updating the old one, which is exactly how the chains in the previous step appear, so keep an eye on the list.
While you are on this screen, leave Fallback Behavior on Default 404. The Redirect to Homepage option next to it sends every address on your website that does not match anything to your homepage. It sounds tidy, and it is the same mistake as step four applied to your entire website at once: every mistyped address and every genuinely dead page starts quietly reporting itself as working, so you stop being told about problems and visitors keep landing somewhere that does not answer their question.
Check Search Console a few weeks later#
Your redirect works from the moment you save it, but Google will not notice for a while, because it re-checks addresses on its own schedule rather than yours. Search Console is where you see it catch up, and it is also where you find the old broken addresses you had forgotten about.
In Search Console, open the Page indexing report. It sits under Indexing in the left menu, and in some accounts you get to it through All reports and tools first. Scroll to the table headed Why pages aren’t indexed and find the row reading Not found (404). Click it and you get every address Google has tried and failed to load. Anything in there that used to be a real page on your website needs the same treatment as this guide: one redirect each, pointing at the closest equivalent page. Over the following weeks the addresses you have redirected drop out of that list on their own, which is how you know it has landed.
If your website is not connected to Search Console yet, our guide on How to connect your website to Google Search Console and submit your sitemap covers setting it up. Leave the old redirects in place permanently once they are working. They cost nothing, and old links keep turning up in emails, printed material and other people’s websites for years.
One redirect at a time is a job you can do yourself. Three things are worth handing over instead: bulk changes, where you are renaming or removing a batch of pages at once and the redirects need mapping rather than typing; a website move, where every address changes at the same time and the redirects belong in the server configuration rather than in a plugin; and anything touching your homepage, where a mistake takes the whole website down rather than one page. If your website has been through a few of these already and nobody is sure what is still pointing where, that is one of the things we untangle in a website health check.
If you would rather not do this every time a page gets renamed or removed, it is the kind of tidying we pick up on a WordPress care plan, along with the updates and backups that sit around it.
Tested on WordPress 7.0.3 with Rank Math 1.0.275, Rank Math Pro 3.0.118, WP Rocket 3.23.1.1, Wordfence 8.2.2, 8 Sep 2026
Rather not do it yourself?
We can take this off your plate
If you would rather someone else handled the fiddly bits, that is what we are here for. Tell us what you are trying to sort out and we will point you in the right direction.
Let us give you a handWritten by