How to set up WP Rocket, and which settings are safe to turn on
Prerequisites
- WP Rocket
Overview
WP Rocket starts caching your website the moment you activate it, with no settings to fill in, and for most small business websites that alone is the bulk of the speed you are going to get. The rest of its settings are a spectrum: a handful are safe to turn on and leave, several are worth trying but need checking afterwards, and a few will quietly break parts of your website while giving you no error message at all. This guide walks through activating it, confirming it is working, and then turning options on in the order that is least likely to cause trouble, one change at a time so you always know what caused a problem. It also names the specific settings that broke a working contact form on our test website, and what the damage looked like. You need an Administrator account to do any of it, because WP Rocket lives under Settings. We use WP Rocket on the websites we look after, mostly because it does the useful things by default and puts a warning on the dangerous ones. There are plenty of other caching plugins and the same options usually exist in them under slightly different names.
Check whether your website is already running another caching plugin#
Two caching plugins on one website fight each other, and the symptoms look like a broken website rather than a configuration problem. This is the one thing worth checking before you install anything, and it takes a minute.
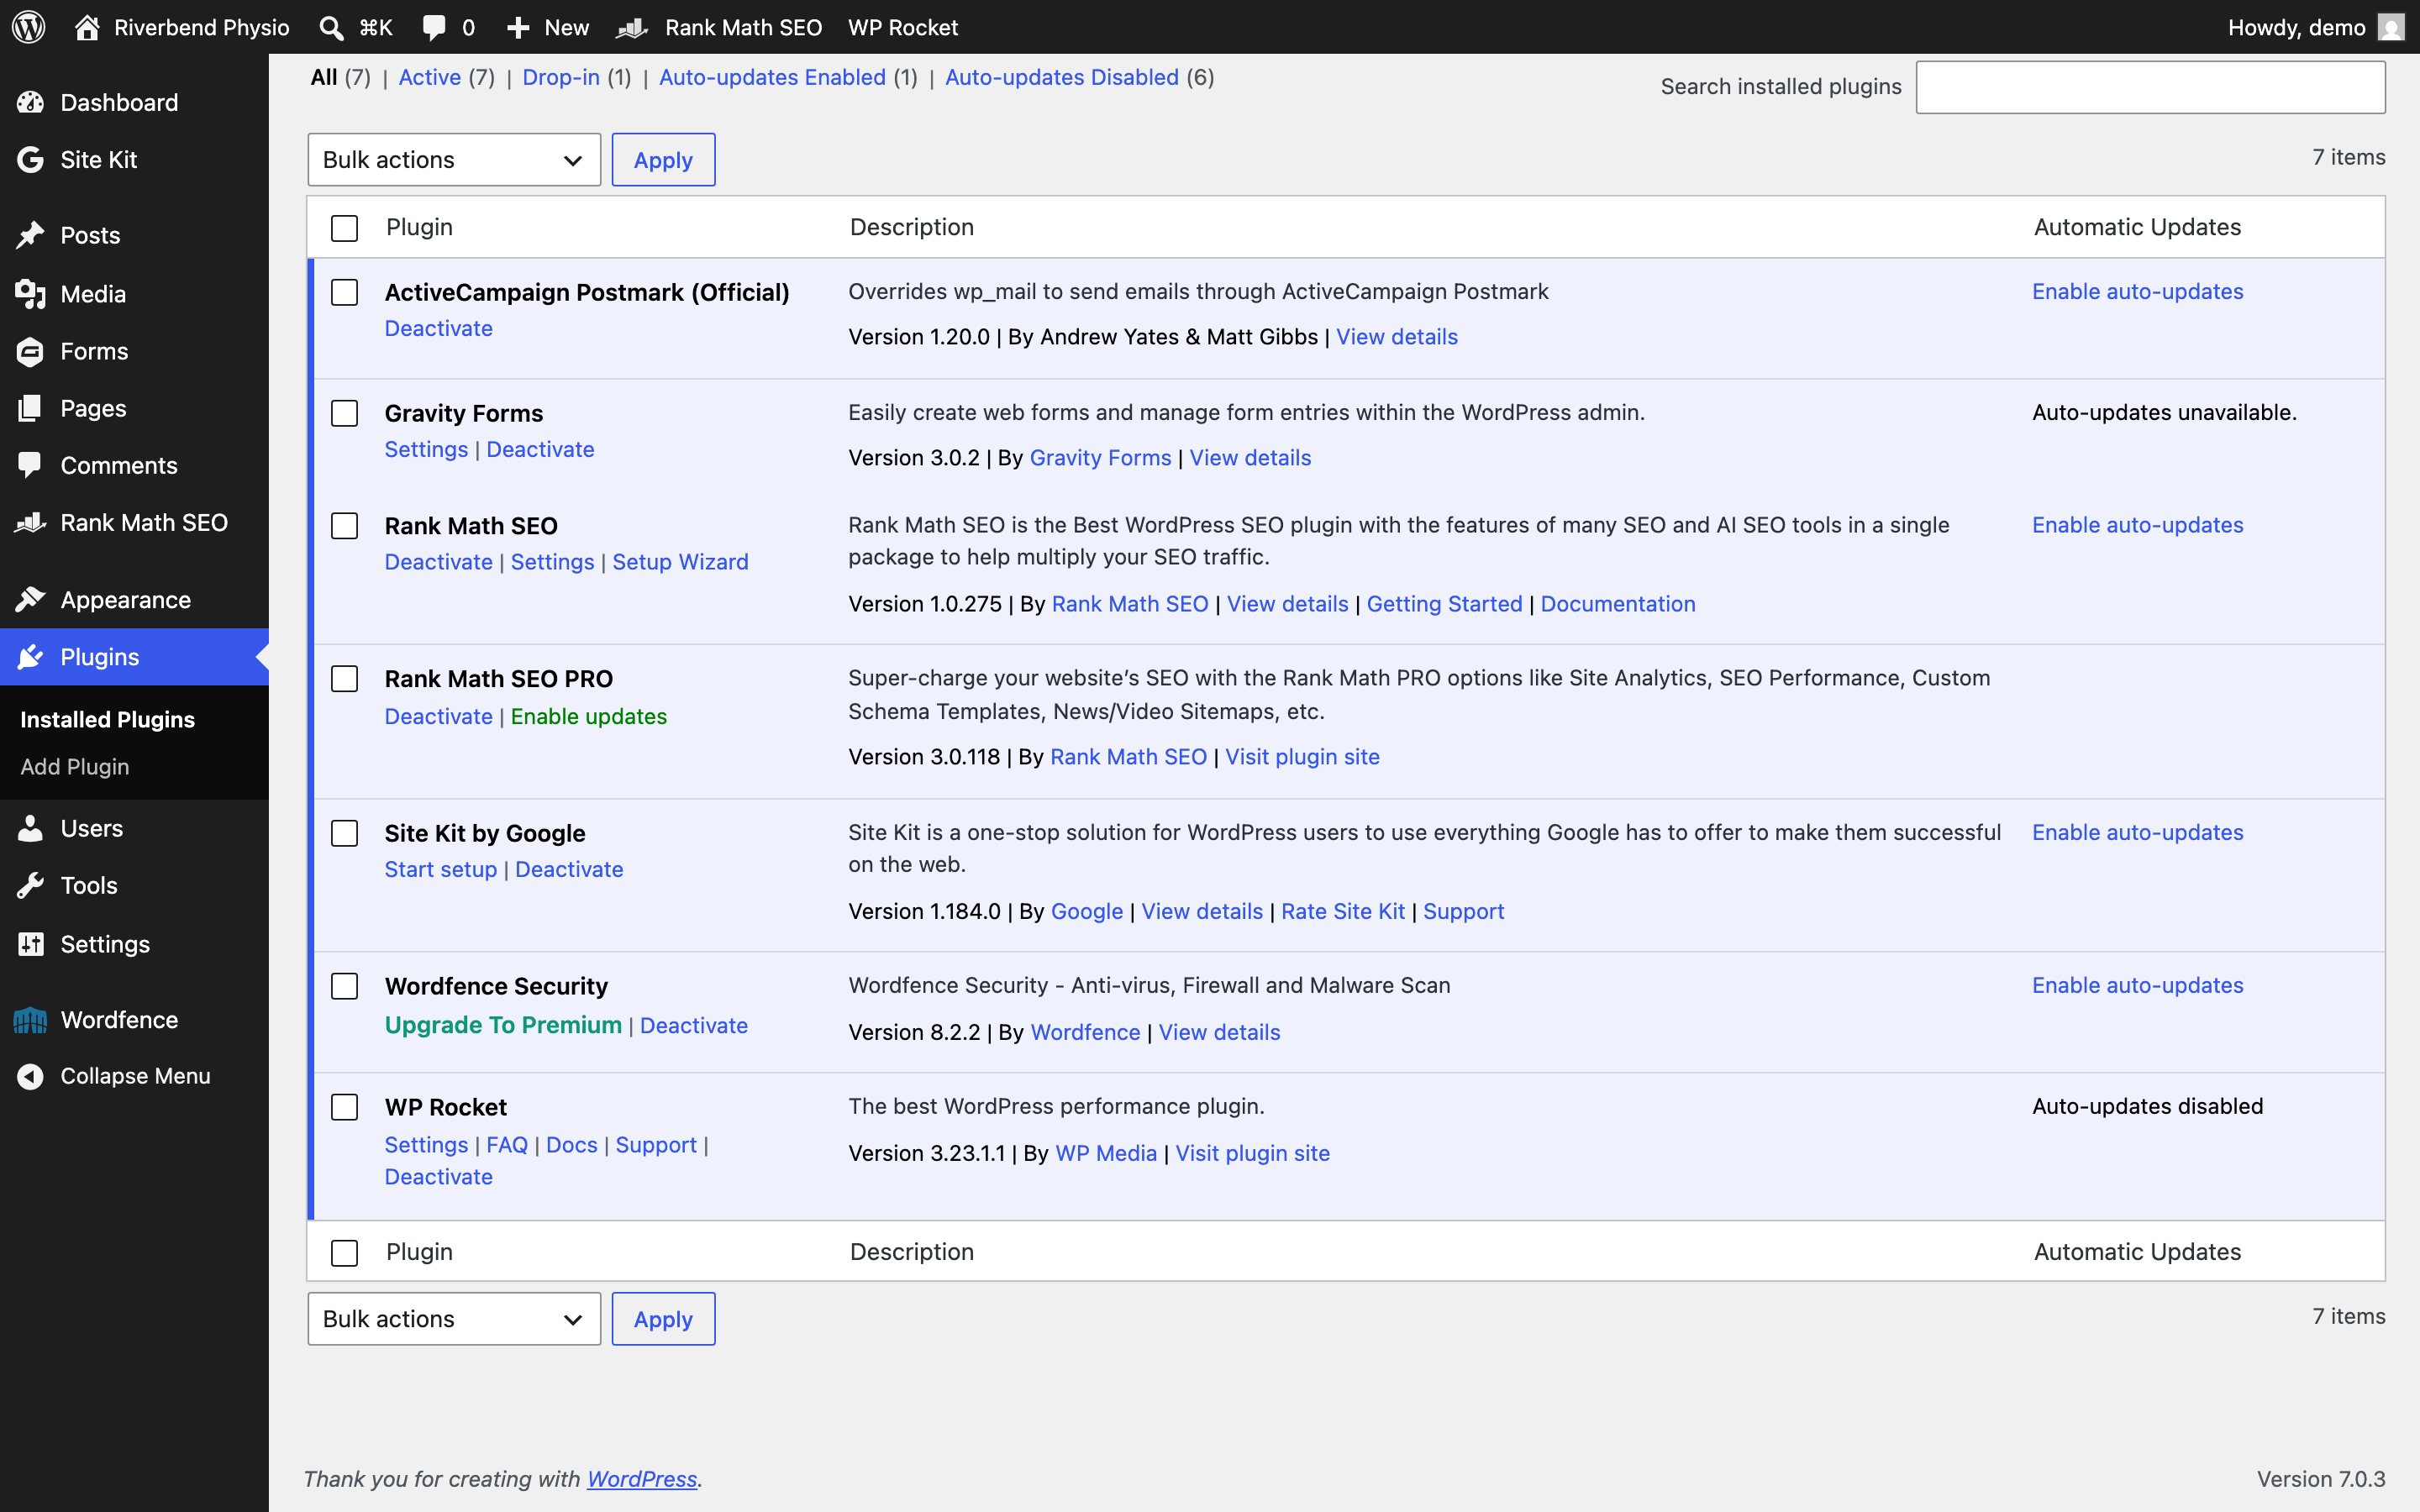
In the left menu click Plugins. Read down the list of active plugins looking for anything with cache, caching, speed, performance, optimise or optimize in its name or description. If you find one, deactivate it before you go any further. Your website will get slower for a few minutes and nothing will break.
Two things that are not caching plugins and can stay exactly where they are: your security plugin, and anything that only optimises images. They do a different job and they do not conflict.
Activate WP Rocket and change nothing else#
This is the step that does most of the work, which is why it comes before any settings. On the Plugins screen, find WP Rocket and click Activate underneath its name.
From that moment your website is being cached. There is no setup screen to work through and no switch to turn caching on, because page caching is the thing WP Rocket does by default and it cannot be turned off from the settings. For most small business websites this single click is the bulk of the improvement you are going to see, and everything after it is smaller gains at rising risk.
It does not arrive completely blank, either. Four things are already switched on for you: Minify CSS files, Minify JavaScript files, cache preloading, and a limit on how often WordPress talks to itself in the background. Those are WP Rocket’s own defaults, not something we have chosen, and they are covered in the steps below.
Check your website still works, in a private window#
The point of this step is not to prove caching is on. It is to prove nothing broke, which is the only question that actually matters, and to get you into the habit you will need for the rest of this guide.
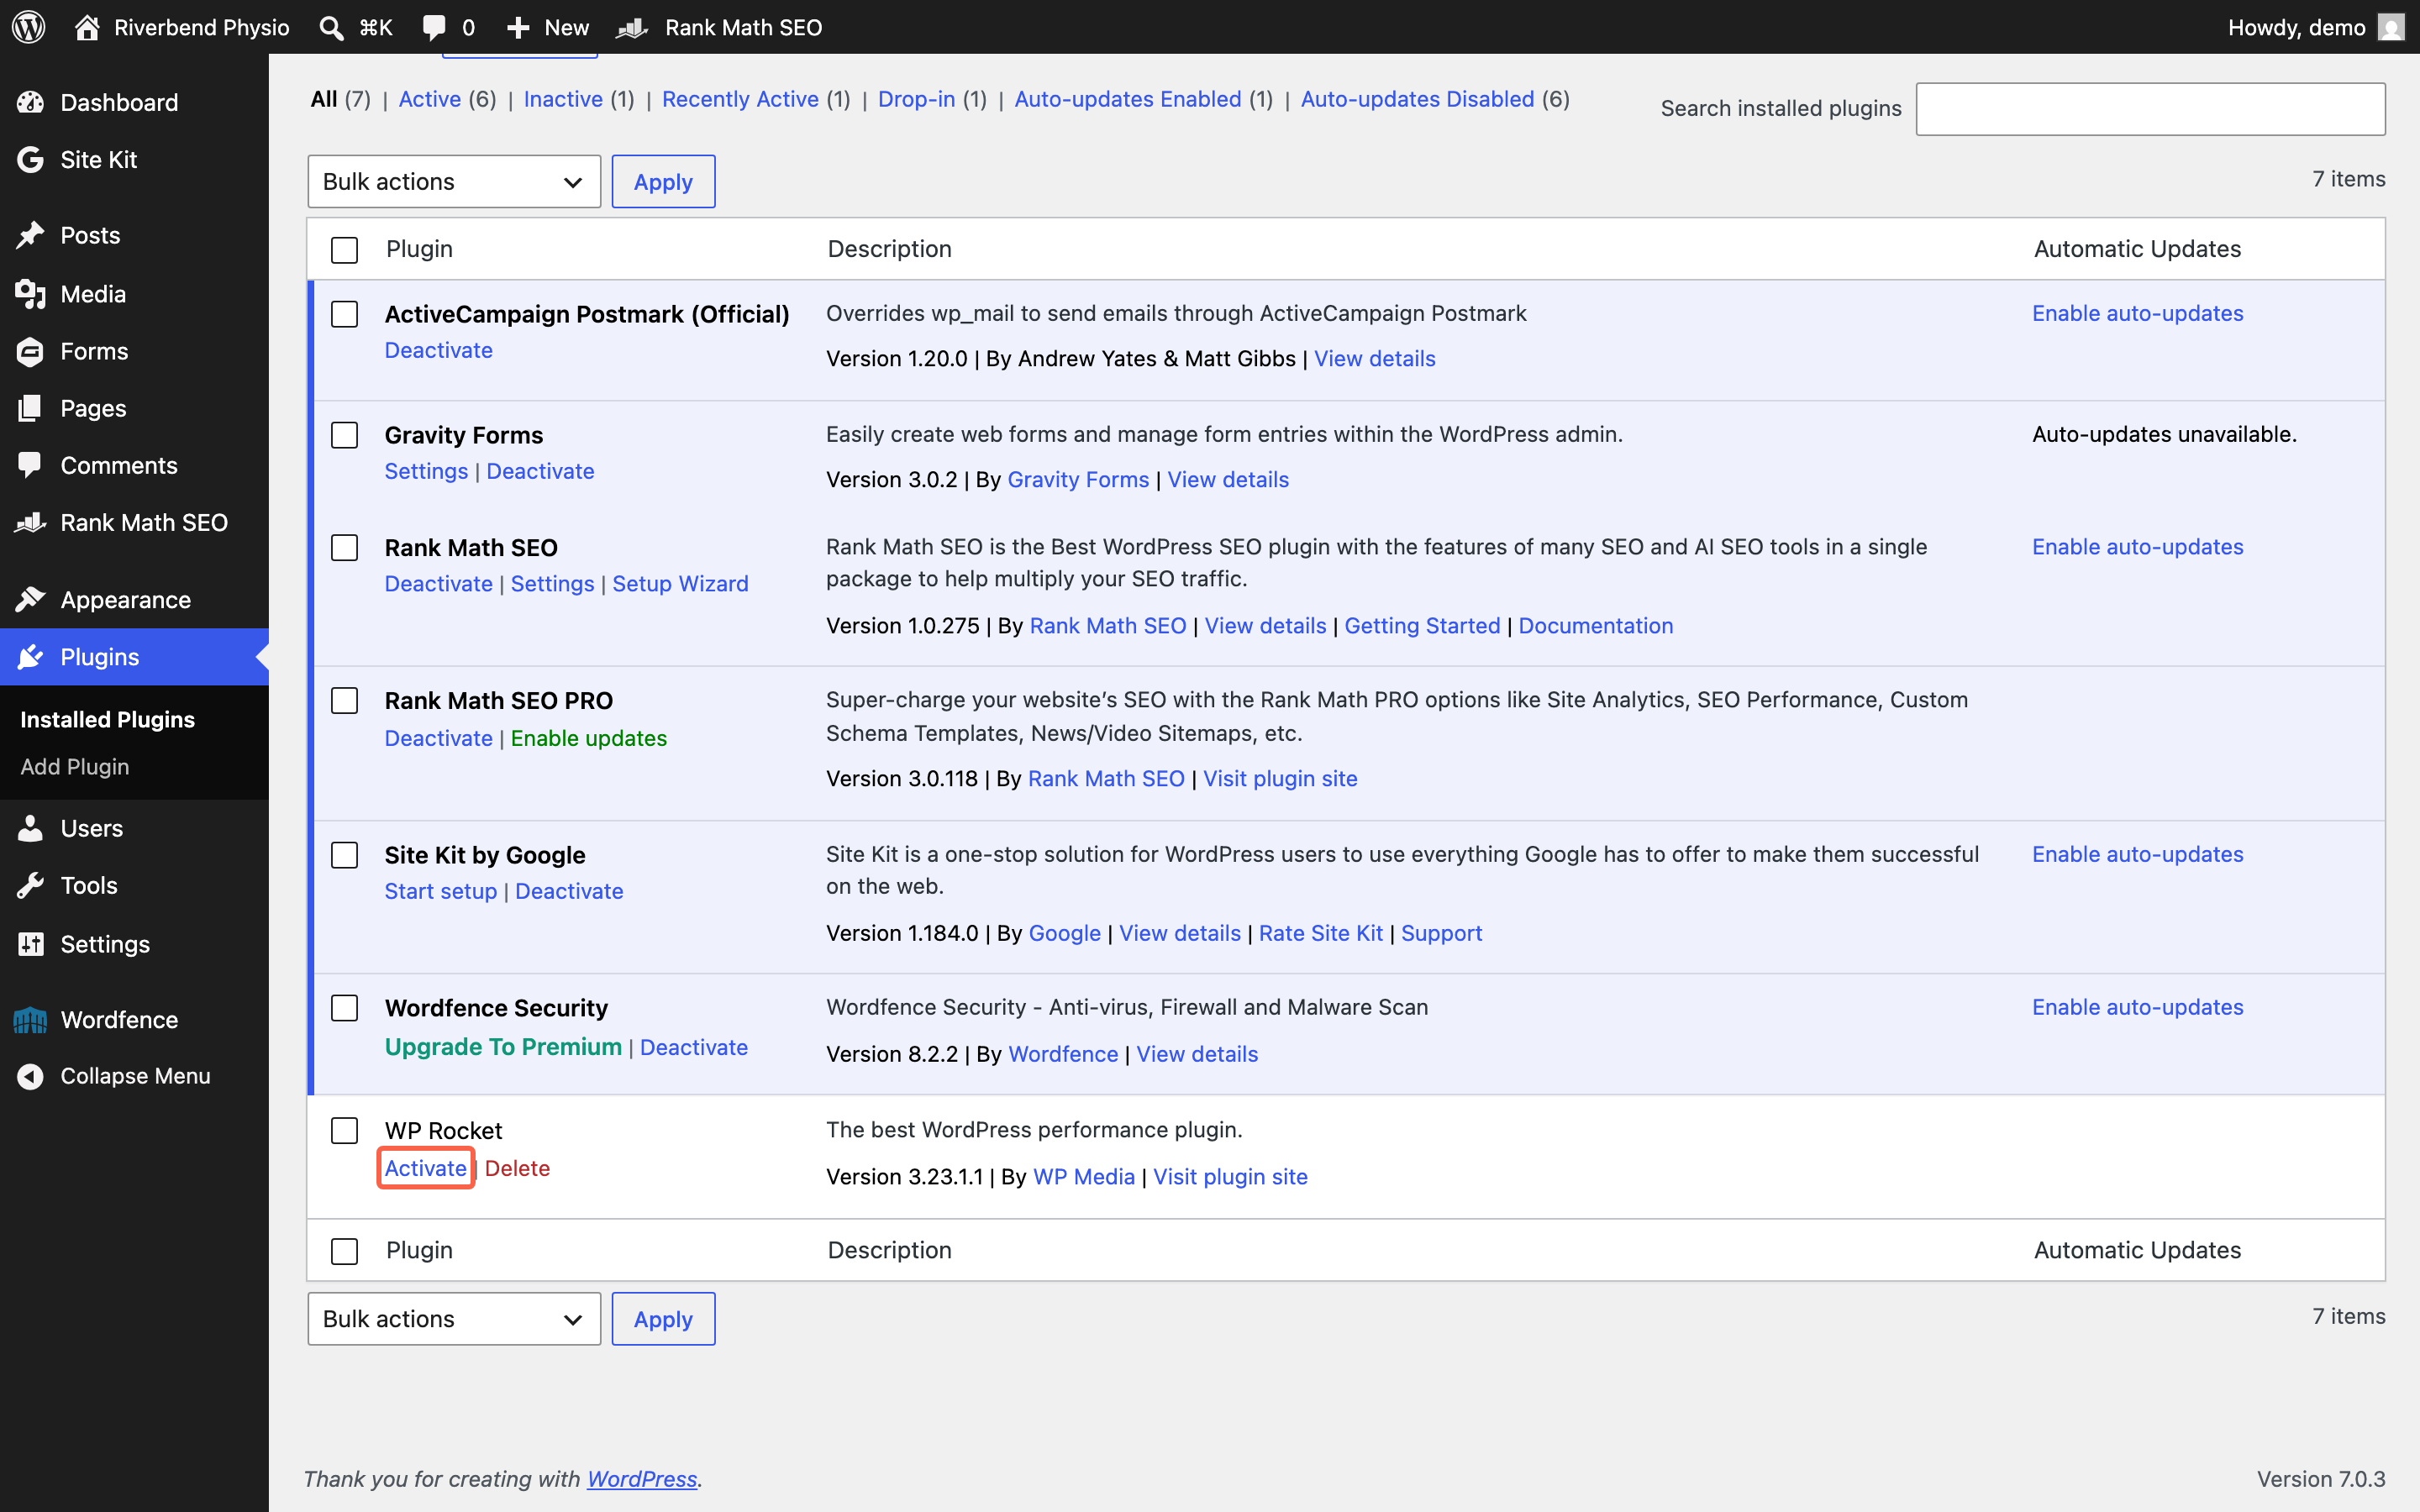
Open a private window, sometimes called incognito, and paste in your website’s address. That window is not logged in, so it gets the same copy of your pages a member of the public gets. Click through three or four pages, including your contact page and any page with a booking form, a slider or a photo gallery on it. Everything should look and behave exactly as it did before.
Keep that private window open. Every time you change a setting in the steps below, this is where you check the result, and reloading it is how you see the change. If you would rather understand the layers underneath this, our guide on why you cannot see your changes on your website, and how to clear the cache covers them properly.
Find the two buttons on the Dashboard tab before you change anything#
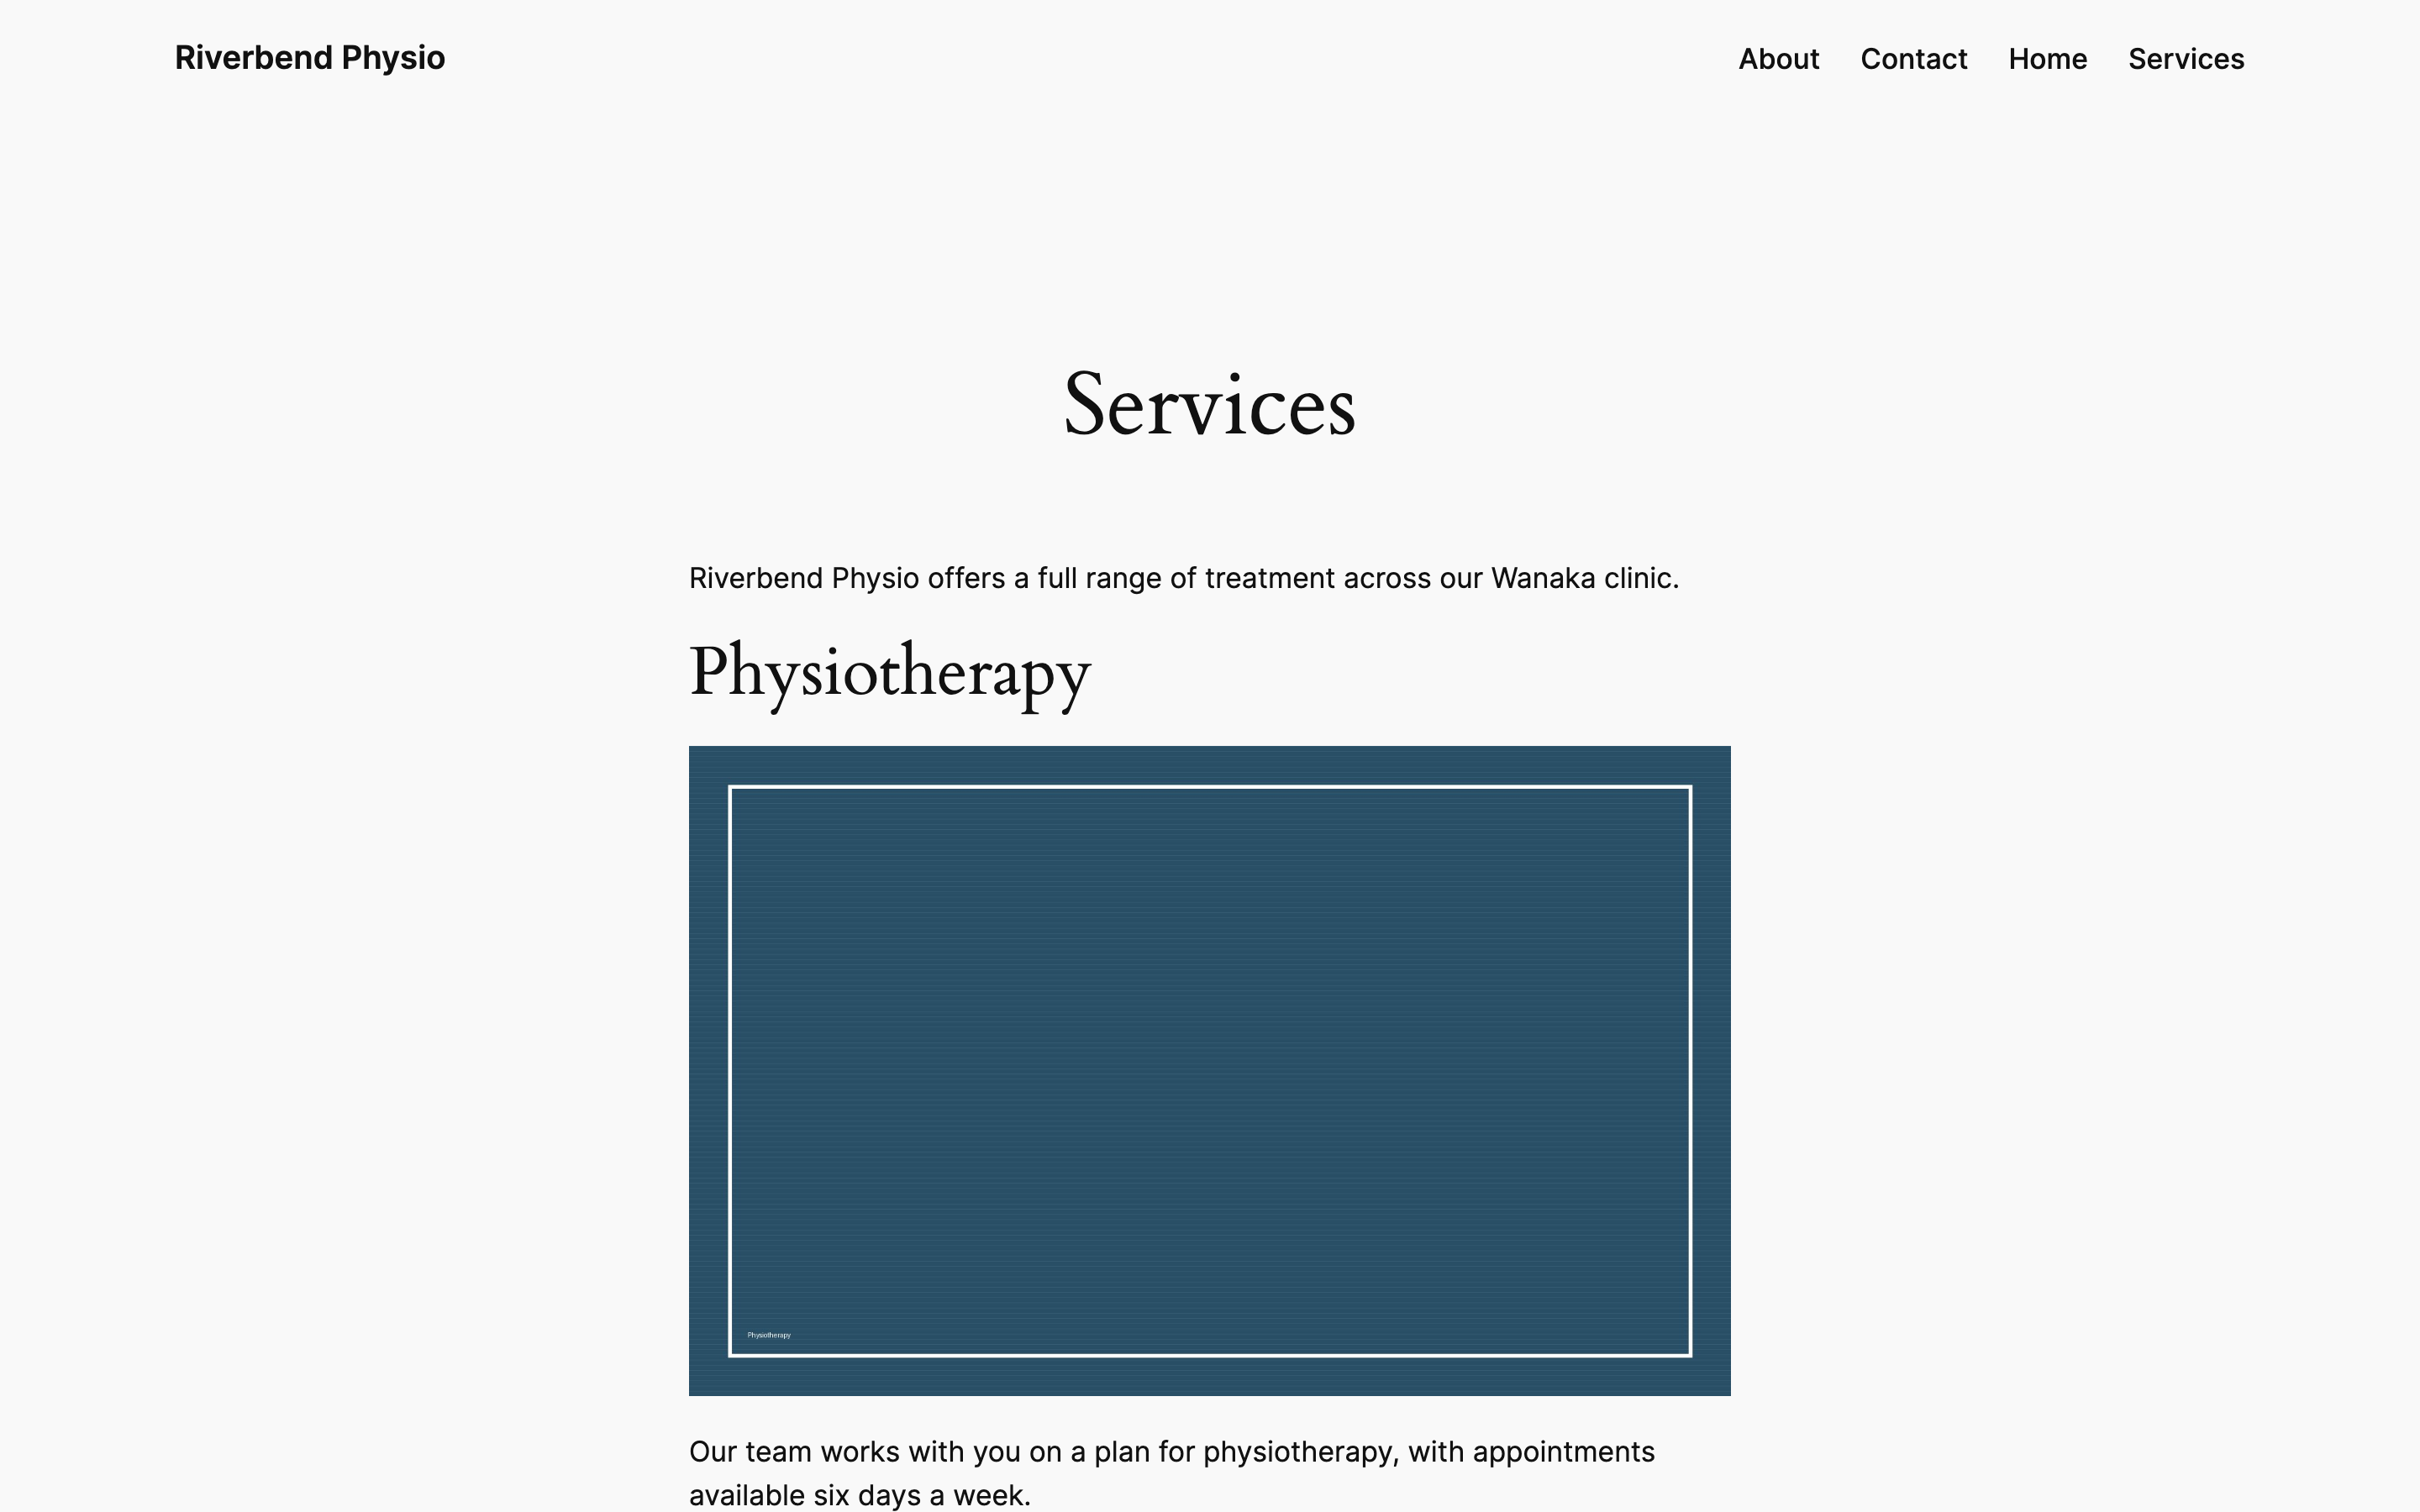
You are going to need one of these after every change you make, so it is worth knowing where they are and what they do before you need them in a hurry. In the left menu hover Settings and click WP Rocket. The page opens on the Dashboard tab, and on the right there is a panel headed Quick Actions with two orange buttons in it.
The one you want is Clear and Preload, under the heading Cache Files. It does two things in sequence. First it throws away every saved copy of every page, which is the part people expect. Then it works through your pages in the background, one at a time, loading each one so a fresh copy is ready before anybody asks for it. That second half is the preload, and it is the reason the button is not called Clear on its own: without it the next few visitors would be the ones paying to rebuild your website.
Worth saying plainly, because it stops people clicking it: this deletes nothing. No page, no image, no setting and no form entry is removed. It throws away temporary copies that rebuild themselves within a minute or two. The second button, Clear under Priority Elements, is a different and narrower thing and you can leave it alone.
Turn on the options that are safe to turn on#
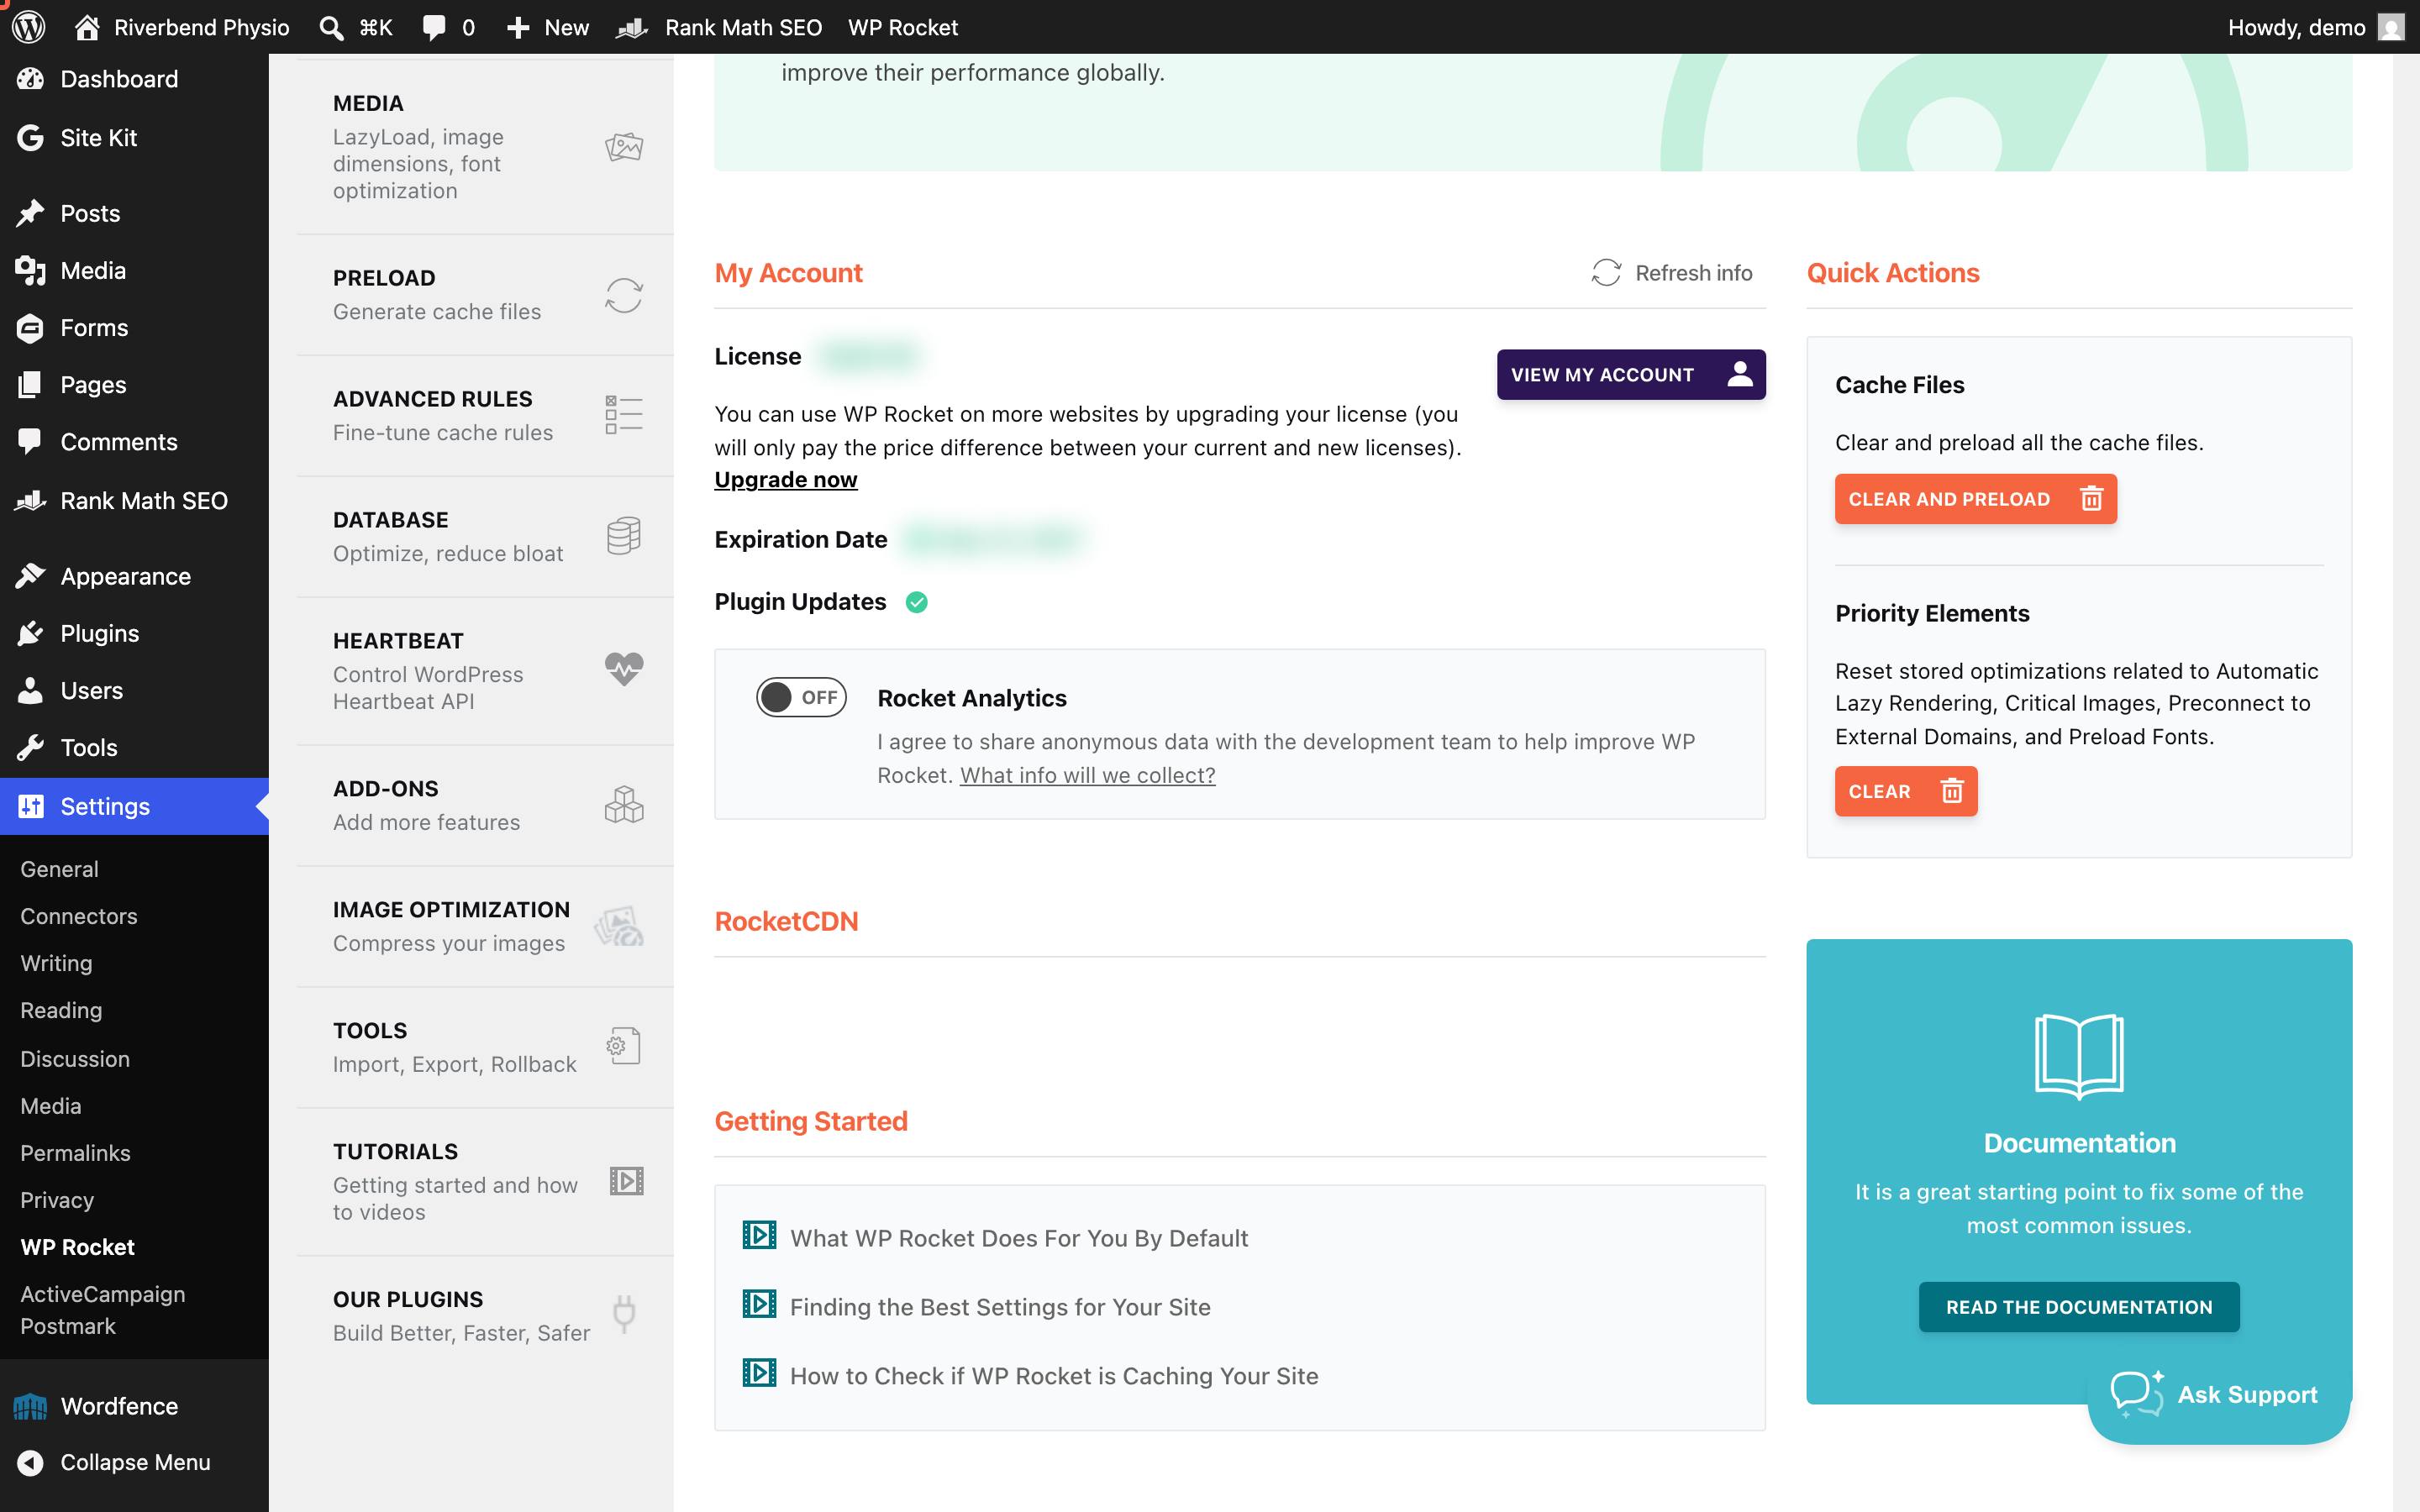
These are the ones we would turn on for a client without needing to book time to test them afterwards. Click Media in the WP Rocket menu on the left of the settings page.
Tick Enable for images under LazyLoad. This holds photos back until the visitor scrolls near them, so a long page stops downloading twenty pictures nobody has looked at yet. On our test website this behaved itself: the images still appeared, and WP Rocket leaves a plain copy in the page for anything that cannot run scripts, so nothing disappears. Underneath it, Add missing image dimensions is also safe and stops the page jumping about as pictures arrive.
Two on that screen to leave unticked for now. Enable for CSS background images reaches into your design rather than your content and is a different level of risk. Enable for iframes and videos is usually fine but worth treating as one of the test-it-afterwards options in the next step. Scroll to the bottom and click Save Changes, then reload your private window and scroll a page of photos from top to bottom.
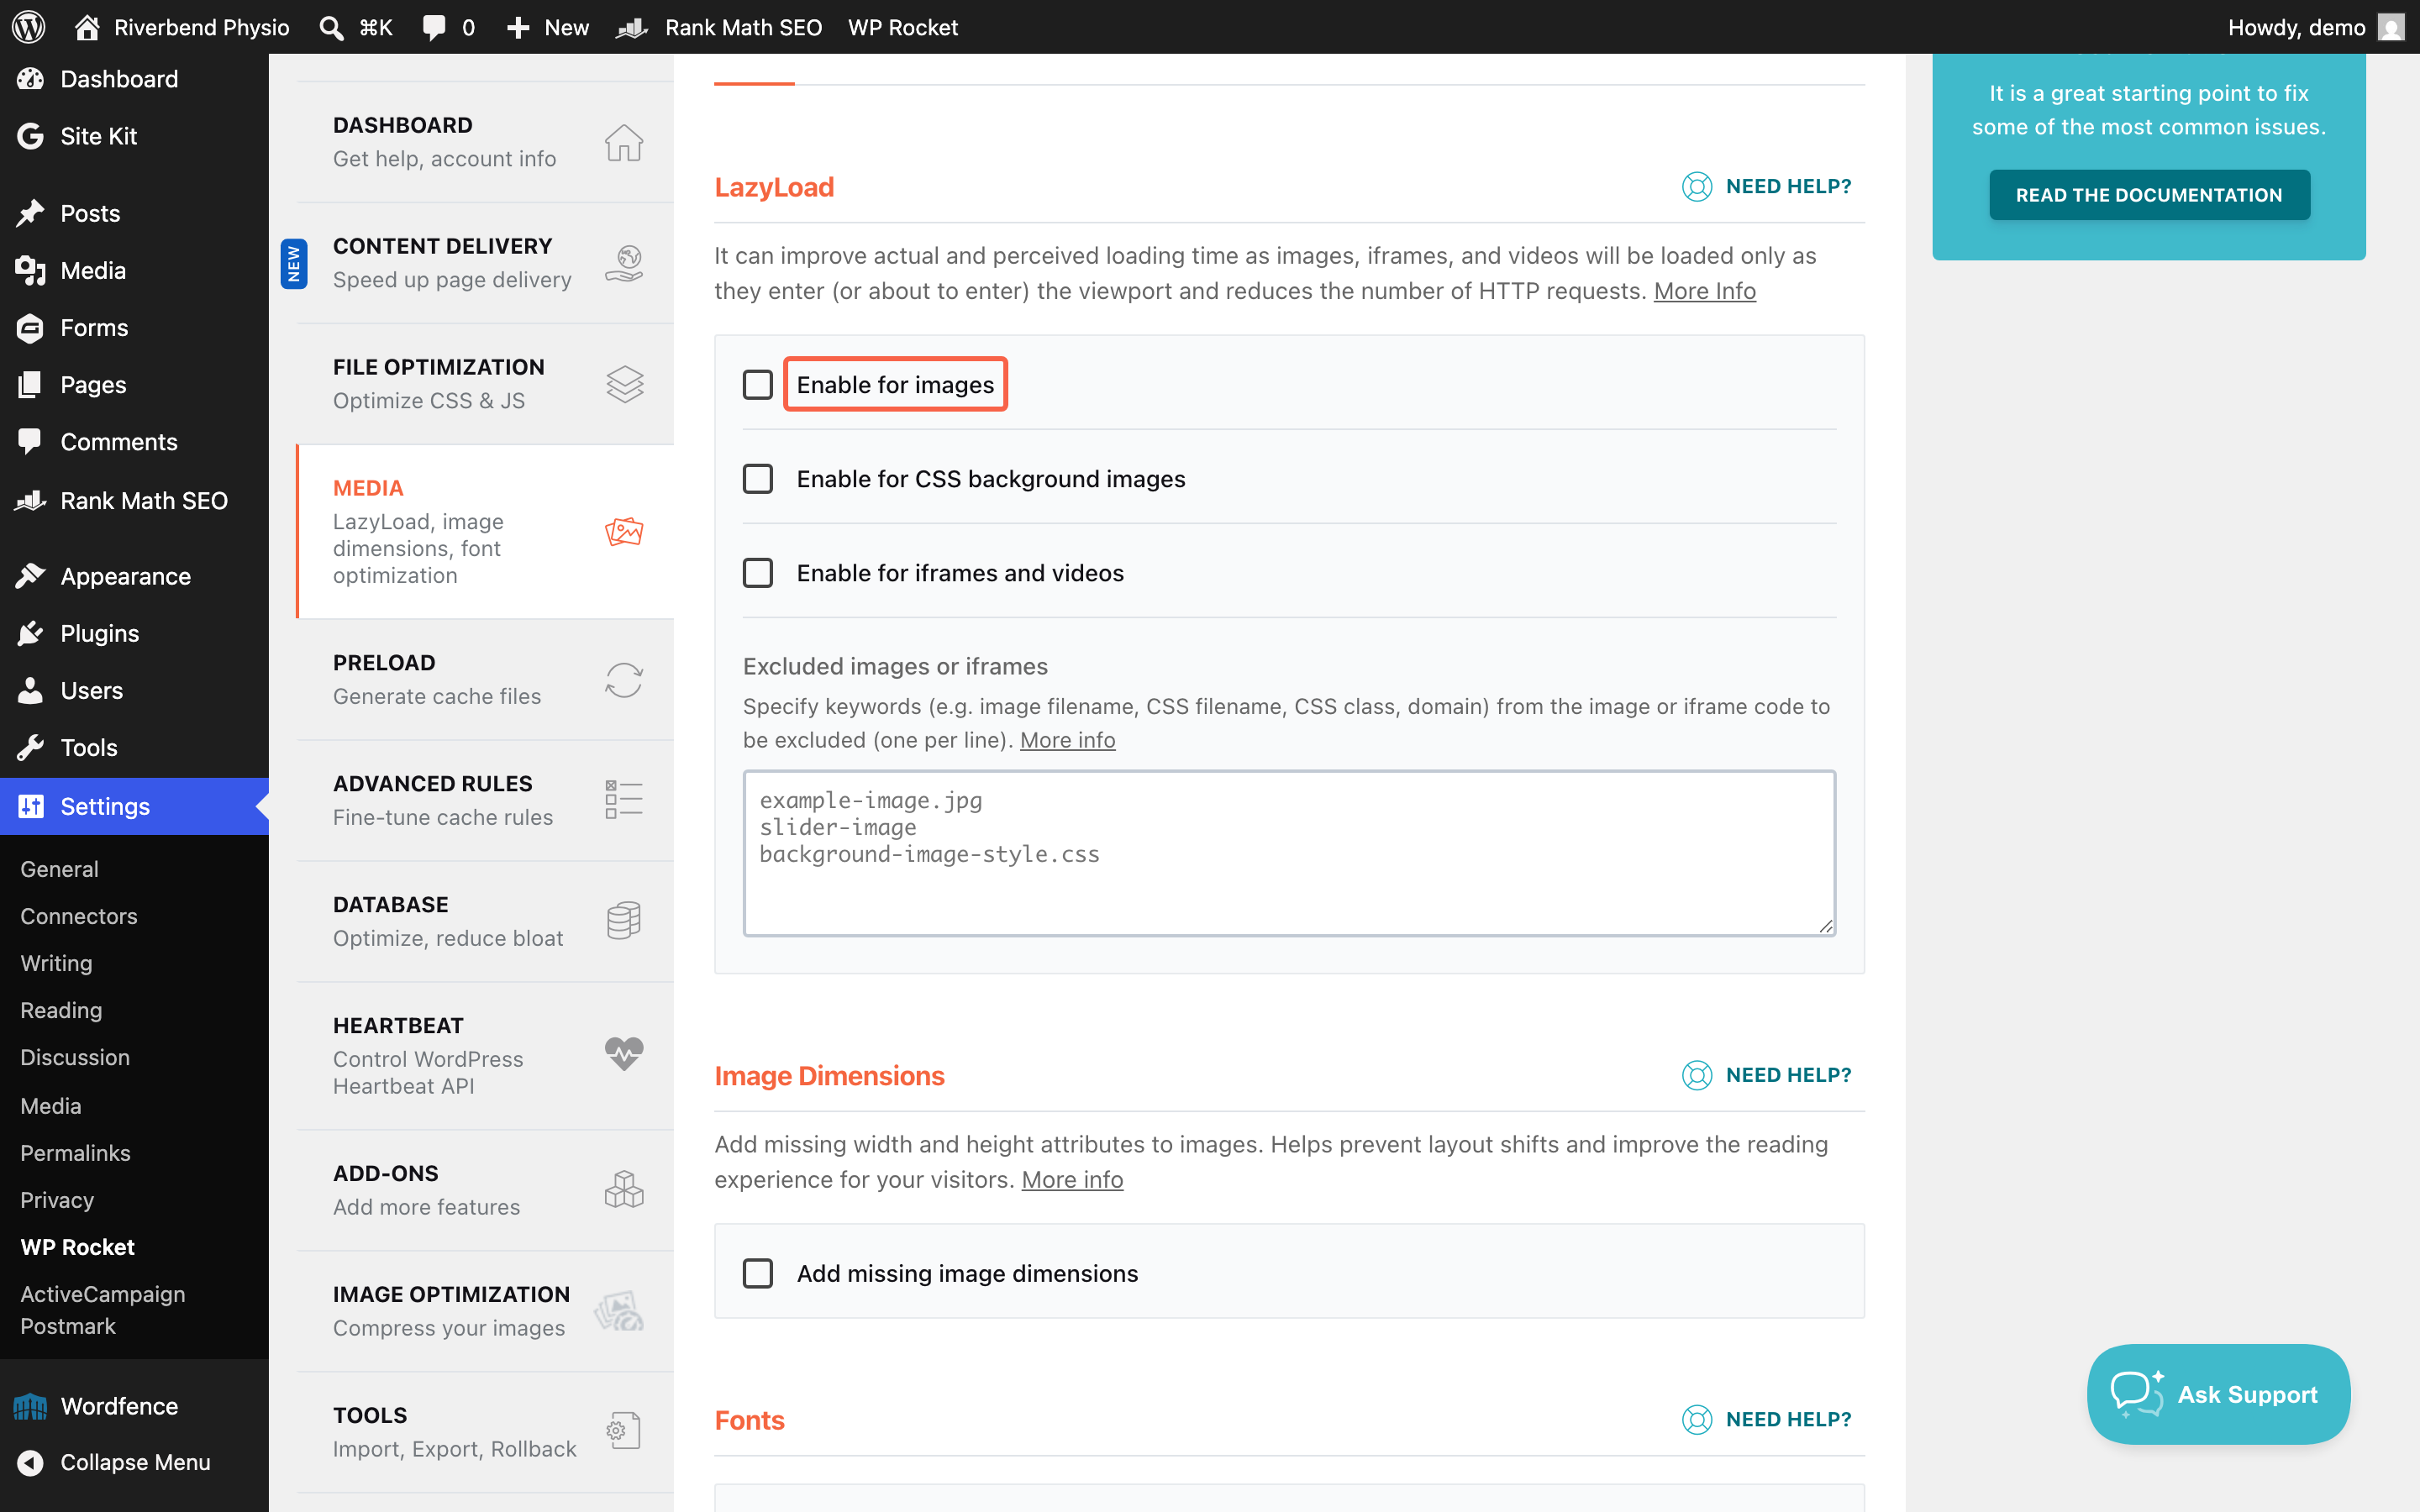
One thing worth knowing rather than worrying about: WordPress already does a version of this on its own, and turning WP Rocket’s LazyLoad on replaces it rather than adding to it. That is normal and it is why the gain is smaller than the setting sounds.
Change one File Optimization setting at a time, and save between each#
This is the tab where speed is won and websites are broken, usually in the same afternoon. Click File Optimization in the WP Rocket menu. The rule for this whole screen is one change, then save, then reload the private window and click something. Not three changes and a hope.
Minify CSS files and Minify JavaScript files are already ticked when WP Rocket arrives. They strip spacing and comments out of your website’s own files to make them smaller. On our test website they caused no trouble at all, and they are the reason your website is already a little lighter without you doing anything. Leave them on. If your website does misbehave later, these are worth unticking as a test precisely because they are on by default and people forget they are there.
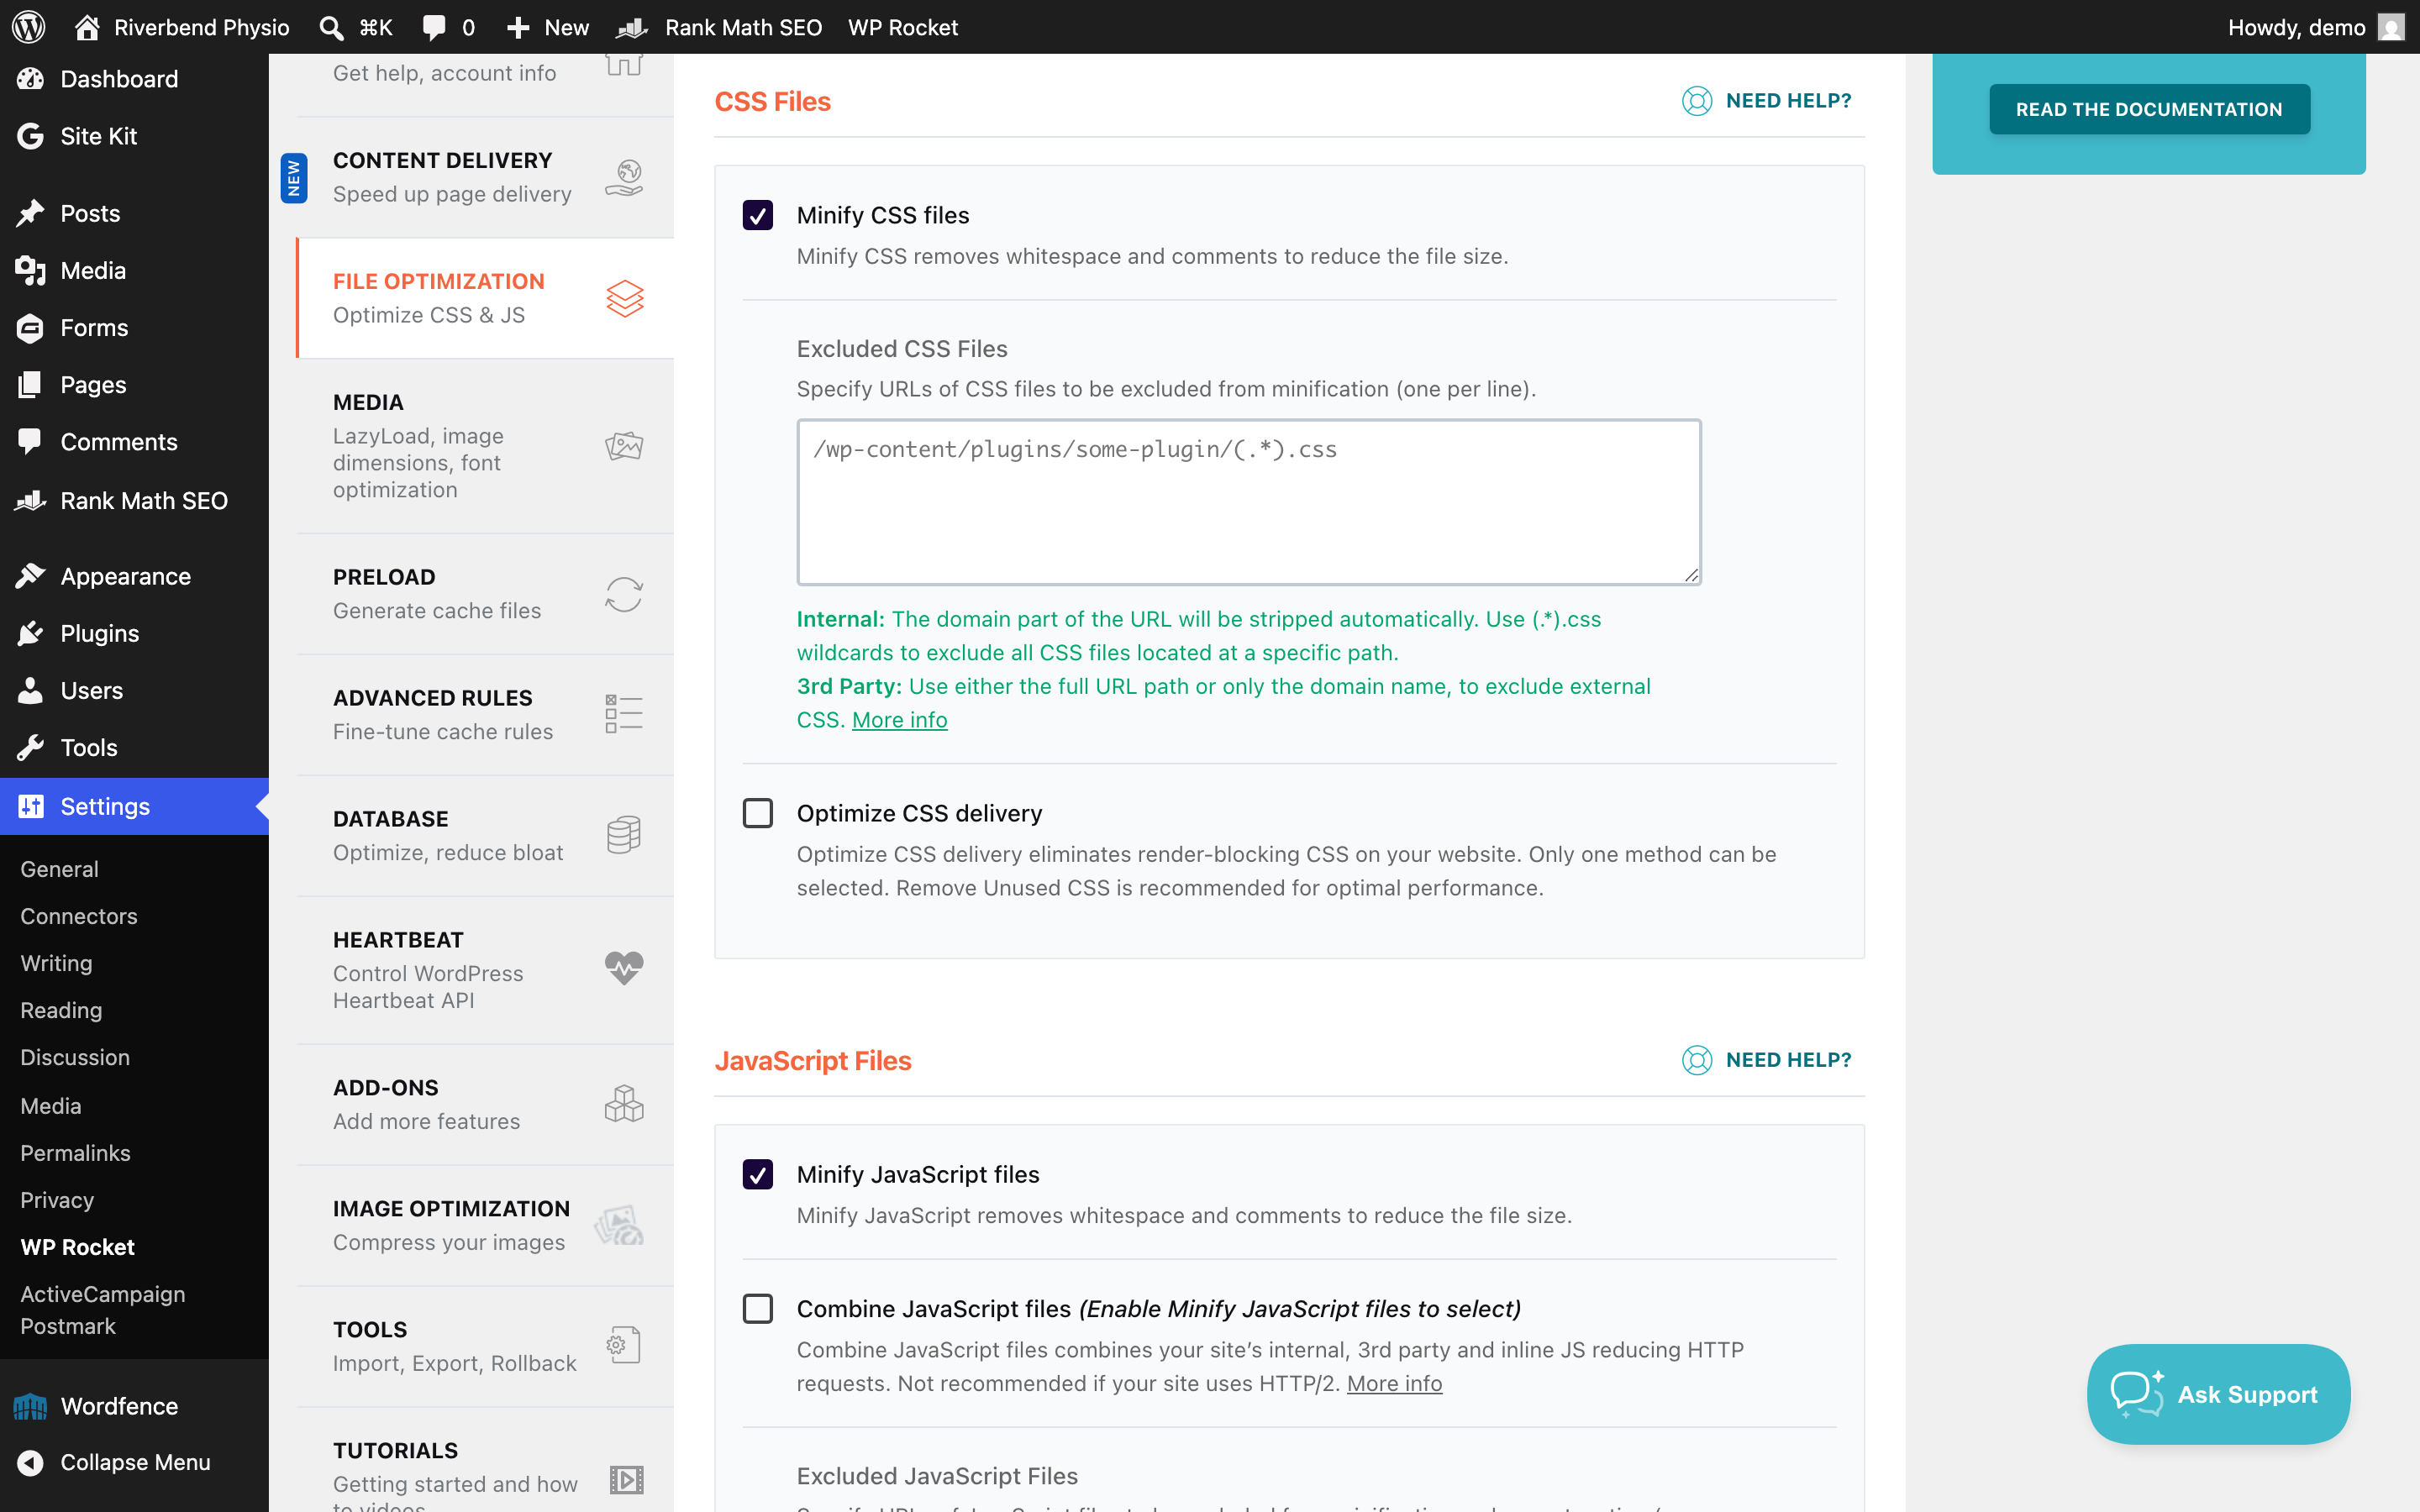
The four underneath are the risky ones, and WP Rocket says so itself. Tick one and a dark panel drops down reading “This could break things!”, with a second button you have to press before the setting will apply. That is not a formality. Read it, and take the reassurance in it at face value: turning the setting back off does put your website back the way it was, which we checked rather than assumed.
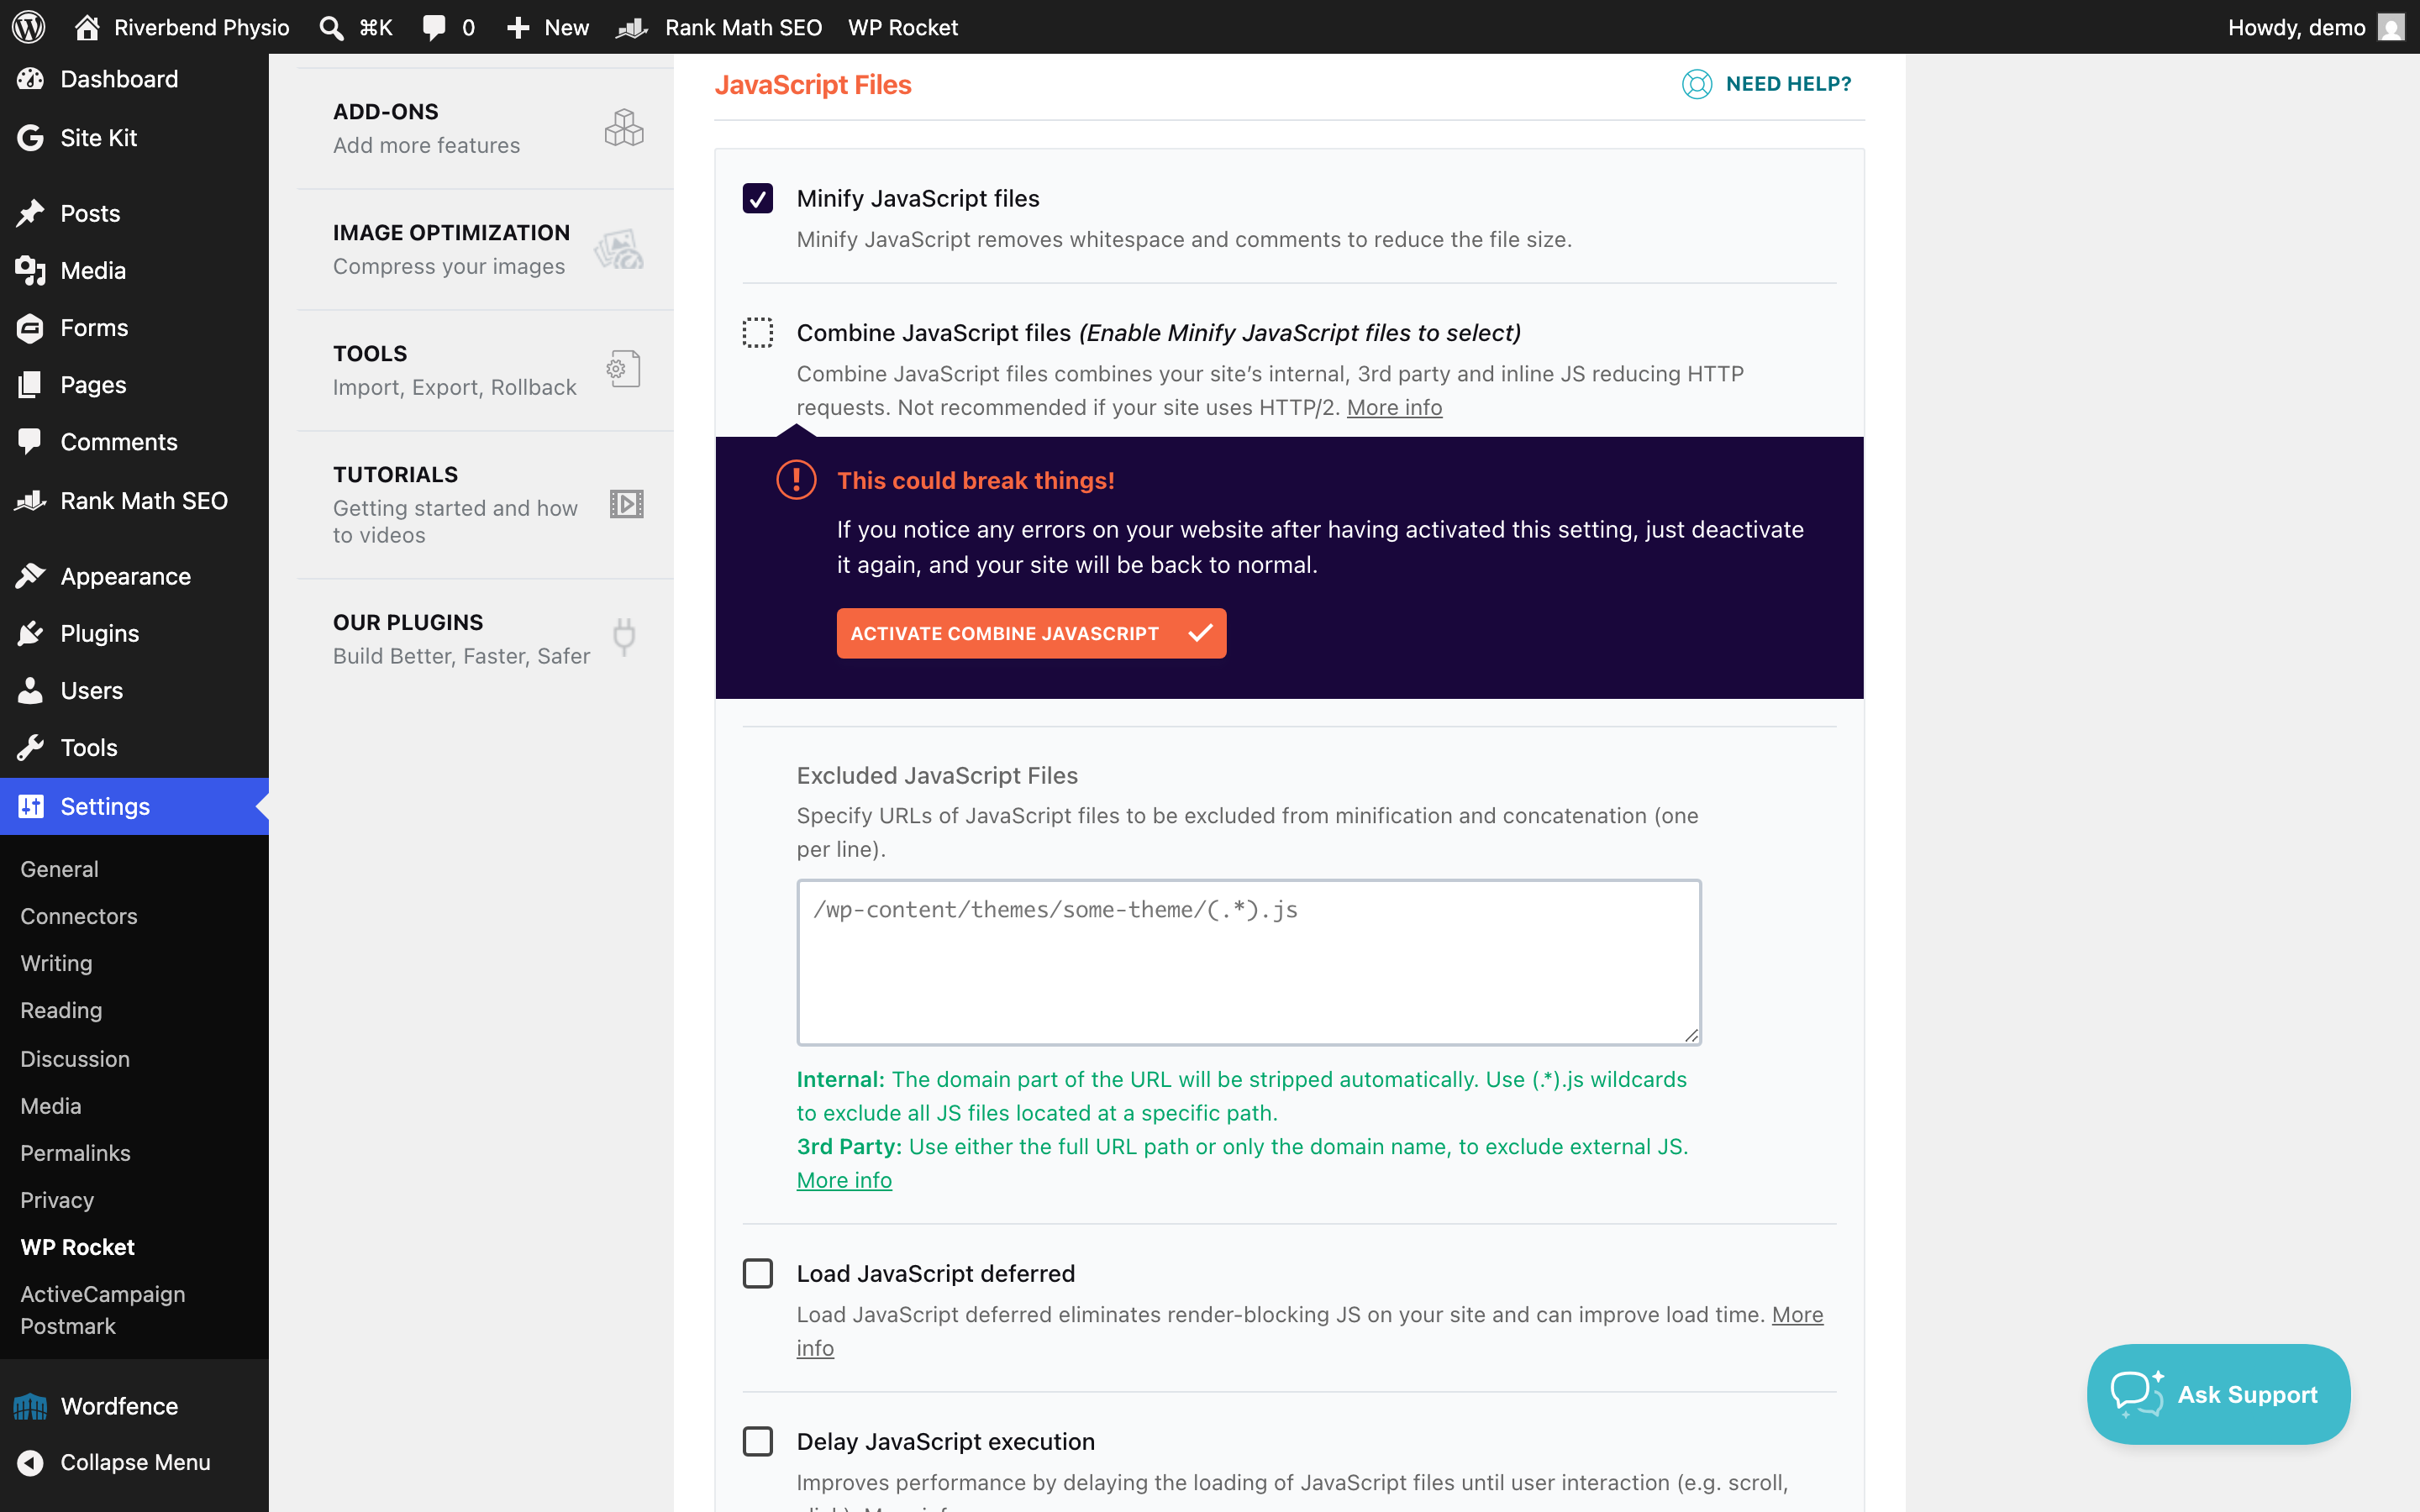
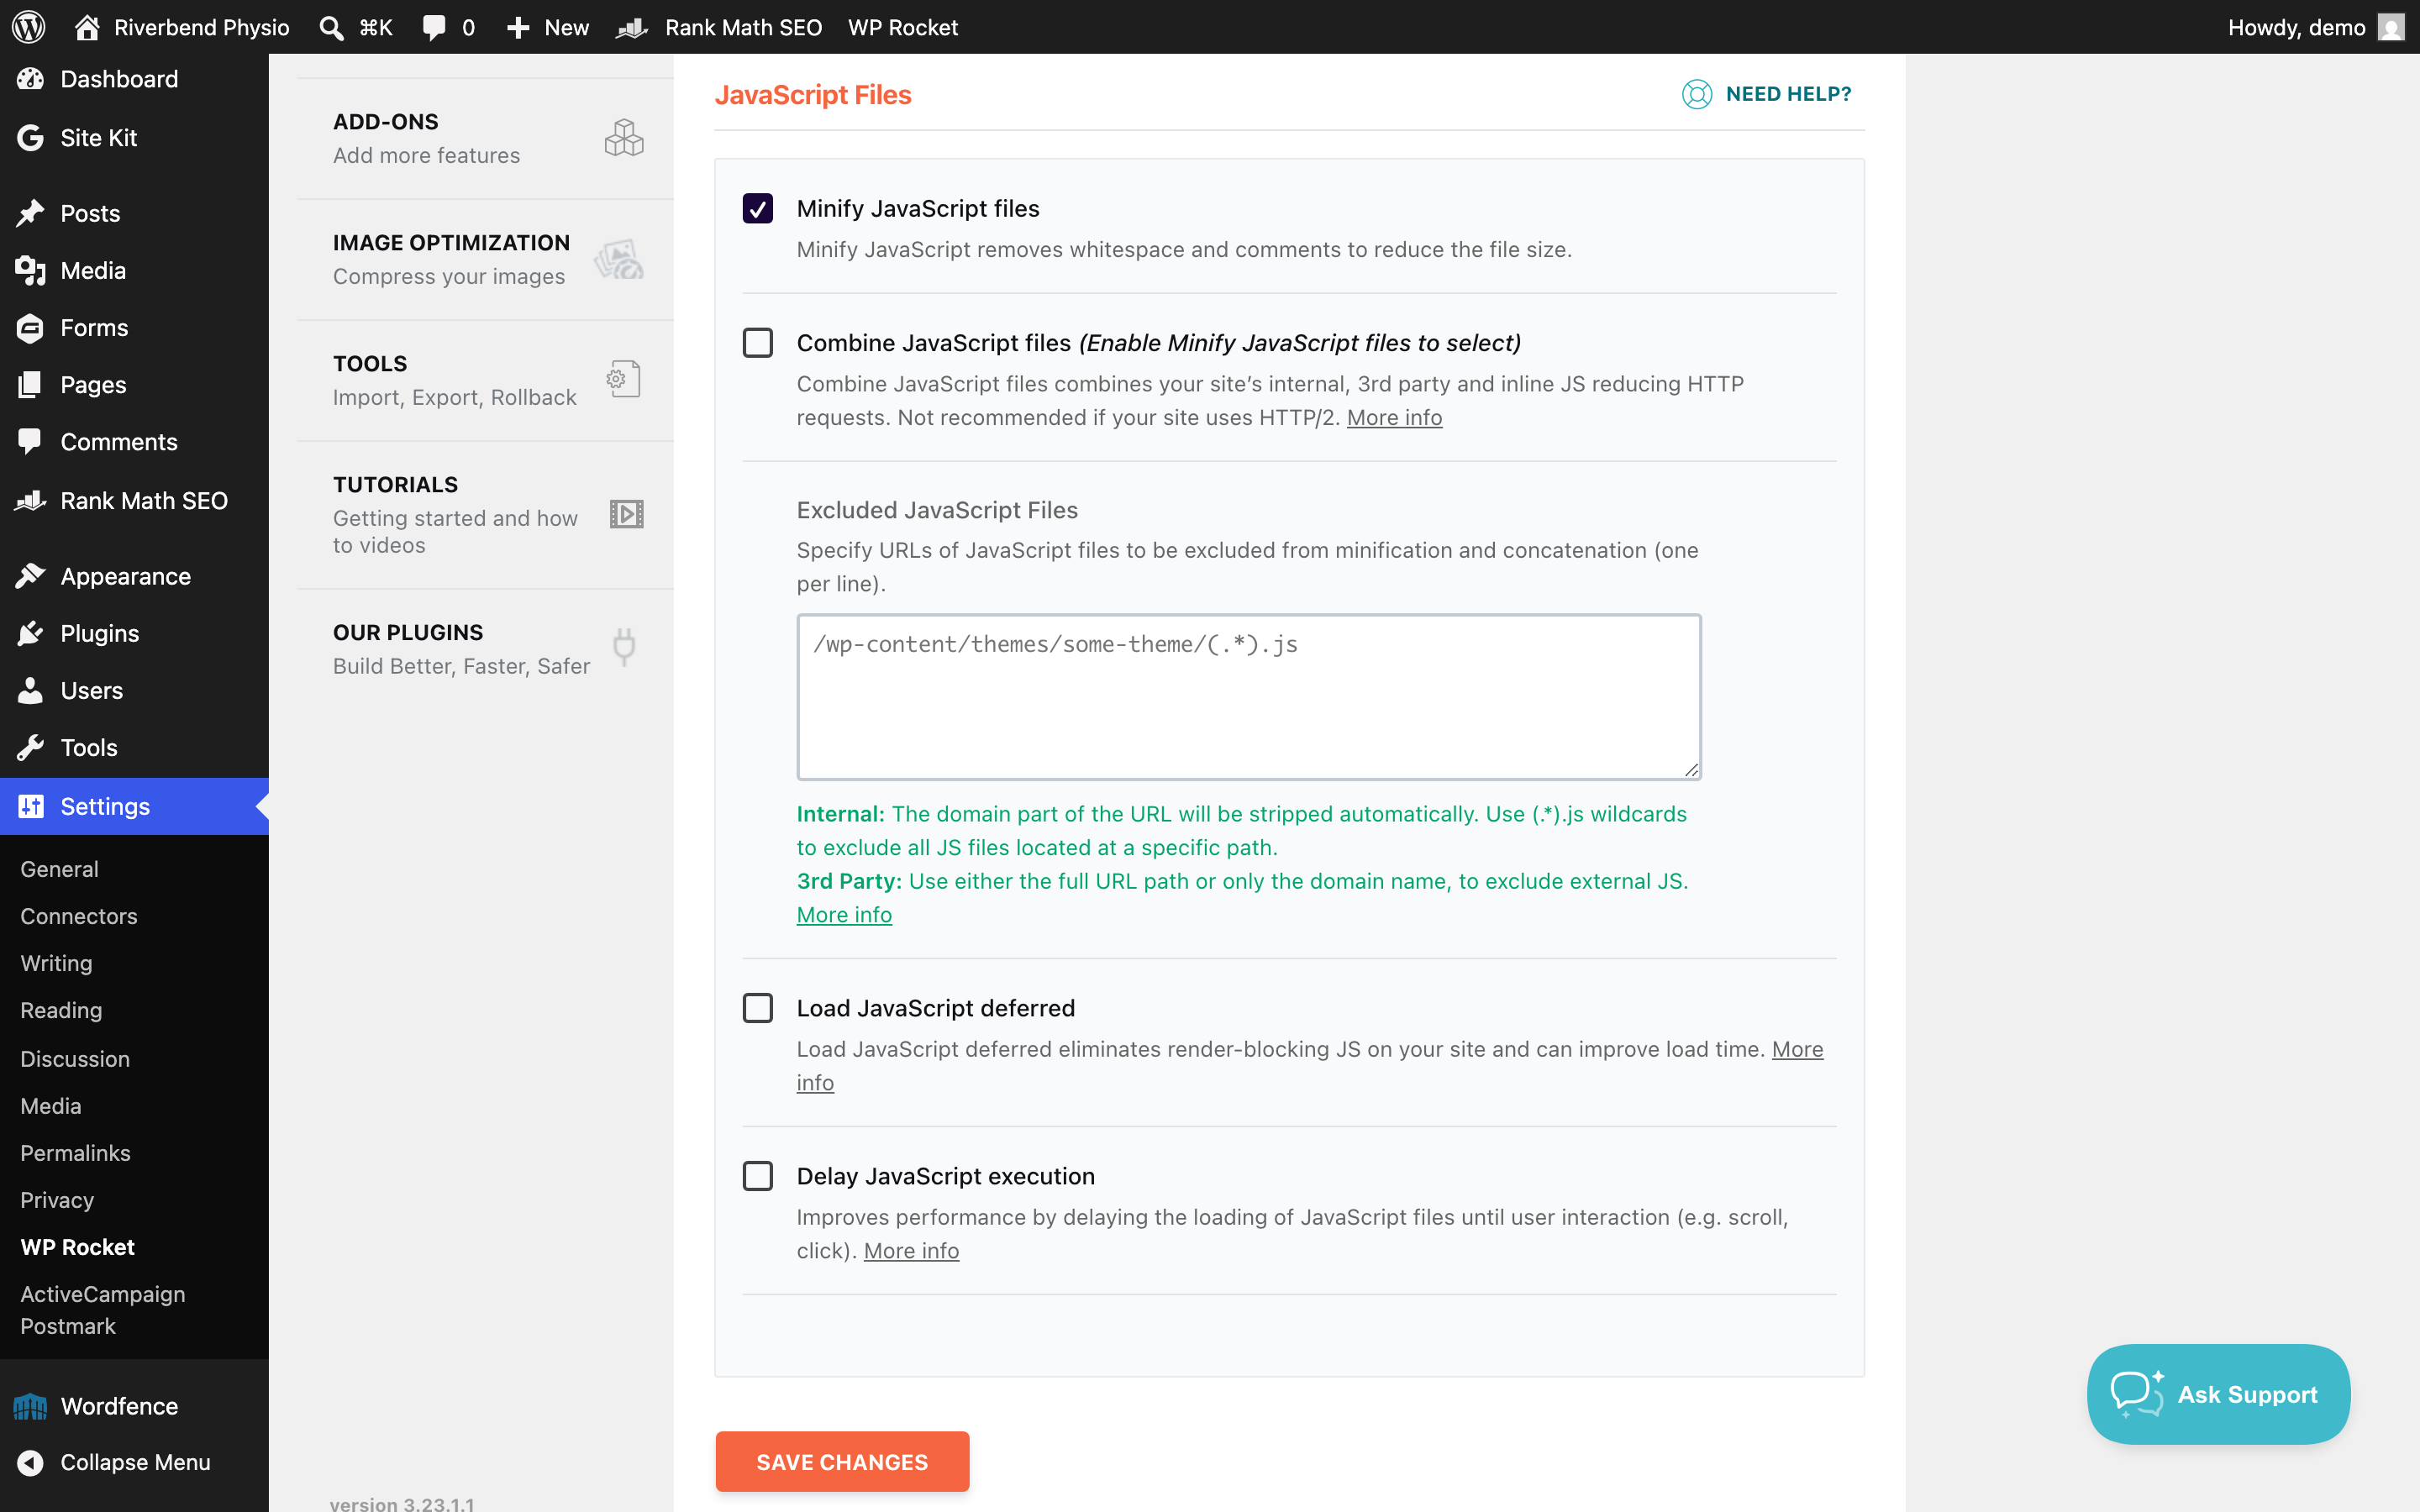
Take them in this order, one at a time, saving and checking between each. Load JavaScript deferred first, because it is the mildest and caused no problems on our test website. Then Delay JavaScript execution, which is the one that needs the checking method in the next step. Combine JavaScript files last, and only if you want the extra few percent, because it is the one that broke things worst for us. Optimize CSS delivery is not in that list on purpose and is dealt with in step 9.
Check the pages that break first, and touch nothing while you look#
Four kinds of page account for nearly all the damage these settings do: any page with a form on it, any page with a slider or rotating banner, any page with a booking or payment step, and your menu on a phone. Those are the ones to open in the private window after every change, in that order.
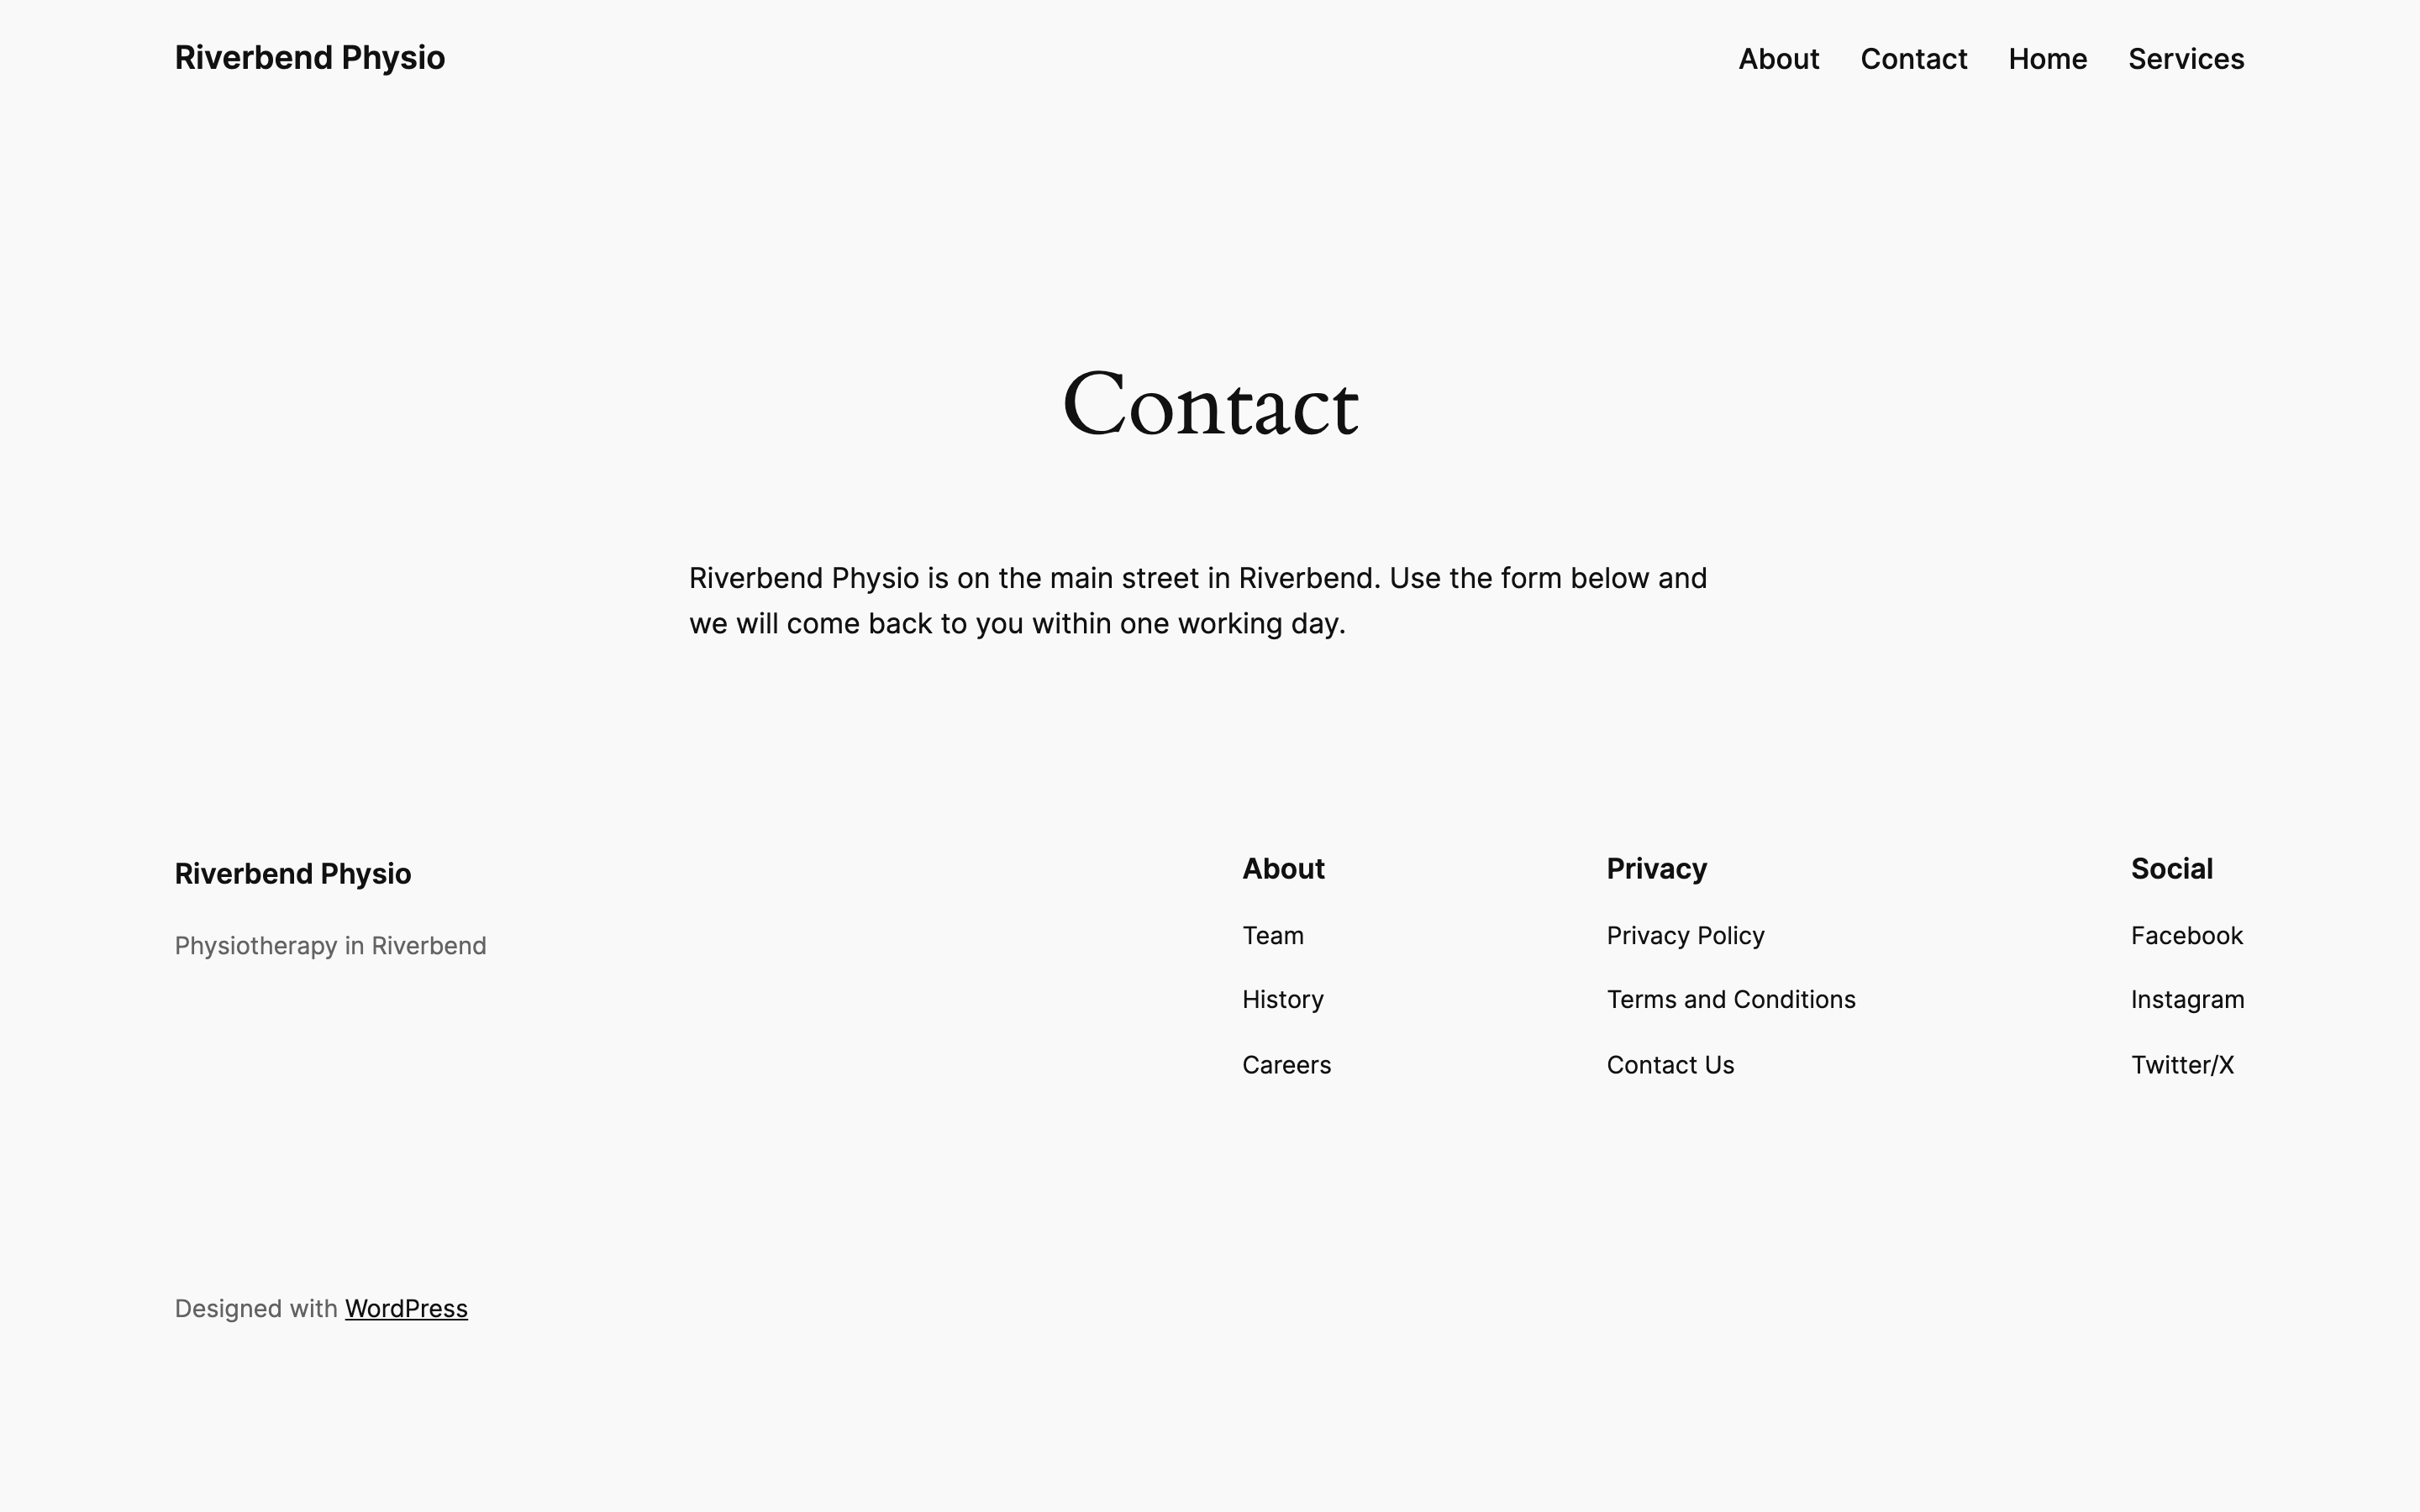
Here is what it actually looks like when it goes wrong. Below is our test website’s contact page with Delay JavaScript execution turned on, loaded and left alone for a few seconds. The heading is there, the paragraph inviting you to use the form below is there, and there is no form. It has not failed to save and it is not a WP Rocket fault as such: the form is waiting for the visitor to do something before it appears.
And here is the same page a moment later, after nothing more than a nudge of the mouse. The form is back, complete and working.
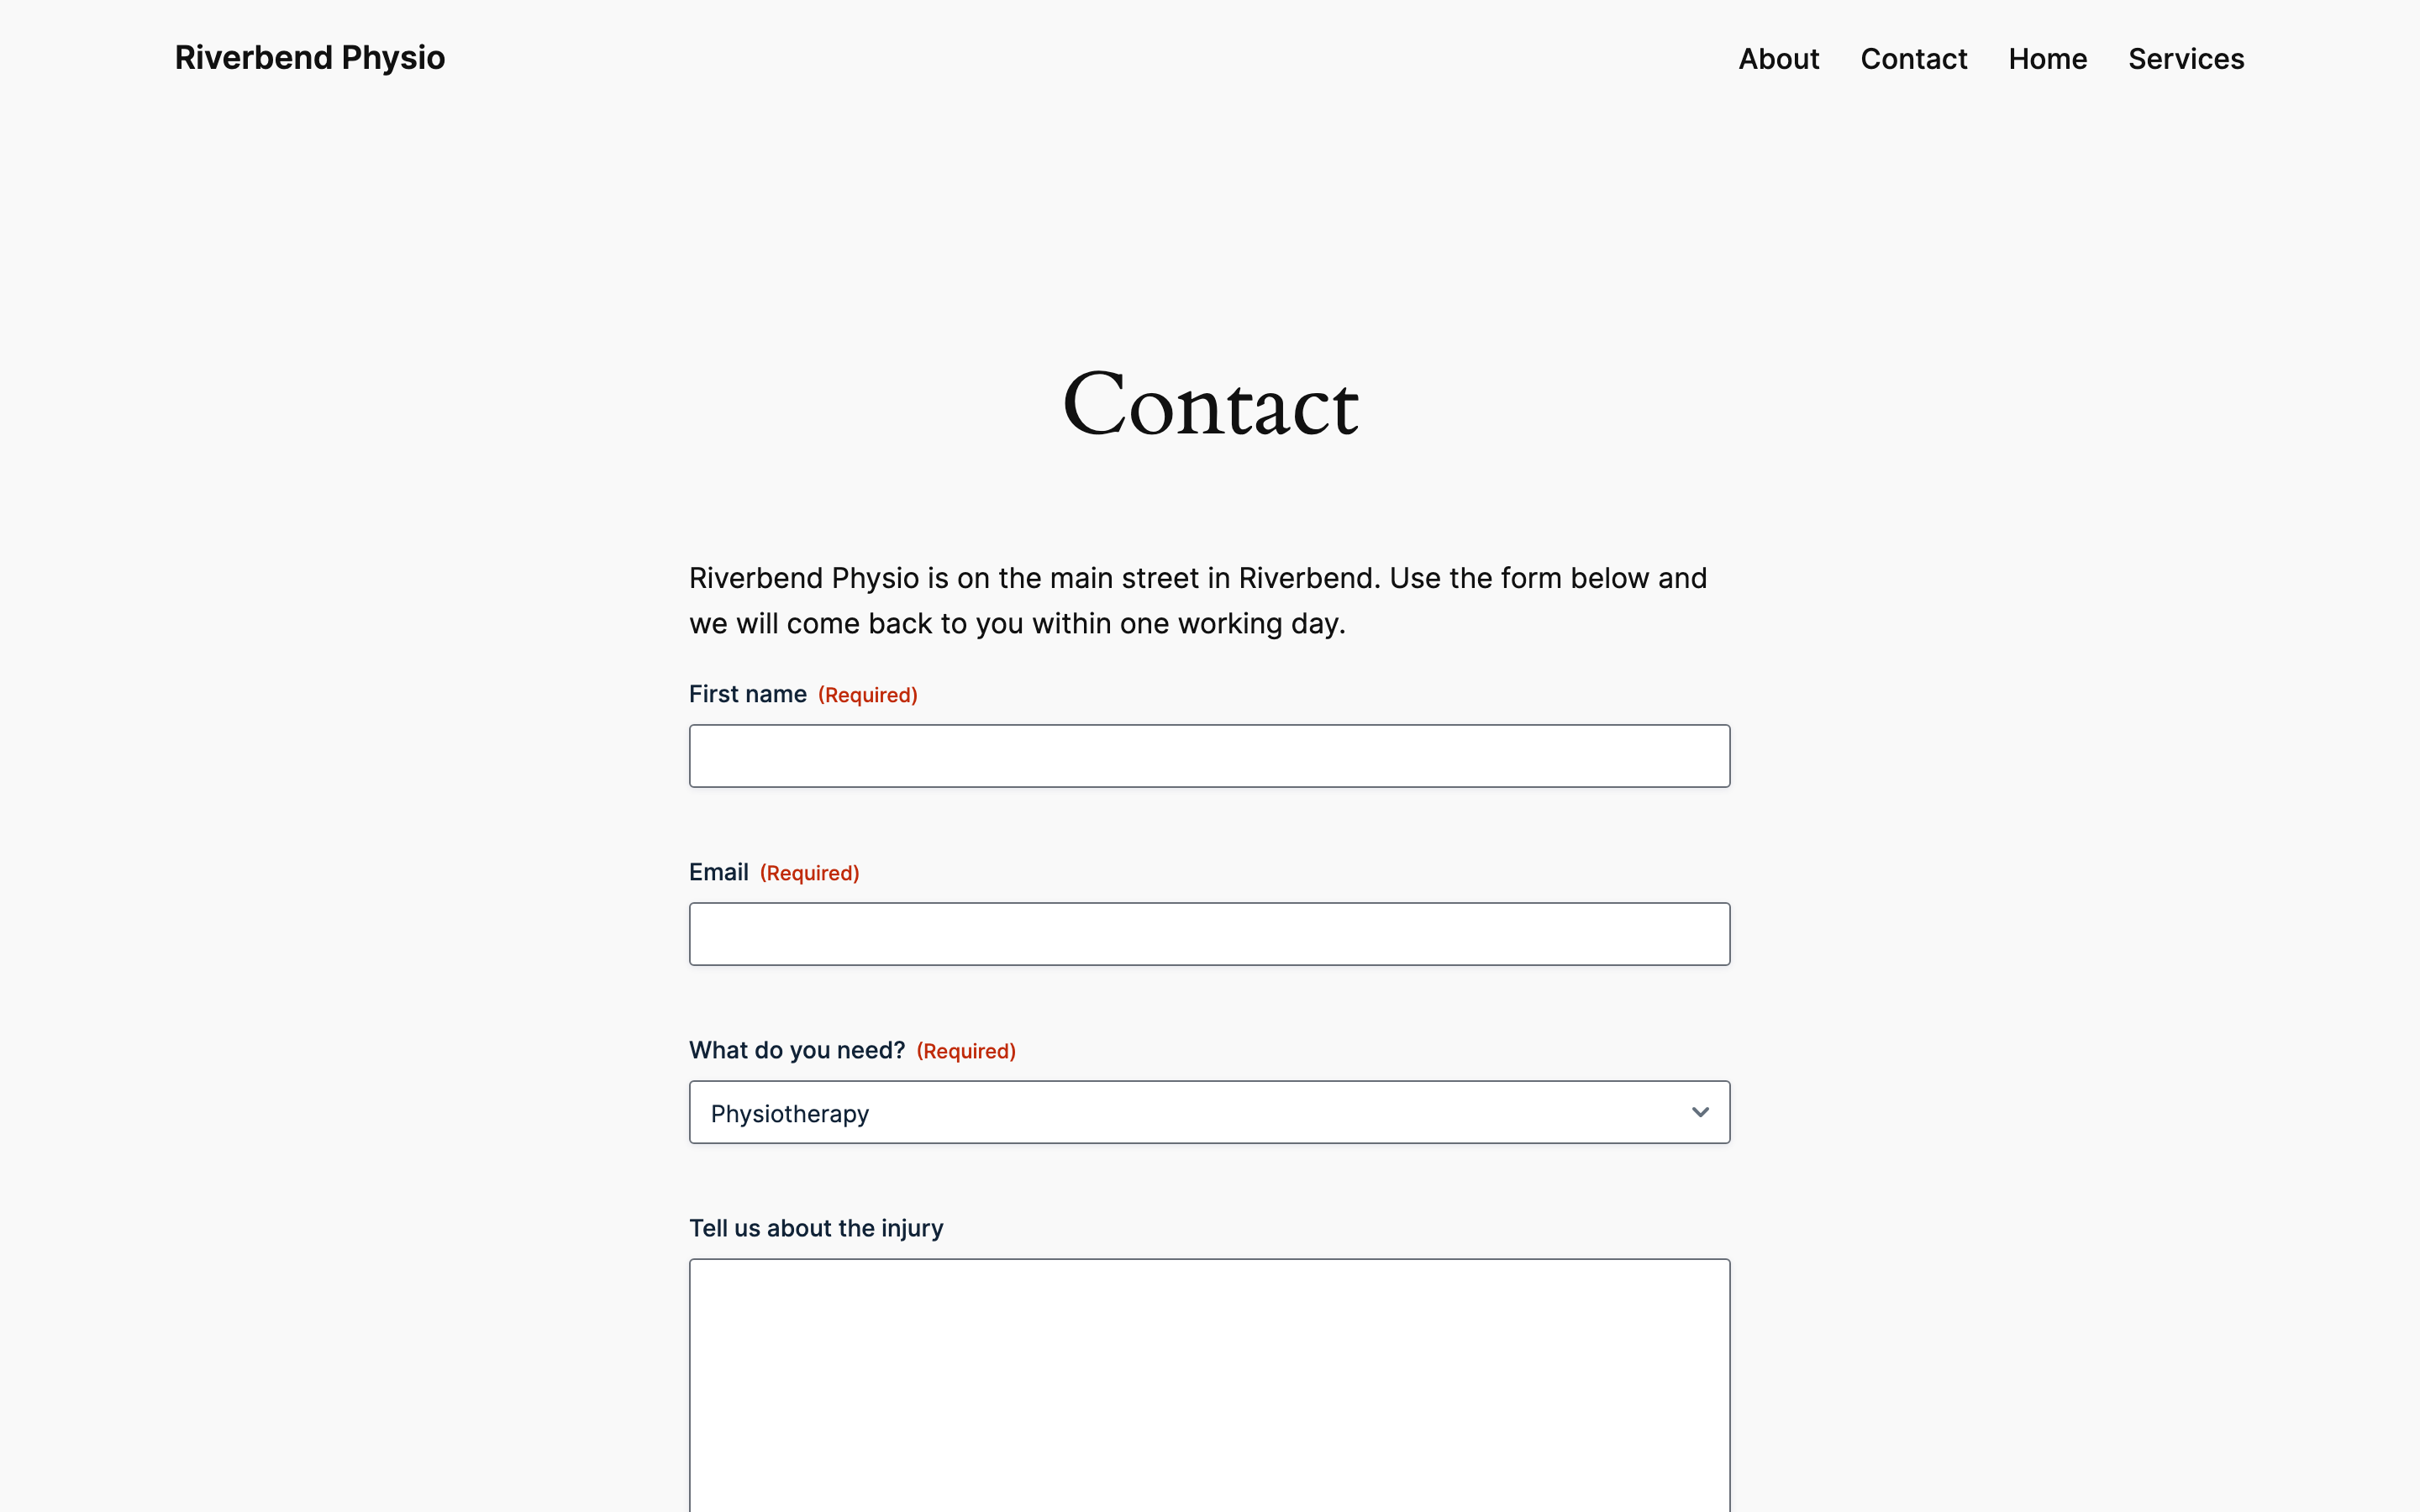
So the test is: load the page, move the mouse, then look. If the form comes back, that is Delay JavaScript execution working as designed and you can decide whether you are comfortable with it. If it does not come back, you have a real problem and step 8 is next. That is what happened to us with Combine JavaScript files: the form stayed missing no matter how long we waited or what we clicked, and nothing anywhere reported an error.
Turn the last change back off when something breaks#
Because you changed one thing, you already know what broke it, which is the entire reason for doing it that way. There is no diagnosis to do here.
Go back to the tab you were on, untick the setting you last ticked, and click Save Changes at the bottom. Then go to the Dashboard tab and click Clear and Preload, because your website is still handing out saved copies of the broken version and until those are thrown away you will keep seeing it. Reload the private window and check the page that broke.
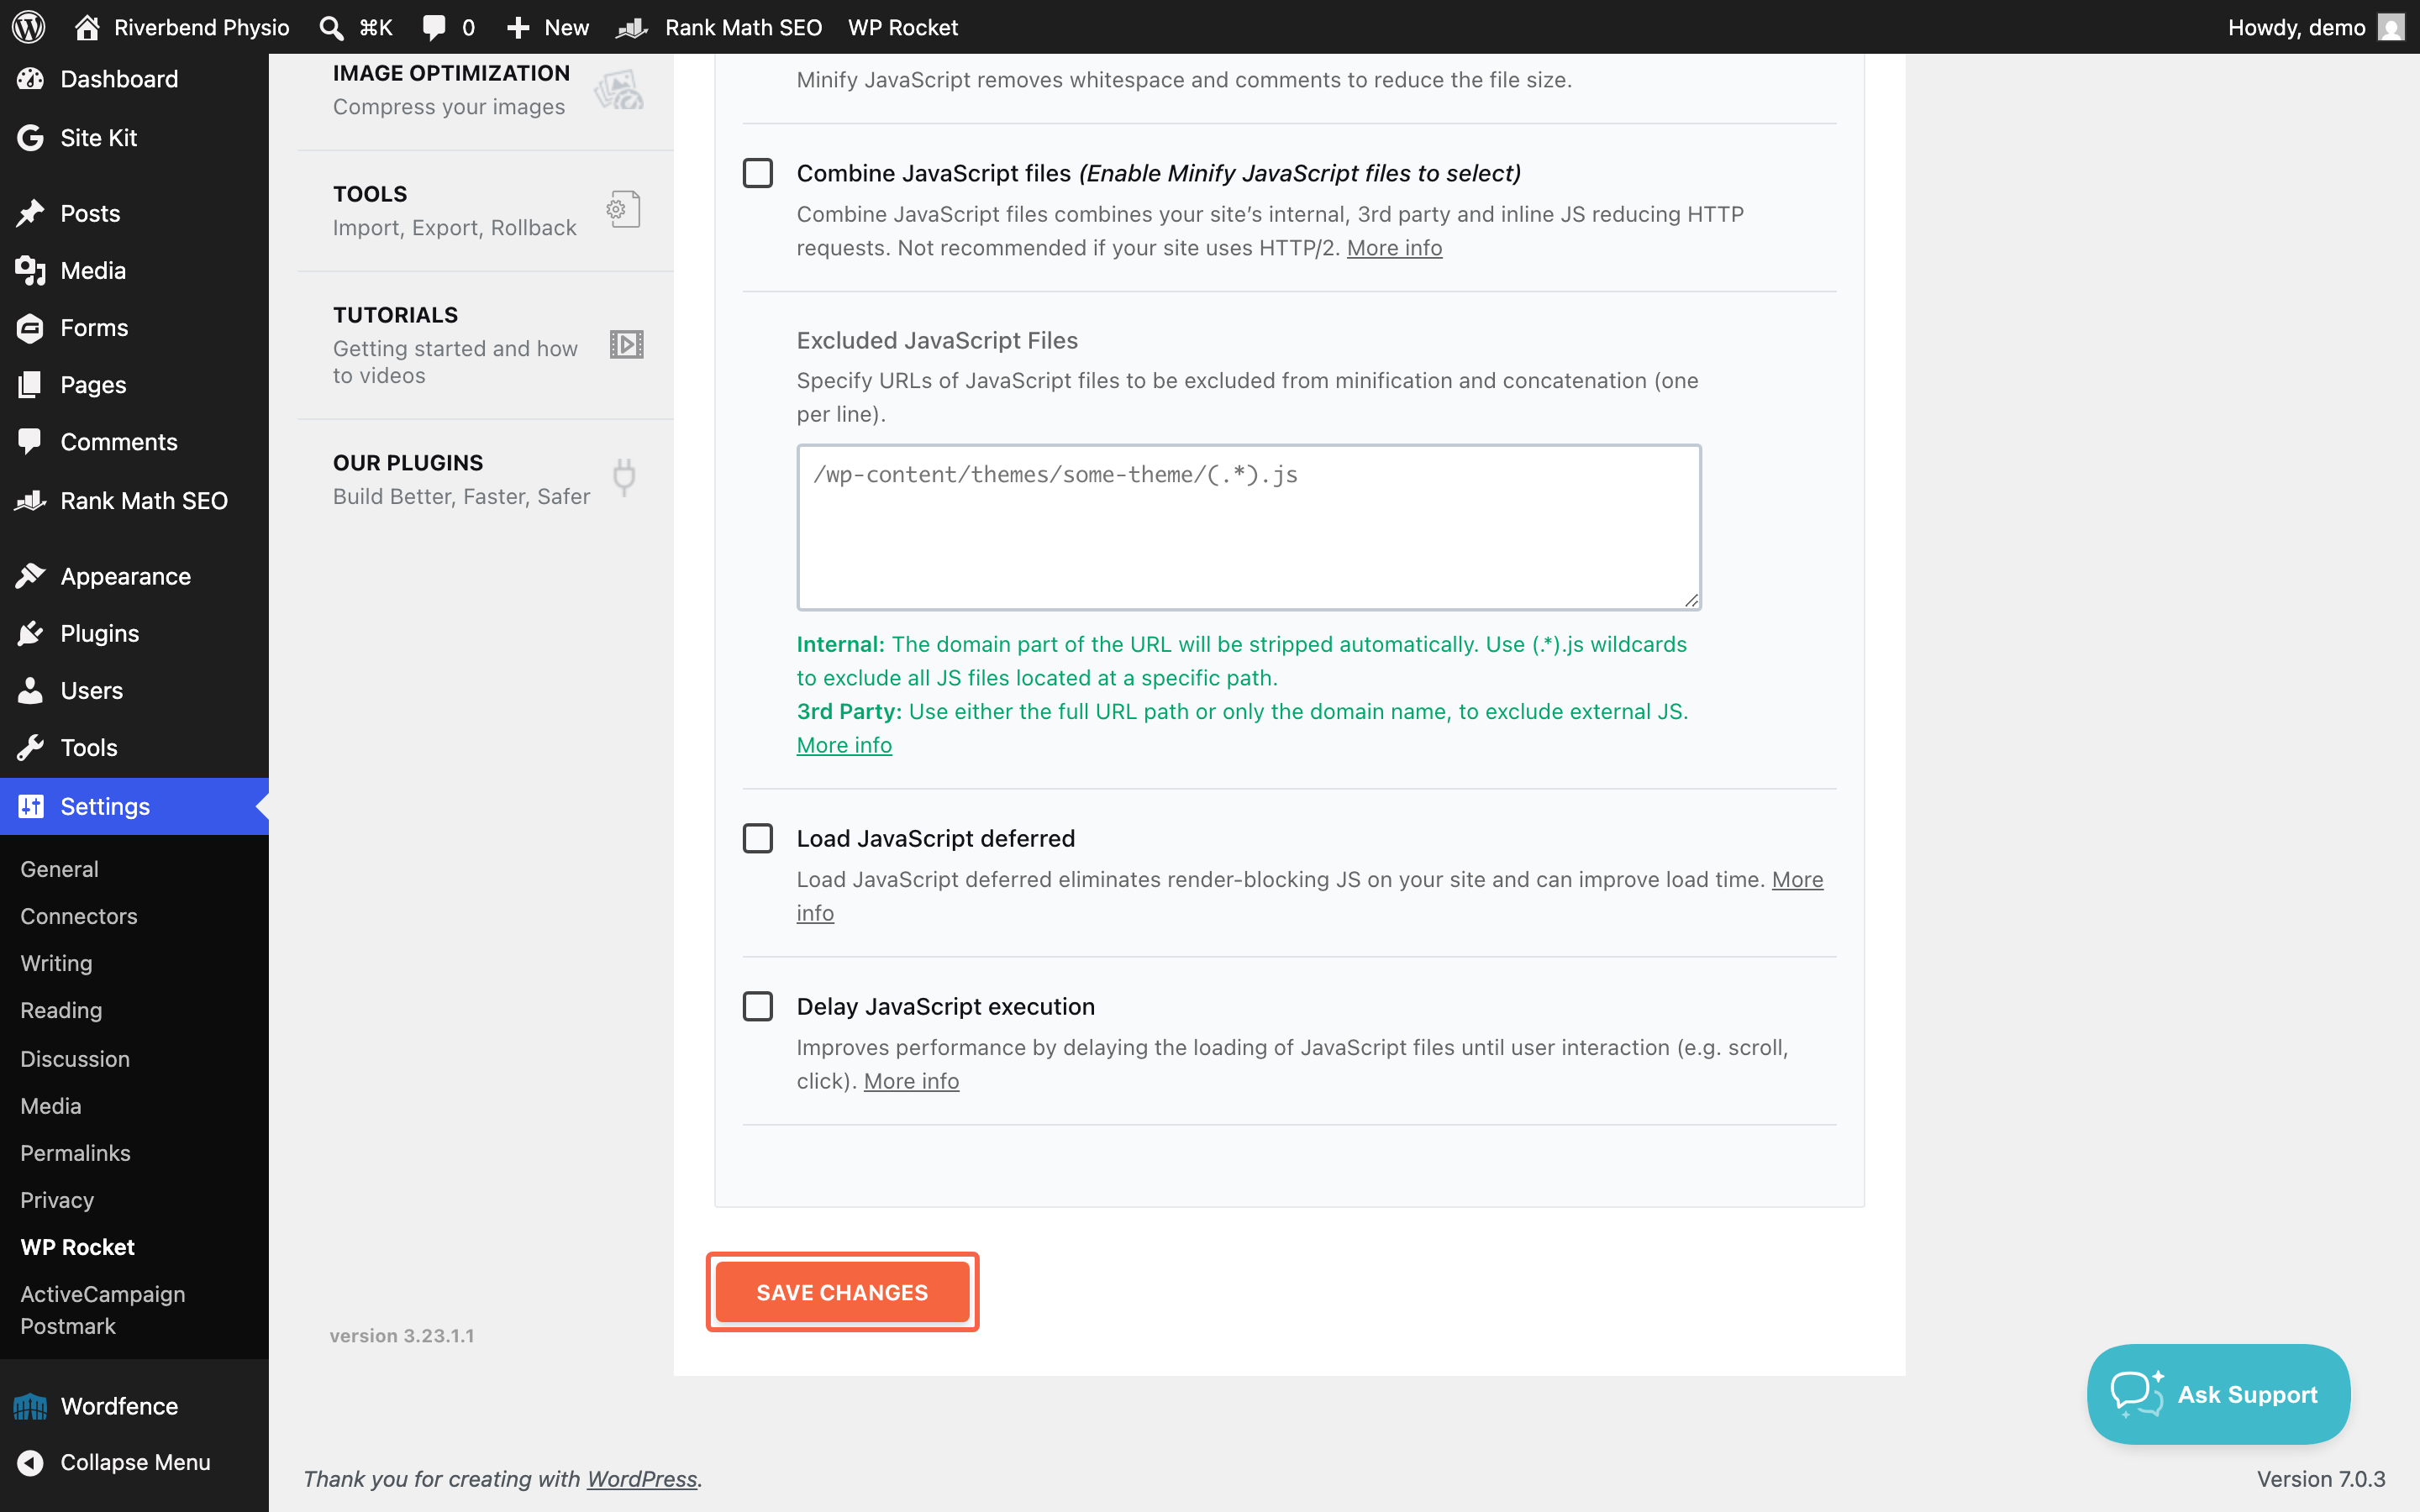
If the page is still wrong after that, do not start unticking things at random. Untick everything you have turned on in this guide, save, clear and preload again, and check once more. A website with nothing but WP Rocket’s own defaults on it should behave exactly as it did before you started, and if it does not then the problem is somewhere else and worth handing to whoever looks after your website.
Leave these settings alone unless someone is testing alongside you#
Everything below is either genuinely risky, or does nothing useful without information you do not have to hand. None of it is a trap you have to avoid forever, and all of it is reasonable to ask for. It is not a good use of an afternoon on your own.
Optimize CSS delivery, and Remove Unused CSS inside it. This is the setting most likely to make your website visibly wrong, because it strips out styling it believes no page is using and it is not always right. It also works differently from every other setting here: WP Rocket sends your pages away to its own service and waits for an answer, so it does not take effect immediately and it cannot be judged in the first minute. Genuinely worth having on a lot of websites, and genuinely worth having somebody check the result on a phone as well as a computer.
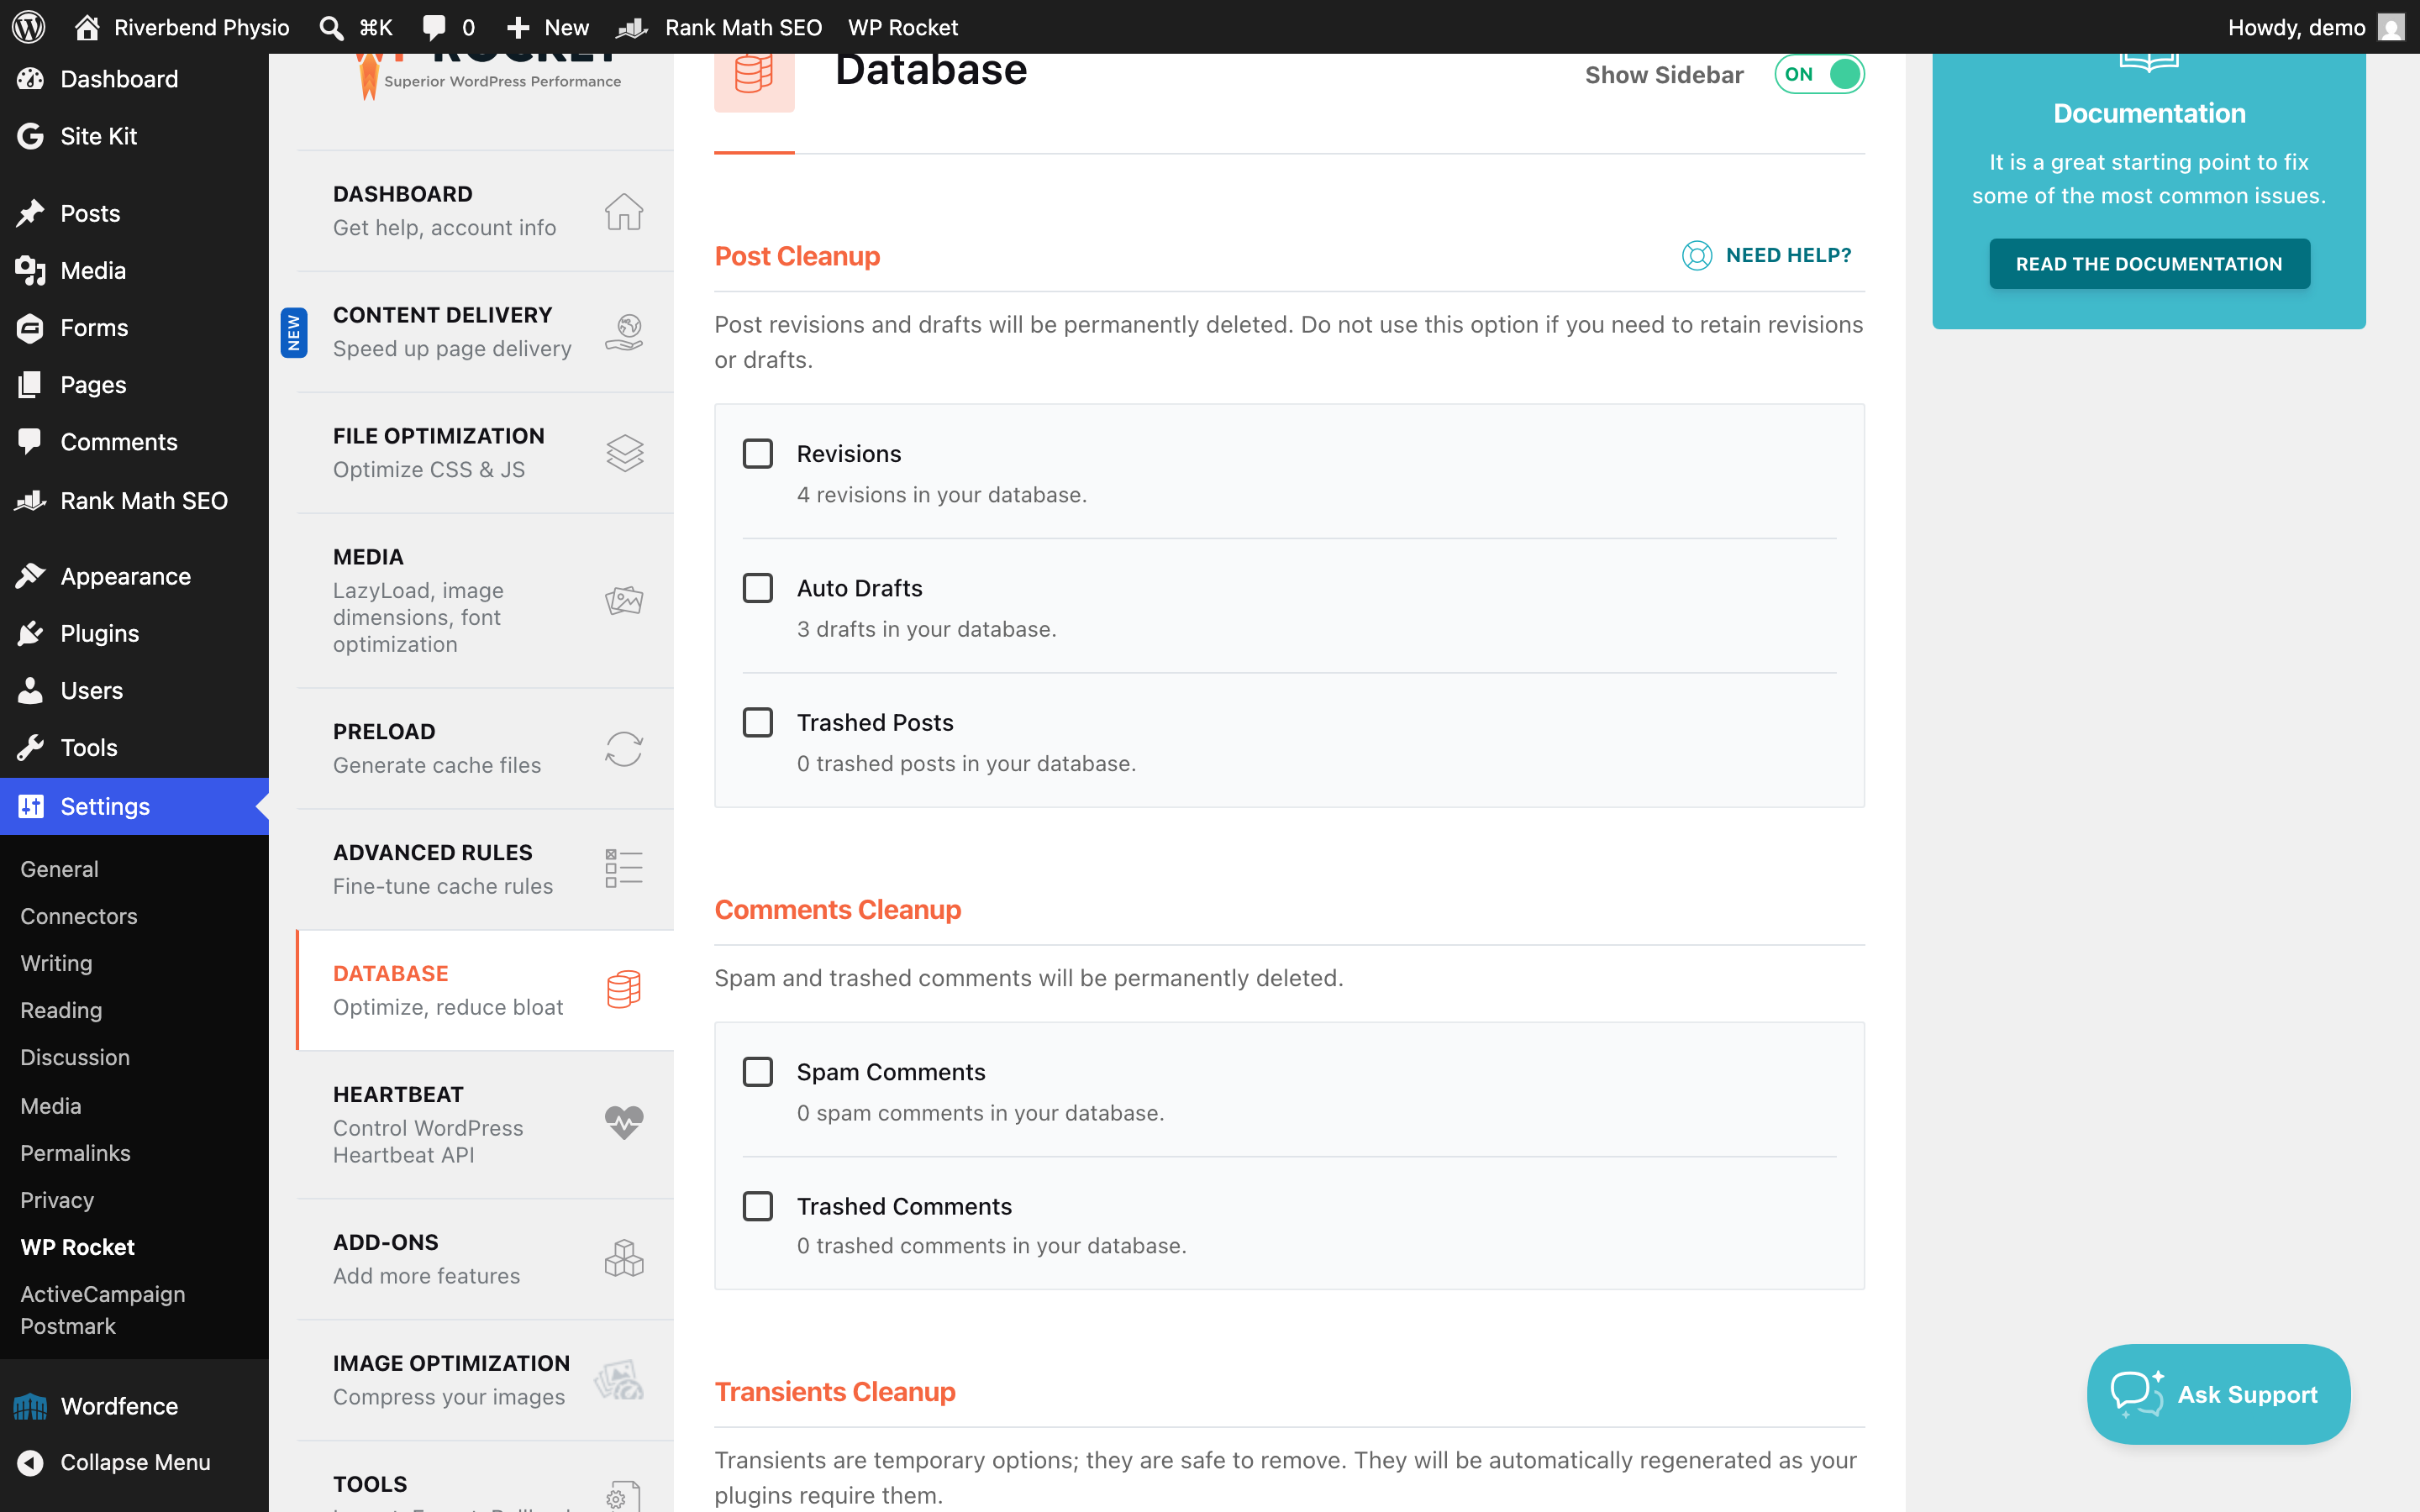
The Database tab. This one deserves care for a different reason: it is the only screen in WP Rocket that permanently deletes things. Post revisions are the old versions of your pages, and clearing them out is not reversible. It is a tidy-up, not a speed setting, and the difference it makes to how fast your website loads is close to nothing.
Advanced Rules, Content Delivery and the Add-ons tab. Advanced Rules is for telling WP Rocket never to cache particular pages, which matters for shops and members areas and needs to be right rather than nearly right. Content Delivery and the Cloudflare and Varnish add-ons all need account details from whoever runs your hosting, and turning them on without those details does nothing at best. Leave the Heartbeat tab exactly as it arrives.
If you would rather not weigh any of this up yourself, having someone tune the caching, test it properly and keep an eye on it afterwards is part of what our WordPress care plan covers.
Tested on WordPress 7.0.3 with WP Rocket 3.23.1.1, Gravity Forms 3.0.2, Rank Math 1.0.275, Wordfence 8.2.2, 8 Sep 2026
Rather not do it yourself?
We can take this off your plate
If you would rather someone else handled the fiddly bits, that is what we are here for. Tell us what you are trying to sort out and we will point you in the right direction.
Let us give you a handWritten by